Omega Owners Forum

Please login or register.

Login with username, password and session length
Advanced search  

News:

Please check the Forum Guidelines at the top of the Newbie section

Show Posts

This section allows you to view all posts made by this member. Note that you can only see posts made in areas you currently have access to.

Messages - Kneepad

Pages: [1] 2 3 4 5 6 7 8 ... 96
1
Good to see you back again Kneepad! :y

Thank you PhilRich. The missus has been very ill, hence my
 absence. Glad to report she is now on the mend.  :y

2
If you do decide to split them, I would
dearly like your plug leads.

3
Maintenance Guides / Fix electric mirror switch on Pre-Facelift
« on: 24 December 2010, 22:15:54 »
This guide aims to show you how to repair your electric mirror adjuster switch. The symptoms to which this guide relates is inability to adjust either of the external mirrors to the left, right or downwards. Upwards adjustment is possible until the mirror reaches it's upward limit.

There are three pieces of trim to be removed before we can access the screws we wish to undo.

The trim pieces are arrowed below:


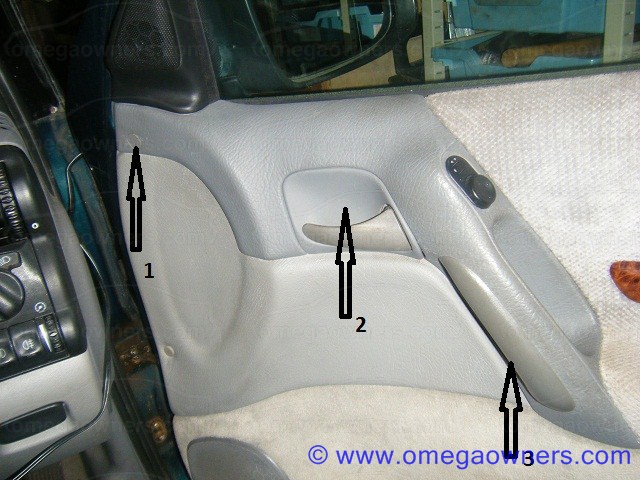
I found the easiest way to remove the first piece is to use the point of a utility knife blade and flick gently. This causes no damage to the trim.
Note the orientation of this piece of trim, there is a slot in the top and it only fits one way.


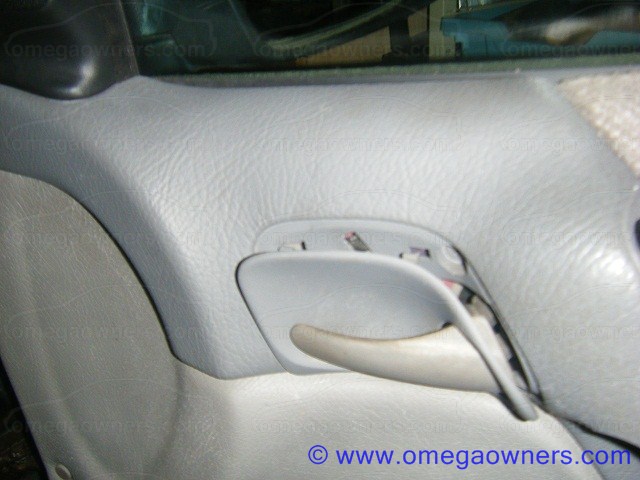
Piece no.2 simply prises off using a thin flat blade screwdriver, nothing complicated here.


Piece no.3 is even easier, just pull the trim away from the handle near the top.


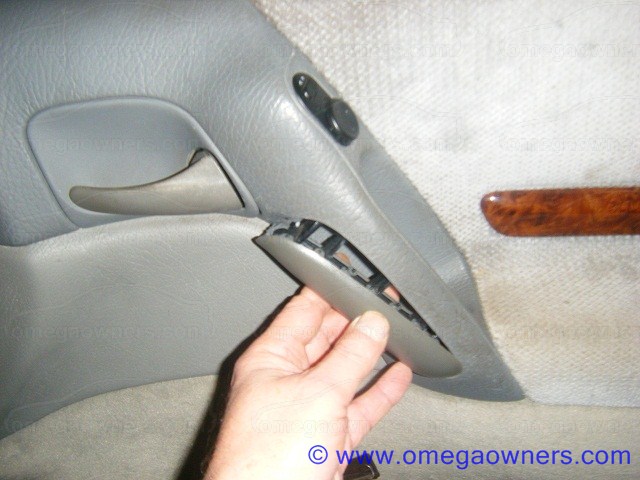
We can now undo the three phillips screws that have been revealed, and remove the handle section of the door panel. The top left corner may need a little tug but should come away quite easily. Don't pull too hard as there are wires behind this which have to be disconnected.


Once the door handle section is off you will see this connector, disconnect this.


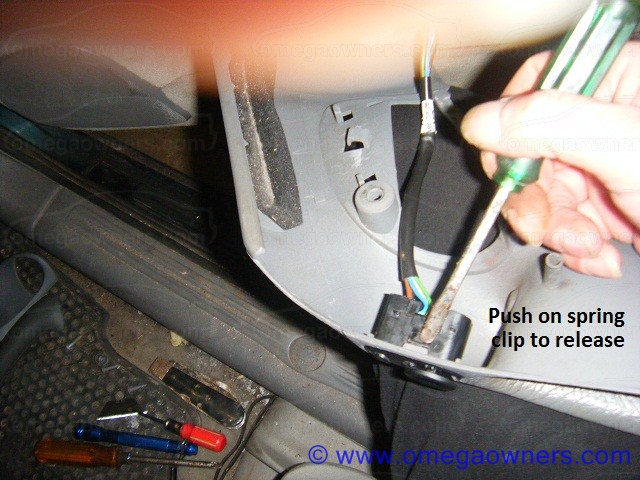
Now we have to remove the adjuster switch. There is a sprung clip on either side of the switch which can be depressed with a screwdriver. Once one side is free the other side comes out with no effort.


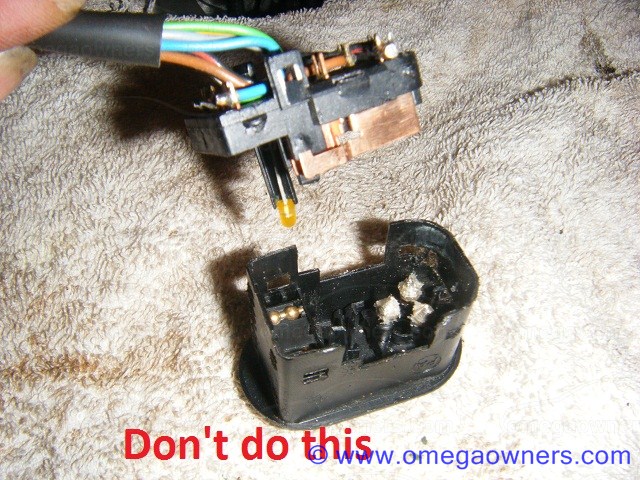
Withdraw the adjuster switch and place it on a flat surface to work on. Not on top of the engine like I did.
I dropped a connector cap down between the radiator and the grill and spent more time trying to find that, than it took to do the whole job.


Now remove the spring clips from both sides of the switch.


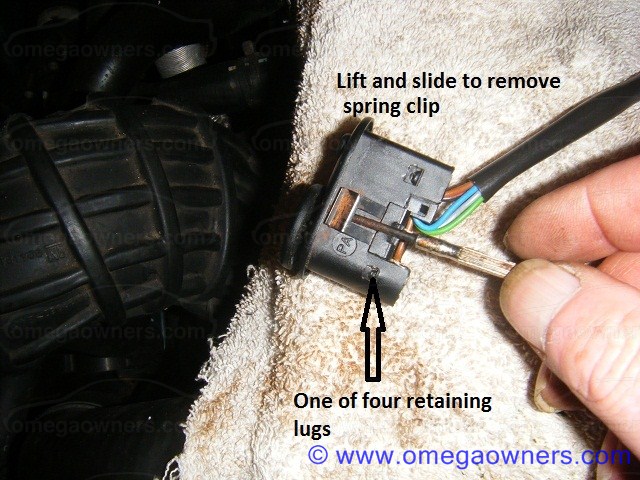
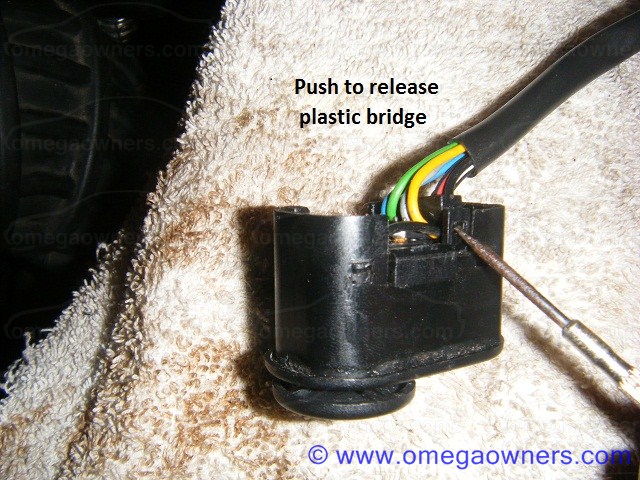
There is a small bridging piece of plastic separating the wires, this will just push out with a small screwdriver.
Now the fiddly part. Work around the four retaining lugs using two small flat blade screwdrivers to separate the two sections of the switch. This is the most difficult part of the operation.
Push one screwdriver down the inside of the switch while pushing on the lug, from the outside, with the other.


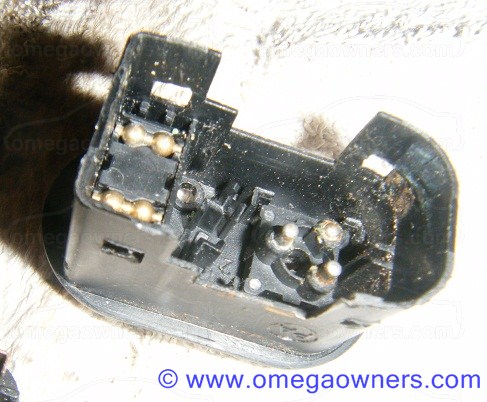
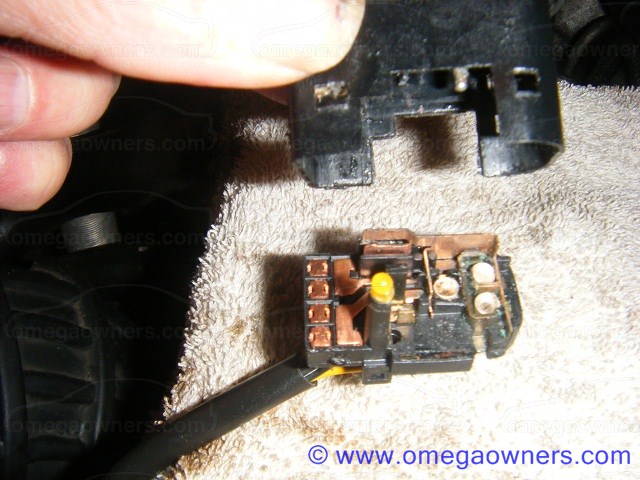
Once the switch is open, inspect for damage.


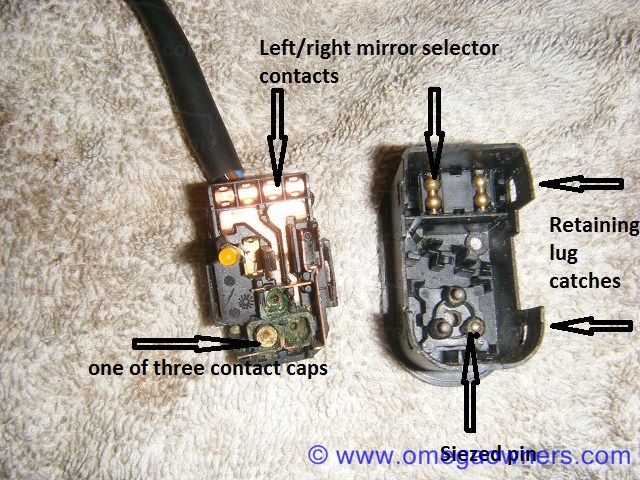
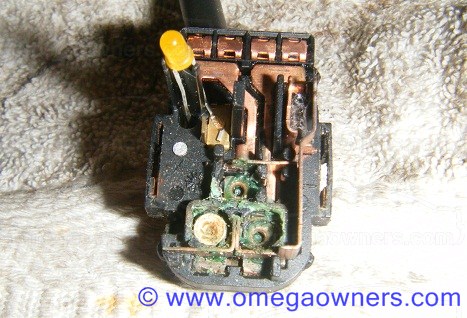
Verdigris on the contacts, one of the contact caps still in place.
Remove the contact caps and clean all the verdigris off using switch cleaner. I used an ammonia based window cleaner spray a cloth and small screwdriver to get in all the corners.


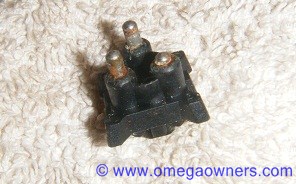
Spring loaded pin siezed.


Pull control button off to release the pin holder.
A spot of 3 in 1 oil on the siezed pin and a bit of working in and out with a pair of pliers soon freed this off.


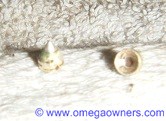
Two of the three contact caps which sit on top of the pins, or under them, depending on your view.
Give the caps a good clean with your switch cleaner especially the outside surfaces.
Beware they are very easy to drop because of thier shape.


Contacts cleaned up and smeared with vaseline.


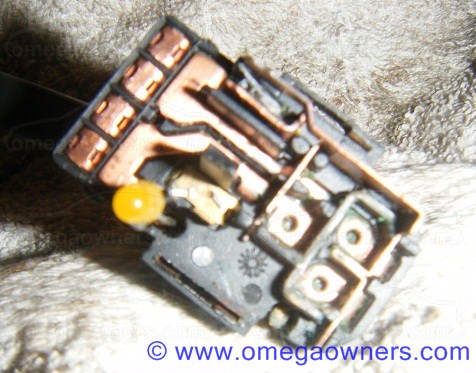
Trying to reassemble the switch with the caps on top of the pins resulted in the caps falling off everytime, so flip the switch over and put the caps into thier cradles in the other half of the switch.


Vaselined and ready to go back together the proper way with caps back in thier place.

Ensure that the telltale lamp locates in it's place properly and that all four retaining lugs snap back in to place.


Put everything back in reverse order and enjoy playing with your mirrors and if this didn't work for you. just replace the switch.   ;)

4
Omega Electrical and Audio Help / Re: played cds made on my computer
« on: 22 November 2010, 20:11:35 »

Quote

Perhaps not totally accurate but gives the basic idea hopefuly.
Certainly accurate enough to give me a reason for not using recordables in the car.
Your reply also prompted me to investigate a little further and all I could find to add was that
'recordables are optimized for use with the lasers in computer optical drives'. Explaining why some recordables just won't play.

Many Thanks   :y

5
Omega Electrical and Audio Help / Re: played cds made on my computer
« on: 22 November 2010, 19:20:12 »
Quote
Quote
Using CDR's in a standard head unit or changer will kill the laser very quickly. Only play original cd's or lose the cd player altogether, choice is yours ;) :y

why does that happen    i dont play copies in the car luckily


I was hoping someone would ask that question, considering the laser head never actually touches the CD  :-/

6
Omega Electrical and Audio Help / Re: Open window
« on: 27 December 2010, 14:40:56 »
Quote
Has anybody else had this problem?
The rear passenger side window seems to be opening by itself.
Three times since I got the car I have returned to find the window open by about an inch.It was definately closed when I left it. The central locking only works with the key, could this be linked to the problem? Any input is welcome :-/

I have had this exact problem, rear passenger window would open about an inch, this went on for about a week. I still have  no idea what caused it, but my solution worked.
I Left all windows open, got out of the car and locked it with the key, holding the key until all the windows were fully closed.
It hasn't happened again since doing this and that was three weeks ago. Might be worth a try.

7
Omega Electrical and Audio Help / Re: horn
« on: 04 January 2011, 19:35:21 »


On it's own, fuse #17 20 Amp. Under steering wheel, middle row, 4th from right. 

8

You will have to retrace your steps and see if you have knocked a wire off or left a cable unplugged.

9
Omega Electrical and Audio Help / Re: Radio, Fuses and Manuals
« on: 17 January 2011, 23:34:49 »


Glad to hear you now have radio working.   :y

Just a thought, while you have the scuttle off you would be as well to change the pollen filter that is under the scuttle, also on passenger side.
There's a good chance it will be damp and causing moist air to be drawn into the cabin. 

10
Omega Electrical and Audio Help / Re: Radio, Fuses and Manuals
« on: 17 January 2011, 22:41:10 »


The scuttle is the plastic trim that runs the full length of the windscreen. Accessible from under the bonnet.

Rainwater washes debris, leaves etc, onto this. there are drains on either side to allow the water to flow away but often the drains get blocked especially the passenger side. This will overflow into the car and soak your carpets causing excess condensation.
Here is a guide to cleaning them:

http://www.omegaowners.com/forum/YaBB.pl?num=1167524083

There are also many other useful guides in the 'Maintenance section.    :y

11
Omega Electrical and Audio Help / Re: Radio, Fuses and Manuals
« on: 17 January 2011, 21:37:20 »
The model of the radio would help.

The radio would normally have a fuse on the back of the unit, so it has to come out to check it.

Brake pad sensor loose, broken or missing, can be bought for a few coppers from the VX dealer.

Check under the scuttle on the passsenger side for a blocked drain.

Check camcover gaskets for leaking oil and clean breathers.

see guides in maintenance section.

12
Quote
Can't be bothered to go out to the car...

  No worries Lazyfocker Lazydocker  we,ll do it for you .     ;D ;D ;)

14
Quote
hey there can anybody tell me wat i should do about the oil light flickers now and again


Can we assume you have checked the oil level?

15
Omega Electrical and Audio Help / Re: battery -fuse?
« on: 10 January 2011, 13:57:27 »
Quote
Quote
....
It's not a jumper pack you need but a battery charger.

It's only the same as getting a jump start & if you need your car now rather than an hour or two  ;)

Agreed, however, getting a jump start is a 'get you out of a hole' remedy until you can charge the battery properly.  ;)

Pages: [1] 2 3 4 5 6 7 8 ... 96

Page created in 0.016 seconds with 17 queries.