Omega Owners Forum

Please login or register.

Login with username, password and session length
Advanced search  

News:

Please check the Forum Guidelines at the top of the Newbie section

Show Posts

This section allows you to view all posts made by this member. Note that you can only see posts made in areas you currently have access to.

Topics - Jay w

Pages: [1] 2 3 4 5 6 7 8 ... 18
1
Maintenance Guides / wiring in an amp
« on: 13 August 2006, 20:36:17 »
seeing as how we have a few people who have been asking, and seeing as i started mine toninght i though i would pake some piccys and make some notes.

My plan os to fit an alpine amp in place of my bose, in addition to wire up an second amp that will run twox12 subs, i am not after all out power, merely a nicer sounding system that covers a greater range than currently.

First this was to route to power cable through to the back of the car, i have chosen 8 guage cable to do this.

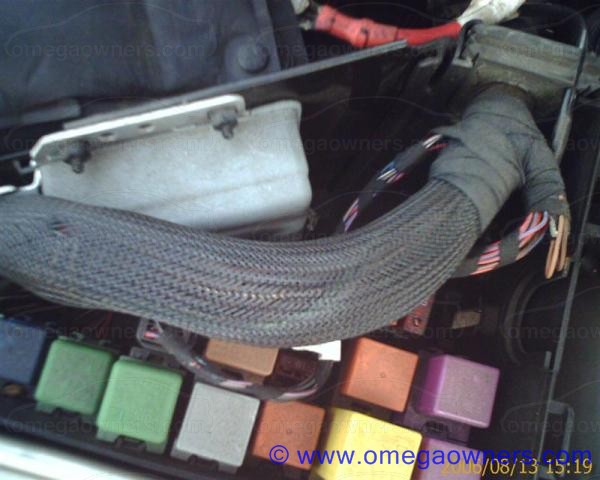
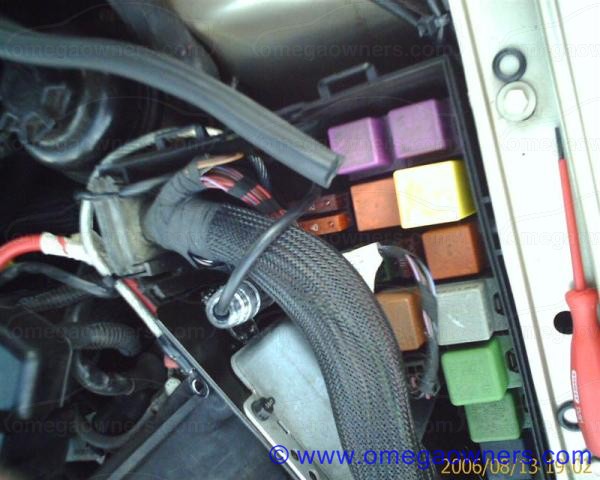
underbonnet first, find a location for the inline 50amp fuse that will be used for the amps:
the fusebox seemed a pretty good place, it's dry and descreet

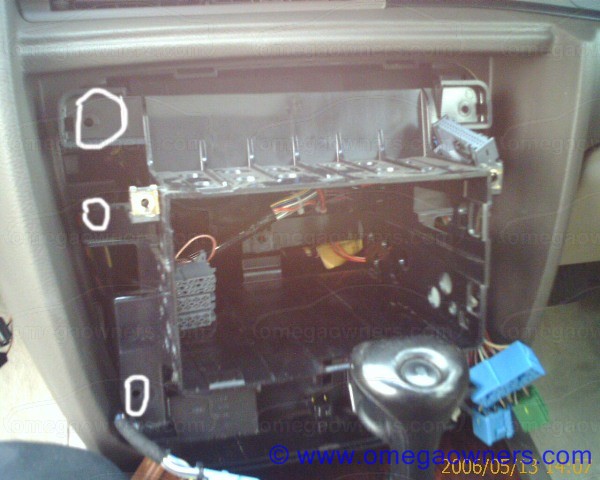
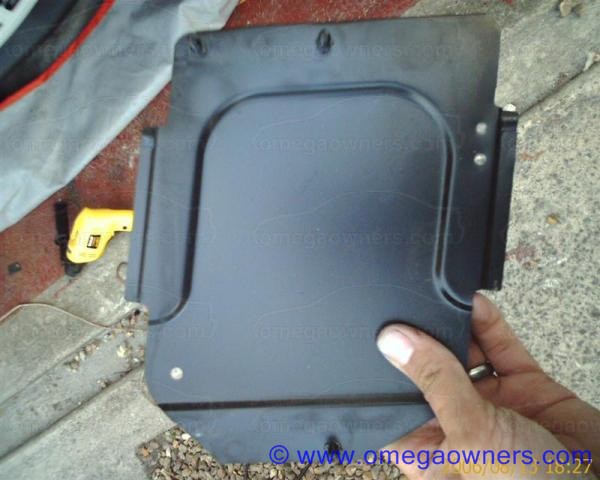
top off and then pull out the ECU as the fuse will be screwed to this

once i hade marked the backplpate and drilled it

It was a cast of threading the wire from the battery and another wire off to the rear of the car, this is the box with the fuse installed, the holes for the wire to thread through were already there

the put the top back on, make sure everything was in place and then time to move on to the bulkhead.

Hillper had kindly advised me of two routes, one was a grommet by the pollen filter, this one was supposed to be the more difficult of the two, the other was a case of running the cable under the scuttle and across to the drivers side of the bulkhead where there is an unused grommet that is easier to use (auto facelifts, not sure about any of the others)
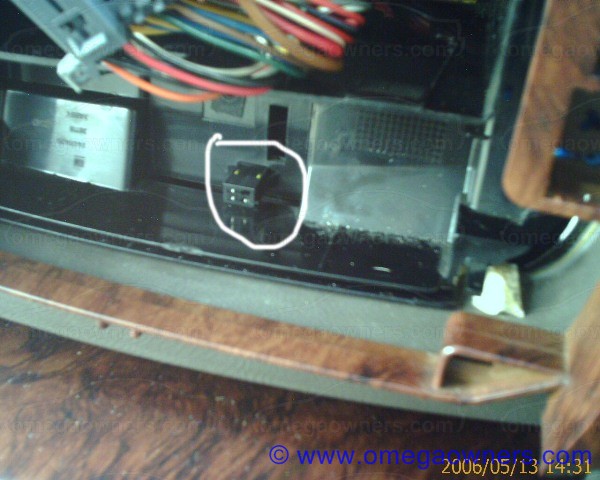
I choce the harder route ( i like a challenge at times, it was made harder by virtue of the face the airbag gets in the way and the generally isn't a lot of space up behind the dash, so i cheated, i removed the passenger vent, it gave me better access to the correct part of the bulkhead.
When you lift the scuttle and look to the side of the pollen filter housing you will see two big grommets, i went for the lower of the two, this mean thatt he cable came through at an easier height to get at

that was the hardest part over, the remainder took me about 15 mins to do.
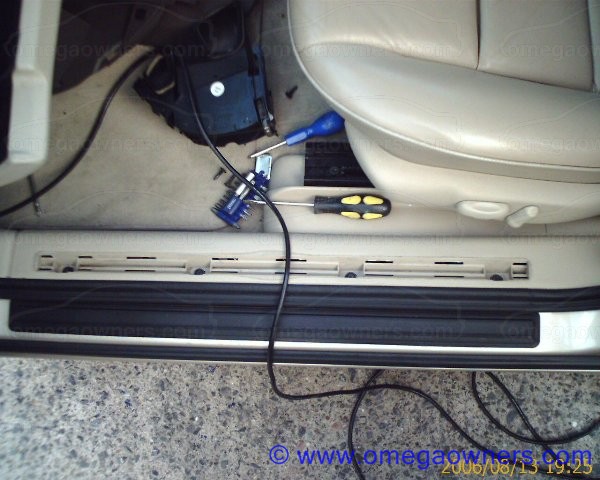
Next step is to remove the treadplates along the length of the car and also the reat seat bolster, all of this is so the cable can be threaded through the car

Once youi have removed the covers you will see 4 torx screw in the front and 2 in the rear as well as 1 on the B pillar, to get the covers off you need a flat ended screwdriver to prise them up

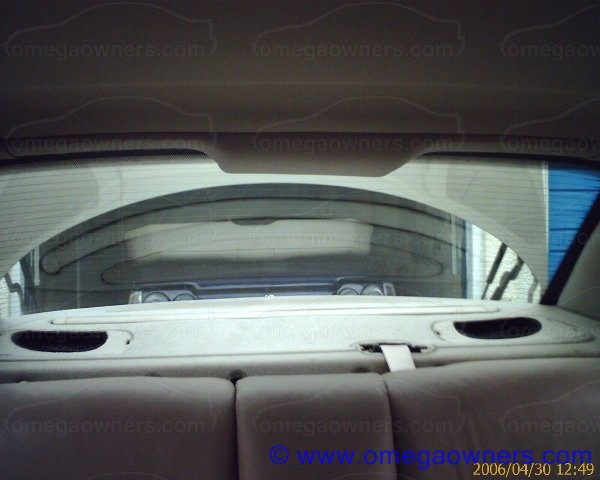
the rear bolster is simple, unclip the lower section of the seat, look at the bottom of the bolster and you will see a body coloured tongue, pull it back and slide the bolster out, this will give you access to the wiring loom as it goes into the boot area


then it is a case of fitting it all back together.

one thing to remember, until the power lead is wired into the amp do not connect it to the battery or install the fuse.

More to follow tomorrow

Thanks for Hillper, Laidback and sounds2K for help so far [smiley=thumbsup.gif]


2
Maintenance Guides / Centre dash panel removal
« on: 13 July 2006, 00:05:40 »
Mods/Admin, if you want to move this then feel free

Centre panel removal………

Tools needed
Philips headed screwdriver, double din stereo removal tool, radio code

In order to remove the centre panel you will need to remove the stereo, undo the 4 grub screws and pull out the stereo with the removal tools.

Once the stereo is out the cage will then need pulling out, to do this pull the top and bottom together in order to squeeze it out of the aperture, before doing this don’t\ forget there is a screw at the back of the cage that holds it to the dash, it would normally be where the circle is.

Once the cage is out remove the multiplugs and the aerial connector, this frees up the cage, from there you will need to remove the ashtray and mechanism. Open the ashtray and remove the ashtray insert (the bit that you empty) and look behind the ashtray, you will see a Philips headed screw, remove this and the whole ashtray assembly will come out, undo the two Philips headed screws at the top of the facia panel (circled) from there you can get at the second part of the centre panel.

Removing the switches is a case of slowly prising them out, some of them are very difficult.

Once the facia has been removed and the multiplugs disconnected from the facia the six screws holding the second part to the dash can be removed.

Before removing the second part you will need to remove the live feed for the ashtray, this is held in place at the bottom of the second part

it undoes by compressing the two clips together.
Once the second part is out of the way you then have access to the wiring, heating trunking, temp sensors (ECC models)

To Coin a phrase from the Haynes manual 'refitting is the reverse of removal'

3
Maintenance Guides / Rear blind removal
« on: 13 July 2006, 00:01:44 »
Rear parcel shelf/sunblind removal for Omega saloon

In order to get the parcel shelf out you will need to remove the base of the seat by pulling the two black handles and lifting the base out of its locating slots. If it an Elite don’t forget that you will have the wiring for the heated seats that will need to be disconnected


Once the seat base has been removed from the car the fixed edges of the seat back then need to be removed, these are held in place by a metal tongue at the bottom of the seat that will need to be bent back to allow the edging to be removed


Once the bottom has been freed you will then need to gently push the edging upwards to release it from the top bracket


This needs to be done on both sides

From there you need to start stripping all the extras from the shelf, I started with the headrests and then the sleeves, there are 4 shelf coloured clips that  hold the shelf in place, they don’t become visible until the rear seat is folded down. As well as the clips there is the armrest turn clip (in the centre of the pic below) this needs to be unscrewed


Once the clips have been removed go on to remove the black rubber boots for the seat back retainers speaker covers, centre seatbelt trim, and also the two grey trims that form part of the access hole for the boot.
Into the boot now and the shelf is held on by 3x10mm headed locknuts, if the car has a plastic tray situated over these don’t panic, an extension bar with a 10mm socket will still undo them as the plastic tray has holes in it for this situation.
Whilst in the boot look in the far left hand corner, there will be a multiplugs connector, this is the power supply for the blind, this has to be disconnected
With the nuts undo, back in the car and now start to pull the shelf out. There are 3 white plastic clips that will be holding it in place still, there sometimes require a sharp tug to free them, in addition the C pillar trims make it a little more difficult to get the shelf out, others have found removing those trim pieces helps with removal and refitting
You should now have the shelf out. The underside will look like this


The blind is held on by 6x10mm nuts, once these are undone it will separate from the shelf
The motor is held in place with 3xT20 torx headed screws and 1xT10 that holds the motor to the mechanism, once these are undone the motor will separate from the blind assembly


If the gears have sheared/come apart then when you open up the motor these will be damaged


There are 3xT10 torx screws holding the cover on, BE AWARE, there are springs behind the cover, if the gears have become damaged they could possibly recoil once the cover is removed.

Time taken to strip and refit was about 1.5 hours, I have never done this in the past so it was a case of looking round for the solution as to why something wouldn’t come apart

If there is anything i have missed feel free to let me know

4
Omega Electrical and Audio Help / double din fascia plates
« on: 27 May 2008, 21:03:42 »
I have finally bought a new double din CD/DVD/Ipod/Satnav double din unit to replace the 2006 unit i have in the CDX.

Now i remember there was someone who was selling the double din fascia plates on ebay, but i cant fine them now and it is bugging me.

I know its a long shot but can anyone remember the seller of have a link to the fascias

all i can remember was the pic, there were plates in different colours and they were spread out on a fan type design

5
Omega Electrical and Audio Help / new double din headunt
« on: 19 January 2008, 21:41:29 »
i have been looking round and considering the possibility of replacing the CCR2006 with a Kenwood DNX-7200.

in addition i wold also need an ipod lead, TCM control module, bluetooth control module and the steering wheel controls, the whols lot comes in at a little under £900......

i will still need to make up a facia panel, i have someone who may be able to do this for me.

any other suggestions for a double din unit that has sat nav built in, can handle ipod and bluetooth an has TMC facility as well

7
My stereo is failing fast and is falling apart as well, i have a couple of options

Either replace the 2006 with another one

Replace with an aftermarket unit.

if it is the latter then i will need steering wheel controld as well as being able to use the MID unit, it would have to have stereo outs for the amp (4 channels) and would have the be able to control an ipod.....
has to look good, and look reasonably factory

If i run an aftermarket unit am i right in thinking that the Traffic master will continue to work, it is after all an aux connection that mutes the sound when activated

a tall order i would assume, any suggestions

8
Omega Electrical and Audio Help / cold bum
« on: 03 November 2007, 22:46:37 »
for the last couple of days the drivers heated seat hasn't worked.

The light comes on, the fuse is ok and the wiring looks to be in order (it hasn't been touched)

any ideas?

9
Omega Electrical and Audio Help / Handsfree kit prewiring
« on: 11 October 2007, 20:36:50 »
I am looking at buying a parrot CK3100 handsfree kit for the car, now i am under the impression that the Elites came prewired for a handsfree kit that mutes the stereo, but would that utilise the stereo speakers?

In the past i have seen a 4 pin connector up behind the glovebox and i do relmember ripping out a power unit for a nokia car kit when i first got the car, although it wasnt wired into the electrics

10
Omega Electrical and Audio Help / blaupunkt multichanger code
« on: 15 October 2007, 22:16:31 »
not mine, my friend with a P reg vectra CDX, i would imagine it is the same set up as a similar model Omega.

He has the radio code but not the multichanger one, i know it is a dealer thing but aside form the reg docs do they need anthing off the multichanger?

if so how the hell do you get it out of the glovebox???

11
Omega Electrical and Audio Help / frequency range of speakers
« on: 18 June 2007, 18:29:22 »
Bit of an od question i know, but i am trying to set up my alpine amp to suit the frequency range of the speakers in my miggy.

I still have the standard Bose set up in the car as well as the head unit, i am finding it has a lot of tone even when the tone is set to mid on the HU.

If anything i would prefer to have it a bit more rich and bassy, not boom boom just more body to it

TIA

12
One of the buttons on my controls no longer works, is it possible to swap the control for a set that do or will i be looking at a complete steering wheel?

13
Omega Electrical and Audio Help / i Pod kits for miggys
« on: 29 July 2006, 16:35:44 »
on the 'other' site i remember there was a conversation about fitting an iPod connection to the standard fit vaux radios.
Someone posted a kit that could be purchased that would hold the iPod and allow the unit to be used with the vaux radio, it spliced into the aerial connection, i can't find the link and i can't remember who made the kit, can anyone help?

Cheers

14
Omega General Help / LPG stopped working!!!
« on: 22 November 2008, 17:39:51 »
Been doing a lot of work on the omega today.

Full service on the petrol side, LPG fuel filter changed and check the settings.

Before i plugged the lappy in i downloaded the latest software, as part of this i noticed that there was a notice about the firmware.
my ecu has 1.9.25 firmware, there was a update to 1.9.27, so after setting the fuel gauge up and taking the car for a spin to check everything out i decided to do the upgrade....

Started the process and about 10 seconds in the laptop lost contact with the ECU, after that it all went wrong......the LPG system went dead....nothing at all, even the gauge was dead.

The ECU has power, but none of the sensors or injectors have power to them, i have checked all the fuses i can see and they are all good......

now i have heard of ECU's going bang when S/W updates are done on them, but before i write it off and speak to Telio does anyone have any other ideas?

Cheers  

15
Omega General Help / Elite set frames on MV6 seats
« on: 02 August 2008, 12:39:26 »
i would like to try and fit Elite full electric seat frames to my MV6 seats, having looked at the wiring on the CDX there is a lot more there than is required and i am wondering if the car has an Elite Loom fitted, so far i have found the additonal loom for the memory adjustment for the rear view mirror.

So the plan is to try and get two elite seat bases/runner assemblies with motors as well as the seat ECU and try and connect it all up to the MV6 seats i have, this having fully electric MV6 leather.....

Any ideas on if this is possible?

Pages: [1] 2 3 4 5 6 7 8 ... 18

Page created in 0.025 seconds with 17 queries.