Omega Owners Forum

Please login or register.

Login with username, password and session length
Advanced search  

News:

Please check the Forum Guidelines at the top of the Newbie section

Show Posts

This section allows you to view all posts made by this member. Note that you can only see posts made in areas you currently have access to.

Topics - sounds2k

Pages: [1] 2 3
1
Maintenance Guides / how to: fit a total closure kit
« on: 24 April 2007, 17:06:14 »
this was done on a 52-reg elite estate, but should be very similar for other models.

Basically - if your car has the total closure facility - whereby if you have window(s) and/or sunroof open and you deadlock the doors using the remote with the lock button, holding it down the second time, the sunroof and windows close themselves - this kit will effectively hold the button down for you. So you can deadlock the car with the remote and it will close any open windows and the sunroof for you. The reason for checking is I'm not sure if this facility is standard on all models ...
 
Parts & tools required:

total closure kit from www.totalclosure.com - details here, price as of April 2007 is £30 inc. VAT and delivery
T25 torx screwdriver
10mm nut spinner

optional, but preferable ...

soldering iron (gas powered is ideal)
solder
insulating tape
small sharp knife

NOTE: fitting this unit ideally requires soldering. Whilst the kit comes with Scotchlok connectors, I have yet to come across a professional installer that uses them ... they always seem to stick with soldering ...

The contents of the kit as it arrives:


Firstly, as you will be connecting to a permanent 12V feed, disconnect the battery negative lead - if you have a powered alarm sounder, bear in mind that you need to do this within 15 seconds of switching off the ignition. I open the bonnet, turn on the ignition, then remove the key and undo the nut and remove the lead ...

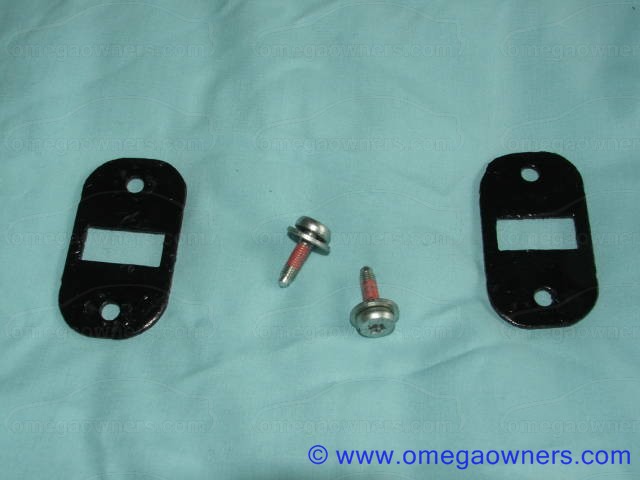
Remove the driver's side kick panel - there are two T25 head screws holding it in place - one is just under the bonnet release lever, the other is underneath the sill trim panel - I removed the entire sill trim panel to make access easier but it's probably possible to remove just the screws in the driver's sill area and lift the trim enough to gain access to the kick panel screw.

You should then be faced with this:


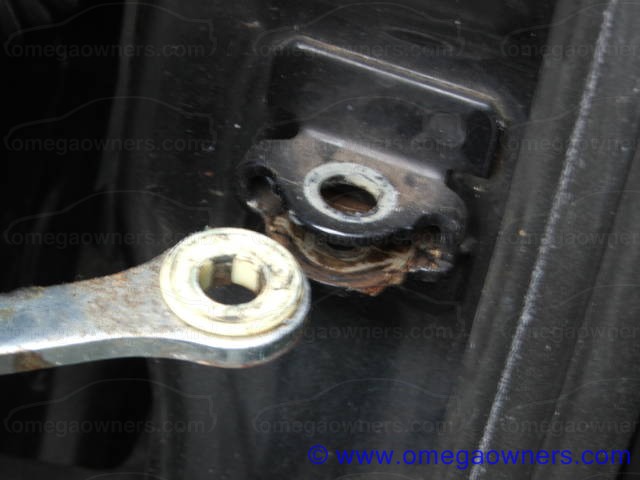
the immobiliser / central locking control unit is the black box behind the wiring loom. Use a 10mm nut spinner to undo the plastic nuts which hold the wiring loom bracket in place, this also secures the control unit in position. This wiring loom is NOT the one you will be making connections to - so tuck it out of the way around the left of the accelerator cable.

Unplug the two connectors from the immobiliser/central locking control unit, when unplugged they look as shown below:


the smaller plug (with bigger pins) is known as X62, the larger plug (with smaller pins) is X61. If you look at the sides of the connectors, you will see that the pins are numbered to aid identification.

Making the connections

If soldering, you will need to remove some of the insulation (about 5mm), tin the exposed wire, then remove approx. 10-15mm of the end of the wire being connected, wrap that around the exposed part of the wire being joined to (this gives a mechanical as well as electrical connection, so the wires are less likely to come apart), then solder the two together and wrap the joint in insulating tape.

As the total closure unit has its' own internal fuse, I connected its' long red wire to the +12V permanent live - pin 9 on X62 (a 1.5mm red wire)
Black wire of total closure unit connects to earth - pin 11 of X62 (1.5mm brown wire)
Brown wire of total closure unit connects to pin 24 of X61 (0.75mm brown/black wire)
Short red wire of total closure unit connects to pin 8 of X62 (0.75mm red/black wire)
Blue wire of total closure unit connects to pin 10 of X61 (1.5mm blue/black wire)

If you cannot locate ALL of these wires - or are in any doubt - do NOT proceed ...
The instructions supplied with the total closure unit say that the blue wire connects to a thin blue/black wire, but it isn't thin on the Omega - however this is the only blue/black wire on either X61 or X62.

the connections should look something like this (before wrapping each connection with insulating tape) ... for some reason the picture shows most leads as blue ... but you get the idea!!


If soldering, make sure ALL the connections are suitably wrapped with insulating tape, then refit the immobiliser/central locking controller. Try and leave the total closure in the footwell for the time being, with the LED pointing upwards so you can see it.

The end result should be like this:


Now reconnect the battery negative lead, reset the sunroof and window memories (refer to the guide here if required).

Time for testing ... open the sunroof and/or windows, then go outside the car and deadlock it using the remote. You should see the light on the total closure unit illuminating, at which point the sunroof and/or windows should self close. After a few more seconds the light on the total closure unit should extinguish.

If all is OK, unlock the car again and put everything back together - cable tie the wires of the the total closure unit if you like - it then sits nicely above the bonnet release area.

Job done  :y

2
... as recently requested ... this was done on a 52-reg 3.2 estate, but should be very similar for other petrol engined models.

Parts required:

1 x Fuel filter (P/N 25313359)
2 x fuel filter clips (P/N 90542453)
1 x set of fuel clip (or hose clip) pliers

Having done changed the fuel filter on a saloon (which was easy), the filter on the estate is not as easy to do, due to its' location. It sits in front of the fuel tank, roughly in the middle of the car left to right.

To start with - park the car on a level surface and chock the front wheels. Start the engine, then with it running remove fuse 18 (20 Amps - yellow), after a couple of seconds the engine should die - this helps to drain the fuel lines. I then jacked the rear nearside of car up, supported it with an axle stand and removed the offside rear wheel as that's how you get to the filter on a saloon. In retrospect you probably don't need to do this but it does make getting under the car & back out again easier ... do make sure to rock the car so as to ensure it is safe as you will be getting underneath.

I would advise wearing goggles all the time you are under the car, as during removal of the filter you tend to get covered in caked on mud !!

I found the easiest way to get to the filter is not from the side - but from the back of the car - slide in and if you look up at the centre of the car as you slide under, just after the petrol tank but before the diff, you will see the filter - mine was well plastered ...


with the saloon I was able to remove the clips fairly easily, however with the estate you can't drop the filter right down to get good access. I did manage to remove the clips using a pair of hose clip pliers:


- but a set of the proper filter pliers would probably make it easier.

Unclip the strap that holds the filter and drop it down slightly. You should be able to see a label on it, with an arrow giving the fuel flow direction. Essentially you need to press in at both clips at the sides of the connector whilst pulling the connector off the filter. Sounds easy but again, due to the access, it can take a while and is a bit fiddly. If you are careful and do this at arms' length, you shouldn't get an eyeful of petrol either!

Remove the fuel line at the top end of the filter first - ie, the one nearest the front of the car and the top of the filter (using the arrow marked on it). This will have less fuel, you should then be able to angle the filter downwards and drain the fuel out of it into a suitable container. Then remove the other fuel line.

Fit the new fuel filter clips into the ends of the fuel lines - they should click into place - then fit the new filter into the fuel lines, making sure that the fuel flow direction marked on the filter is the same as on the original. It should point towards the front of the car. Then tighten the strap which holds the filter in place. Look for any leaks, there shouldn't be any if the clips have been clicked into place onto the fuel lines and filter.

Then refit fuse 18, start the car (it will take a couple of seconds' cranking), run for a few seconds, then re-check the filter to make sure there are no leaks.

If all is OK, refit the nearside rear roadwheel and lower the car back to the ground. Using the hose clip pliers, I managed to remove the old filter without damaging the clips, but given that they are cheap (approx. 60p each) it's worth replacing them anyway - no clips = no fuel filter = no car  :'(

my original filter (with its' clips) looked like this after removal:


then pat yourself on the back for a job well done and wash all the mud off your face  :y

3
some people have noticed that when closing and opening the front door on an omega (especially the driver's door as it gets more use) that there is a kind of cracking noise.

A "fix" for this is documented on the omega owners' group on yahoo (largely cribbed off TIS by the looks of it) - but I tried this and it did NOT fix the problem. Worth doing though, as it will stop the internal bracket tearing which isn't good!

What did fix the problem though, is also replacing the plastic bushes that fit between the check strap and the big bolt that fixes it to the bracket on the 'A' pillar, as shown below:


Parts required and their RETAIL pricing:

4 x 9195961 (reinforcement plate) @ £1.04 each
4 x 13104167 (longer torx head bolts) @ £0.12 each
2 x 90462823 (plastic bush) @ £0.19 each
total cost: £5.02 + VAT = £5.90.

don't believe Vx if they tell you that the part numbers are invalid !!

Procedure

First off, the repair plates I bought (helpfully) had a nice sticky label on each one with the part number. Ideally use proper label remover to get them off as you need to paint the brackets to prevent rust. I found that the Maplin label remover (part no. N63AN, £2.99 per can) does a very good job.

You also need to cut down at least two of the brackets - cut off the top 8mm or so and round off the corners, turn 180 degrees and repeat. The info I've read differs - one source says do both brackets for each door, the Vx field rememedy info says to do just the outer one. I'd already done both anyway ... once this is done, paint the brackets to prevent rust.

So for each door you will have two brackets, two screws and one plastic bush. The brackets and screws should be similar to this:


before installation, the door check strap fitting to the door looks like this:


Start by removing the door card (see Haynes manual page 11.8 if needed), then the front speaker. Note that removal of the plastic sheet is NOT needed for this job - so no problems if you've got side airbags fitted.

The hardest part I found was removing the door locking knob - the Haynes manual makes it look so easy to remove the clip - but it's best done with a sharp knife initially to make a suitable gap as it's a tight fit otherwise. If it's been removed before then it shouldn't be a problem.

to remove the check strap itself, use an 8mm socket - alternating between the top and bottom bolts. When they are out, remove the pin in the 'A' pillar bracket. This will require two 10mm spanners initially - after a few turns the nut on the bottom can be undone by hand - then remove the pin.

At this point you may want to use latex gloves (unless you like greasy hands) - reach inside the door through the speaker hole and remove the check strap. The mechanism should be covered in grease, you may want to re-grease the mechanism at this point for good measure.

Put one of the plates over the end of the mechanism and see if the screw holes in the plate line up with those on the check strap. If not you'll need to bend the check strap brackets slightly to match (both mine were slightly out).

The second reinforcement plate needs to sit between the door and the fixing bolts - I found the best way to do this is to get the check strap into its' approximate position, then pull it back, fit the plate and push it through again.

Fit the two new bolts through the inner and outer reinforcement plates and into the check strap - note that they have a T30 torx head and not standard 8mm hexagonal. On the driver's side, I had trouble getting the bolts in position - it turned out that there was a slight lip which the reinforcement plate needed to be sat on top of, otherwise it was about 1mm out. When complete it should look like this:


(I suppose a bit of paint over the screw heads wouldn't be a bad idea either )

Next comes the bushes. They fit on the end of the check straps, between the bolt and the strap, as below:


Push out the old, replace with the new. Ideally grease the pin before replacing - it may now not go right the way through without "assistance" due to the new bush, but there should be enough to fit the nut onto. Tighten up using the two 10mm spanners as per removal, which will pull the pin down through the bush.

Opening and closing the door should now be free of the cracking sound!  [smiley=thumbsup.gif]

4
Omega Electrical and Audio Help / aerial adaptor for NCDC2013
« on: 22 March 2007, 08:22:06 »
Hi folks,

I'm trying to fit my harman kardon drive & play to the new omega, the problem is that the FM modulator uses ISO connections not DIN. It does come with adaptors, however these are of no use as they do not clip into the cage - so when you push the radio home it would not make a connection. Plugging the aerial in place and then fitting the cage isn't possible either as the main loom to the radio isn't long enough.

There appears to be a Vx part number 90349287 - which looks suitable as it's a flylead. Has anyone used such a thing, and more to the point does it clip into the cage like the normal aerial cable does ... or does anyone know of an equivalent adaptor or a better solution?

Thanks  :y

5
Omega Electrical and Audio Help / Nokia CK-7W on NCDC2013 (Bose)
« on: 19 March 2007, 12:07:59 »
I'm shortly going to be taking delivery of my new miggy (52 plate 3.2 elite estate) - and will be transferring the nokia CK-7W handsfree kit from my current miggy.

However, last time I used the seperate microphone and loudspeaker, this time round I thought it'd be best to try and utilise the pre-wiring.

After searching, there appears to be some doubt as to if this will work OK on the Bose headunits (it's a NCDC2013). Has anyone done this, if so what adaptor lead did you use, how much was it and where did you get it from?

I'm thinking along the lines of the Autoleads "06-109B Saab 18 pin VDA Cellular Telemute Interface lead with electronic filter" from SIO communications here - as it mentions it's also for "Vauxhall Vectra 'C' and Signum with Bose or CD70 Sat Nav 2002" ... any ideas??  :-/

6
Omega Electrical and Audio Help / NCD2013 wiring for car kit
« on: 22 July 2006, 18:36:13 »
I'm finally getting round to transferring the nokia car kit between cars and am now at the point of making power and mute connections. I've identified the power connections (tapping into the trafficmaster adaptor lead), anyone know which wire to connect to implement the radio mute function?

7
Omega General Help / quench the barge's thirst !!!
« on: 09 August 2007, 15:22:07 »
Hi folks,

I'm concerned about the economy (or lack thereof) of my barge. Admittedly it's a 3.2V6 auto which is never going to be economical per se - however (as an example) yesterday I put in £20's worth when the range was showing about 7 miles left, drove 60 miles of which about 45 was on a return trip which included about 80% motorway driving, the remainder was the usual urban stuff but not stop/start. It then said range was 29 miles. This would put the range of that £20's worth at approx. 82 miles - working out to an average of 17.85 MPG - which strikes me as a bit juicy !!!

I tried resetting the trip computer whilst on the motorway on the way back recently, it said about 25-26 MPG whilst remaining on the motorway, but once off it dropped down to about 23MPG by the end of the journey.

Is this normal as such - I don't expect miracles round down but on a run it seems to be a bit thirsty?

If not, where should I start looking? I was considering changing all the inlet manifold, throttle body and breather "top hat" seals ...

8
Omega General Help / wishbone fubar'd?
« on: 23 April 2007, 23:16:00 »
had a look at the wishbones whilst checking the brakes at the weekend, noticed this on the front offside wishbone's vertical bush - does this mean it needs replacing (looks like the bush is poking out the top of the hole to me) ?


9
Omega General Help / sunroof mechanism greasing?
« on: 26 March 2007, 18:35:13 »
Hi folks,

on my new miggy the sunroof is a bit stiff, I think through lack of use ... sounds like the motor is working harder than the one on my old miggy. I've been able to slide the roof all the way back and spray grease into the runner, which appears to have resolved the issue for the sliding action. However, the tilt action is still a bit laboured, sometimes you have to hold the button in to make it close all the way. Which part(s) need to be lubricated for the tilt action?

cheers  :y

10
Omega General Help / wipers very intermittent ...
« on: 20 March 2007, 19:02:29 »
... as in not working at all on intermittent  >:(

it seems that the intermittent setting - which *should* operate in conjunction with the rain sensor - on my new omega ain't working - at all. If you set the wiper to position 1 or 2, the wipers move fine.

Possibly related - I noticed that if you wash the windscreen, on my old omega the wipers then perform about 3 sweeps automatically ... on the new one this doesn't happen, so you have to set the wipers to position 1 (or 2) manually ... any ideas where to start looking? ta  :)

11
Omega General Help / quick queries on coolant change
« on: 19 March 2007, 23:25:24 »
Hi folks,

I've just taken delivery of the new miggy ... noticed that the dealer's mechanic has filled it with non-Vx coolant after changing the water pump - it's a blue colour. I've read the maintenance guide on coolant change, and have two questions:

1) is it just plain tap water to be used
2) on a V6, given that approx. 50% drains from the system, would it not be possible to repeatedly flush until the draining water is clear, then after this last drain top up with neat coolant to achieve the 50-50 mix?

cheers  :)

12
Omega General Help / Re: Best place for new parts
« on: 13 March 2007, 23:32:33 »
what parts?

13
Omega General Help / boot tail lights
« on: 17 February 2007, 20:13:02 »
hi folks,

picked up my omega from the bodyshop on Friday ... had a problem very quickly thereafter - fuel gauge reading erratic, rear fog light telltale light on dash flickering, turn signals intermittently working ... they cleaned up the earth connection in the boot and it appeared to be fine thereafter.

However, upon driving it today and switching on the sidelights, after a few seconds I got an error on the GID saying check side/tail light ... so I stopped, walked round the car and the sidelights on the boot lid aren't working, only those on the wings.

The reversing lights DO work - and I tried swapping one of the reverse light bulbs into the sidelight bulb holder - no difference. So ... any ideas? Could it be another earth missing, if so where's the best place to check? I'd have thought a common earth would have been used, yet the reversing lights work ...

thanks

14
Omega General Help / oil leak
« on: 18 February 2007, 18:39:20 »
hi folks,

a month or two ago, I noticed on a long run that the "check oil level" warning showed on the GID. I did as it said, and - sure enough - the level was low.

Having just got the car back from the bodyshop, I checked the oil and made sure it was OK too ... as I've also noticed that the coolant seems to be dropping a bit (I think).

On a run today, the "check oil level" light came on again, I've noticed two things:

1) if you switch off the air conditioning once the engine is warm, the idle revs are about 500-ish, at this speed it sounds like it's missing (a lilttle bit) - just not completely smooth. If you switch the air con back on, revs sit at 700 and idle seems completely smooth.
2) there's a drip of oil from the back of the engine, looks like where the engine and gearbox meet - there are two torx headed bolts and the oil drips from there. Oil also seen on the subframe - but I did spill a bit when topping up the oil level, so that may have come from there?


Having stripped off the plenum chamber and inlet manifold, I saw a bit of coolant next to the thermostat, however having thought about it, this may have come from the throttle body coolant hose when I removed it.


I can't see any oil in the spark plug wells nor in the valley between the two banks (next to the heat exchanger and stat).

The engine still pulls like a train and revs freely.

I cleaned out the breathers 2 or 3 months ago, they weren't clogged up much ... there's no mayo in the oil filler neck, coolant in expansion tank seems to be OK (there's a bit of what looks like scale in the tank, around the edges), no mayo on dipstick.

So ...... any ideas????

I'm a bit worried that it appears to be using (or more to the point losing) quite a bit of oil, seems worse on a run rather than short trips though.

Any ideas as to what might be causing the oil leak???

thanks  :y

15
Omega General Help / wishbone replacement "fun"
« on: 15 January 2007, 22:15:19 »
I replaced the front O/S wishbone on my miggy yesterday ... eventually !!!

Not having done one before, I wasn't sure what to expect, but it did sound easy from the how-2 ... but I found getting the vertical bush in and out an absolute pig, along with getting the balljoint out of the knuckle - the latter due to the wishbone vertical mount stopping the wishbone moving down any further!

I managed to get it changed (in the end) albeit I noticed that the boot on the balljoint is now split, so it's gonna have to be done again, along with the track rod as the boots on both ends are also split where I used one of the fork-type seperators on 'em  >:(

Looking at it, I think if I use a set of spring compressors to clamp the spring before jacking the car, this should then give me more room to drop the wishbone in order to get the balljoint out, plus then make getting the wishbone itself in and out easier as it should be closer to level ... any ideas or hints?

ta  :y

PS: drop link changed too ... easy peasy!!  ;D

Pages: [1] 2 3

Page created in 0.026 seconds with 17 queries.