Omega Owners Forum

Please login or register.

Login with username, password and session length
Advanced search  

News:

Please check the Forum Guidelines at the top of the Newbie section

Pages: [1]   Go Down

Author Topic: Brake Fluid Flush & Change  (Read 8581 times)

0 Members and 1 Guest are viewing this topic.

tunnie

  • Get A Life!!
  • *****
  • Offline Offline
  • Gender: Male
  • Surrey
  • Posts: 37520
    • Zafira Tourer & BMW 435i
    • View Profile
Brake Fluid Flush & Change
« on: 29 August 2006, 21:04:43 »

Brake Fluid Flush & Change - This method will apply to pre-facelift & facelift models

This is the 2 person method, which i prefer.

Car Featured: 2000 Model 2.2 Facelift Saloon

Tools Needed

 - Another person (will explain later)
 - Brake Bleed Kit (basically some tubing and a pot)
 - 9mm Spanner
 - At least 1 Litre of DOT 4 Brake Fluid (GM stuff recommended, Part Number: ???????)
 - Paper Towels or a rag
 - 17mm socket for wheel nuts
 - Alloy wheel locking nut (if you have one)
 - Something to 'chock' the front wheels (bricks, lumps of wood)

Chaning the fluid

This is an easy job, and very worth while. Most garages will just 'top-up' your fluid and not change it, often a dealer will say its been changed but often its not.

Brake fluid should be changed every two years on average mileage & every year if doing big miles.

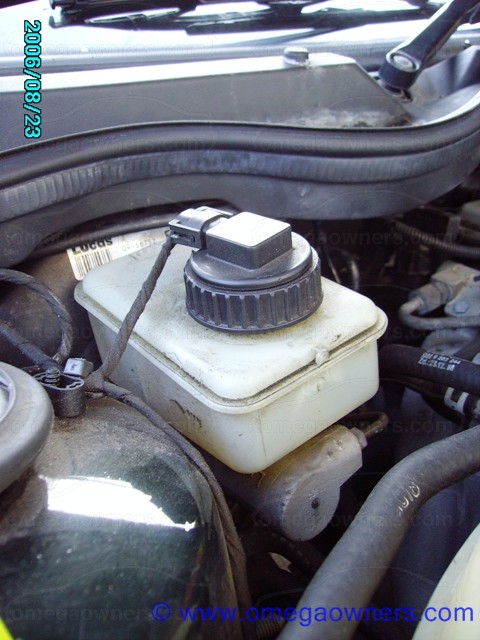
Firstly check the condition of the fluid, below is an image of the engine bay with the brake fluid expansion tank circled.


Unscrew the cap to this tank.


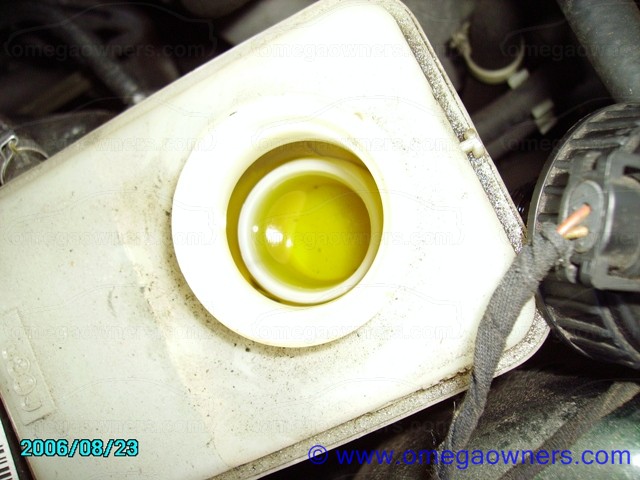
This is what my fluid looks like after its been changed ( forgot to take a picture before  ::) ) - Yours should be similar, if its very dark orange, brown or going black it needs to be changed.


Leave this tank unscrewed, make sure the car is on a level surface, put the hand brake on firmly, chock the front wheels of the car and put it in 'Park' if an auto, or 'Reverse' if a manual.

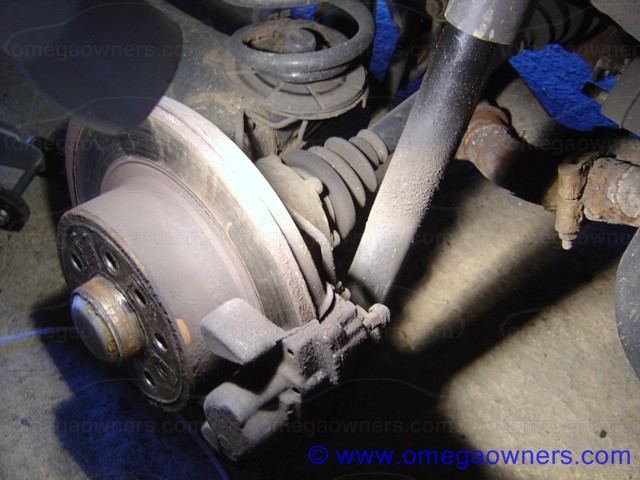
Jack up the back passenger side of the car, and remove the wheel.

You should see something like this:


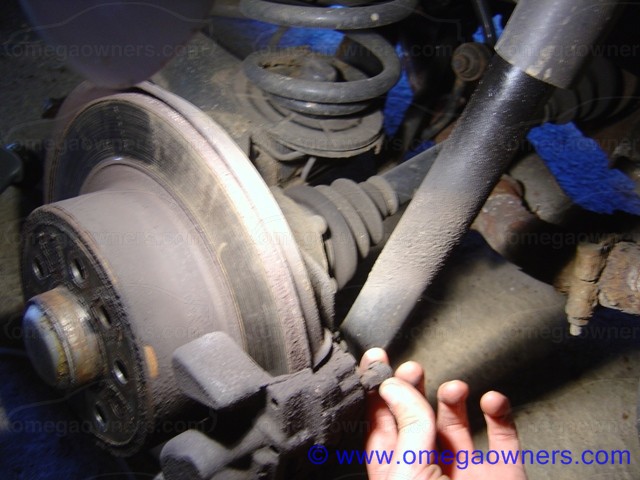
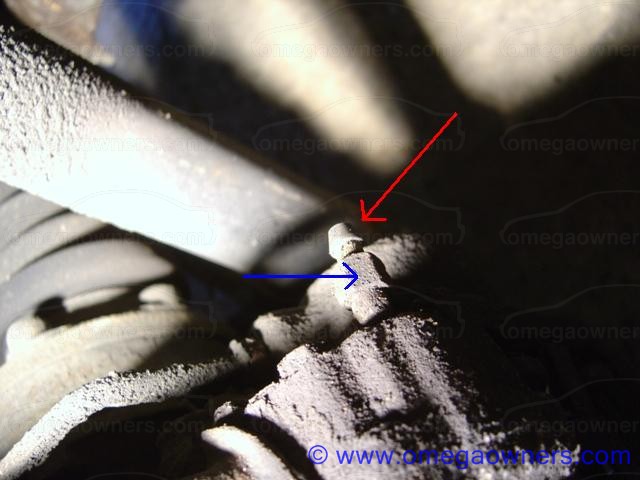
You need to remove the cover to the 'Brake Bleed Nipple' - Shown here:


With the cover taken off, you can see the 'Bleed Nipple' & the 'Release Nut' which bleeds the fluid.


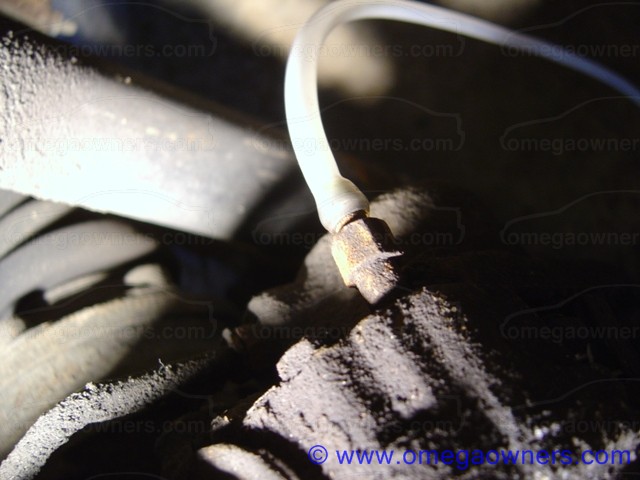
Attach your brake fluid pipe to the end of the nipple, this can be fiddly if the pipe is new or a little tight. Keep working it and wiggling it and it will go on. Make sure the edge of the pipe comes well over the edge the nipple. They have a tendancy to 'pop' off under presure. You can see here the pipe attached. Rember if you have closed spanners, put the spanner on the pipe first  ;)


Now put your 9mm spanner on the release nut, now you need your helper. Ask them to get into the car and pump the brake pedal a few times. Once done, you call out 'PRESS' - Your helper presses the brake pedal down BUT does NOT release, the pedal stays pushed down.

You then pull the spanner towards the back of the car undoing the nut, brake fluid should start to come out fast, but then become slower in speed. Before it almost stops, turn the spanner back to the front of the car closing the nut. You then call out to your helper 'RELEASE'

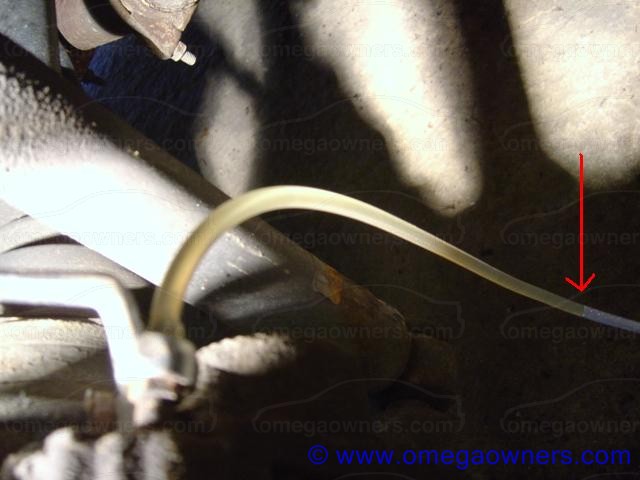
You can see here the fluid has started to come out:


Leaving the spanner on the nut you then repeat the procedure, fairly quickly the fluid will reach your pot. Make sure that you call out release AFTER you have closed the nut. Because you don't want it to suck up air, which then becomes a real pain to get rid of.

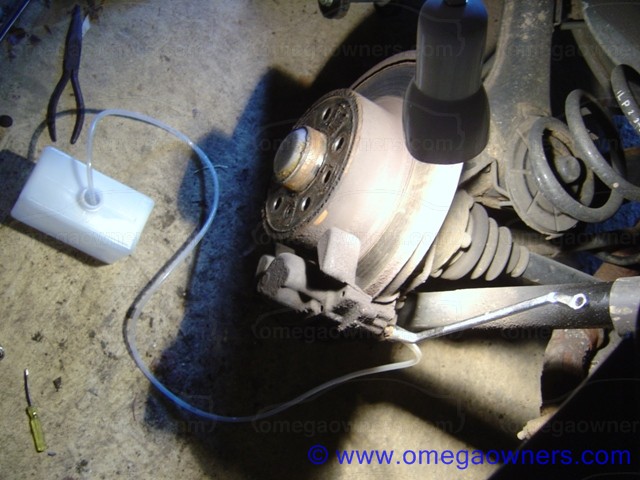
See here the basic setup:

« Last Edit: 24 July 2007, 14:03:26 by TheBoy »
Logged

tunnie

  • Get A Life!!
  • *****
  • Offline Offline
  • Gender: Male
  • Surrey
  • Posts: 37520
    • Zafira Tourer & BMW 435i
    • View Profile
Re: Brake Fluid Flush & Change
« Reply #1 on: 29 August 2006, 21:06:44 »

Repeat the procedure of 'PRESS' & 'RELEASE' to drain most of the fluid, you want to take the main fluid tank in the engine bay down as low as possible, but not too low as you don't want air in the system. Keep an eye on the tank as you do the 'PRESS' & 'RELEASE' procedure, keep it half full as the pumping of the pedal can make the fluid 'spirt' out - Once the main tank is nice and low top up with some nice fresh fluid.

WARNING - Brake Fluid is better than paint stripper, keep it away from body work.

I recommend GM's own stuff - Its only £3.06 for 500ml at retail price!! - My local shop changed me £4.99 for unbranded rubbish.


Once the main fluid tank has been topped up, repeat the procedure of 'PRESS' & 'RELEASE' until the nice new clean fluid comes though the pipe. Close the nut, but not too tight pop off the pipe and mop up any fluid that escaped & pop the wheel back on.

Now move on to the front drivers side of the car, remove the wheel, you should see something like this:

The bleed nipple cover looks a little different, but pop this off.


With the pipe on...


Again attach the pipe, and repeat the procedure of 'PRESS' & 'RELEASE' until the new fluid comes though.

To get all of the brake fluid out, its also good to get it out of the calipers. Unfortunately I don't have any pictures i forgot  ::) - i'll post them up next chance i get...

Release the caliper by release the nut at the bottom right of the caliper. There is a rubber concertena thing inbetween the nut and the caliper assembley, this allows the whole lot to move when you brake.

The caliper assemberly should just pull up, you should then see a circluar tube type thing. This is what pushes against the pad, ask your helper to pump the brake pedal and you should see it slowly moving out. WARNING Only do this if you have a G-Clamp

Now using a G-Clamp, lock the caliper so it won't move, and pinch the main brake fluid pipe thats right at the back of the wheel arch. Repeat the procedure of 'PRESS' & 'RELEASE' to drain out the really stubbon fluid.

Now move onto the rear drivers side wheel and repeat, the final wheel should be the front passenger.

It must be done in this order on post 1998 cars.

Rear Passenger
Front Drivers
Rear Drivers
Front Passenger

With the system flushed and fluid changed, check all the wheel nuts are to the specified torque values and take the car for a run.

Take it easy for a while, do some light breaking to begin with. After you have been driving a while, stomp down on the pedal and see how fast it can stop. Repeat this a few times and you should really being to feel the new fluid begining to bite.

If there is anything I have forgotton, then please let me know or a site admin.
« Last Edit: 24 July 2007, 14:05:24 by TheBoy »
Logged
Pages: [1]   Go Up
 

Page created in 0.025 seconds with 21 queries.