Omega Owners Forum

Please login or register.

Login with username, password and session length
Advanced search  

News:

Welcome to OOF

Pages: [1]   Go Down

Author Topic: how to remove 2.2 cylinder head with pics  (Read 1173 times)

0 Members and 1 Guest are viewing this topic.

cd 2.2

  • Guest
how to remove 2.2 cylinder head with pics
« on: 02 February 2014, 21:18:26 »

I'm posting this here as I can't post in maintenance guide area?

To start with these are the tools that I used in removing the cylinder head on my 2003 2.2 cd auto:

- Halfords 150pc tool kit (these are great and any broken tools get replaced free for life if you have purchase proof)
- Halfords 24 inch (2 foot)  1/2 inch breaker bar
- Halfords 1/2 inch T55 socket bit (for head bolts)
- Box of gloves (I hate dirty hands)
- Digital camera
- Plenty of coffee

!!AT ALL TIMES I HAVE THE CAR IN P (park) AND THE HANDBRAKE ON SO I KNOW IT'S NOT GOING TO MOVE!!
!!ALWAYS THINK ABOUT YOUR OWN AND OTHERS SAFETY PLEASE!!
These are the steps that I took to remove the cylinder head, I'm known to shortcut wherever possible so if you like you can do things in a different order  :y

Step 1: Remove the 4 E10 bolts securing the exhaust manifold heat shield and retract the heat shield. Use lots and lots of penetrating oil like WD40 (I use Swarfega duck oil). If they are really tight just turn them a tiny bit and use some more spray, work the bolt in and out a bit at a time until free enough to remove.


*centre bolt was sheared before I got the car*
*closely inspect the top of the manifold for cracks especially if there is staining on the underside of the heat shield*

Step 2: Completely drench the exhaust manifold nuts with the penetrating fluid and come back to it in an hour or so, Work the nuts using more penetrating spray if needed for any ultra tight ones. There are 10 in total and they should be 13mm. Use of a deep reach socket helps especially for the lower nuts.*don't worry if they come out like bolts you can replace them easily but they are easy to shear off if you don't take care*


Step 3: When detached from the head lift the manifold and rest it on the studs (if any are left in the head) like this:


Step 4: Remove the manifold to down pipe bolts/nuts, there are 4 in total and should be 13mm. You will most likely find that a deep reach socket helps as the 2 studs nearest the engine are awkward to get access.

The 2 bolts pictured I found the hardest of the 4 to remove but yours may be different and the heads are on the lower side.
*the manifold will fit between the pipe and the engine to remove with a good bit of a jiggle*
!!IGNORE STEP 3 AND 4 IF YOU ARE LEAVING THE MANIFOLD IN PLACE DURING HEAD REMOVAL!!

Step 5:Remove the 5 T20 screws securing the air box lid (they only come out so far not all the way), remove the air box lid and air filter

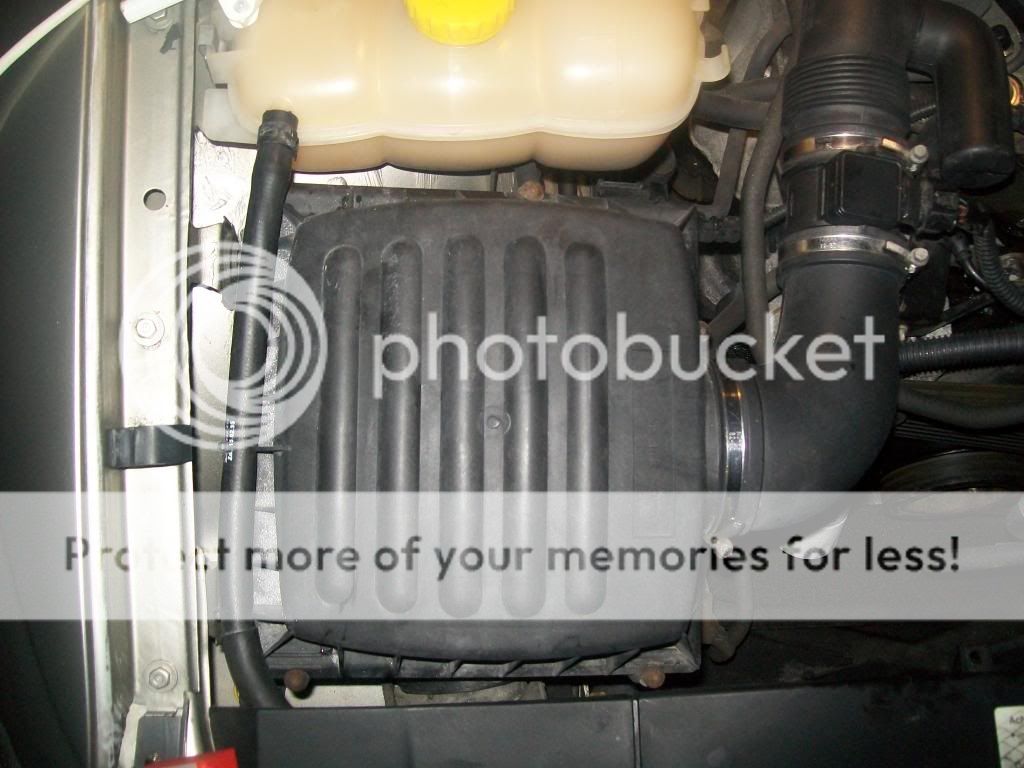
*you will also have to loosen the second jubilee clamp on the pipe and electrical connector to get everything out of the way*

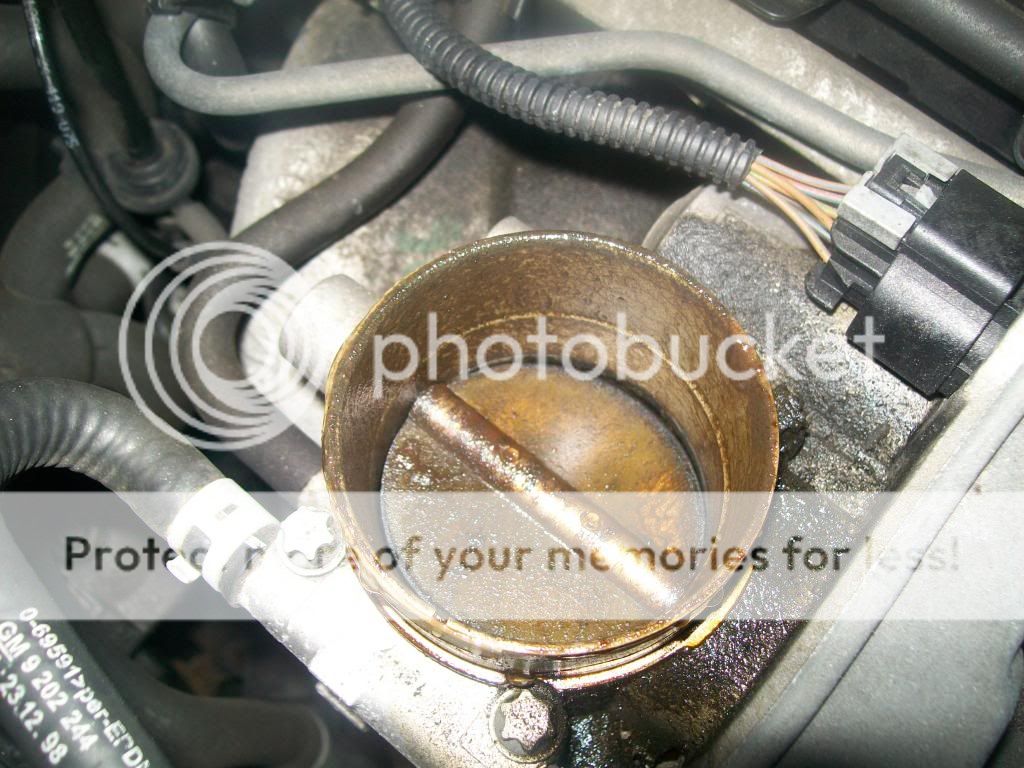
Step 6: If you haven't already, remove the pipe that remains from the air intake system from the top of the throttle body and remove the 4 E10 bolts that secure the throttle body and all connected pipes on the throttle body, only remove the throttle body if you want to clean everything out like I did after a massive HGF as my inlet manifold was full of oil.


Step 7: Remove the plastic cover on the centre of the engine (the bit with the VX logo and Ecotech on it) by firstly removing the coil pack connector at the back of the engine and then sliding the black insert towards the rear of the car.

*the connector for the coil pack is at the back you can just see it in the picture*

Step 8: Remove the coil pack by removing the 2 T30 Torx bolts and gently pulling the unit upwards.

As you can see my coil pack has the No-4 rubber stuck on the plug still but seems ok, Also all of my plugs were well under oil, From what I'm told this can be one of the signs of HGF or blocked breather system so always worth checking those too.

Step 9: Remove the wiring harness from the front of the engine by pulling up on the plastic clips then removing the 10mm nut in the centre of the bottom of it. *never thought of taking a picture for this step*

Step 10: Remove the cam cover (the big plastic silver thing for those who don't know) by removing the 10 E10 bolts and removing all of the breather hoses 1 is on the rear right to crank and 2 are front left. You may have to wiggle it around some to release it depending on what gasket, if any is there. Also to note there is a black wire over the front edge of the cam cover you will have to move out of the way. *again sorry no picture*

Step 11: As you look to the left of the engine (from the front) you see a big black plastic box like structure, This is where the injector connectors are. To remove this you have to make sure all of the electrical connector are removed at the back (I believe there is 1 connector) and gently but forcefully lift upwards while giving it a jiggle around (this is why cam cover off first as it makes access easier)


To be continued when I have finished typing it up
Logged

cd 2.2

  • Guest
Re: how to remove 2.2 cylinder head with pics
« Reply #1 on: 02 February 2014, 21:39:11 »

Step 12:Remove the injector rail, To do this you will need to release the pressure in the rail to be safe. I achieve this by unscrewing the black round cap that looks like a tryre valve and pressing the valve inside with an extension *watch your eyes*. Remove the 2 bolts that secure the rail to the manifold and uncouple fuel feed and return hoses and give the whole assembly a good jiggle while pulling upwards. All of the injectors come out with the rail but they are in fairly tight and I managed to dislocate my knee on the front bumper while removing them  :D
BE VERY CAREFUL WITH THE REMOVED INJECTOR RAIL AS THE INJECTORS ARE SENSITIVE TO DIRT AND GREASE! and yes this can include finger prints so put them safe and out of harms way.

Step 13: Remove the pressure pipe to the servo from the inlet manifold, it's located at the back near to the bottom of the manifold.


Step 14: Remove inlet manifold nuts they are all 13mm but there are 2 awkward ones to get to, first is at the back of the head and is a bolt, not a nut like the rest of them. you will need a 13mm ratchet spanner to get this off quickly with no swearing, others have reported needing to remove the expansion bottle but I didn't.

And the other difficult one to get is I believe another 13mm bolt where the side that faces the expansion bottle is right at the bottom of the manifold about 3/4 of the way back, it's like a securing bracket to stop things moving around I think and you have to remove it to get the manifold out.

Step 15: Extract the manifold from the car and be proud that the second hardest part is done with!! :y

Step 16: Set the engine to TDC there are 2 things that your looking for here firstly is that the pointer on the bottom pulley lines up with the indentation shown here...


And secondly that your cams look like this ...


Logged

cd 2.2

  • Guest
Re: how to remove 2.2 cylinder head with pics
« Reply #2 on: 02 February 2014, 22:17:54 »

If the pointers on the cams are the other way up just take it round another turn and that should set it right as 360 degrees at the bottom is 180 degrees at the top. The bottom pulley bolt is 17mm and wants to be turned clockwise. *I did mine with it sat in park and the handbrake on no issues but check out the belt slackness  :o*

Step 17: Or as I like to call it the SCARY BIT, removal of the bottom pulley WITHOUT disturbing the timing .... To do this you have to undo the 4 E bolts (I forget the size and the car is in my garage so I can't check just now), Just crack all 4 of them so they are loose enough to undo by hand .. If the timing mark moves off it's o.k at this point as you can move it back either direction with the 17mm socket (that's what  had to do as the bottom pulley is not keyed in any way  :o! once you are happy that all is good with the timing proceed to remove the bottom pulley and once off put the bolts back in where they came from leaving one stuck out like this.

this is so you know which way to put the pulley back on afterwards  ;)

Step 18: Remove the timing belt .. I removed a roller to take of what little tension there was and then it just came right off no fuss

Step 19: disconnect this little mess ... the picture is to help you out as I had to do this blind and as you can see it's IMHO the hardest bit of the job, disconnection of the heater bypass valve.


Step 20: Remove your thermostat housing, This is located on the front right of the engine.

Step 21: Remove the camshafts, I couldn't get the sprockets off at all while they were on the engine so I have to get these off on the bench so as to speak. Keep all of the bridge bolts in the correct order and all of the bridges in the order they were removed THIS IS VERY IMPORTANT! The left side cam comes out easily but the right (exhaust) cam is a pig, it really is .. lots of jiggling required if your leaving the sprocket on for any reason.

Step 22: remove the 2 small Torx bolts from the top left and right of the backing plate that is secured to the head, Also the cam shaft sensor (we don't want to damage this) and the central post for securing the cam belt cover which is a 17mm


Step 23: Remove those pesky head bolts, These are T55 and I can't stress enough how important that the 2ft breaker bar was. Don't try and use 3/8 drive either you will most likely snap them 1/2 inch all the way. Start at the centre bolts and work your way around in a spiral in stages until you have them to a point that you can get them removed. Eventually you will end up with a picture similar to this:


If I have missed anything I can only apologise for that, also If any information is incorrect please feel free to correct me. I took 3 very slow paced days removing the cylinder head and do have a back injury so if I can do this job I'm sure just about anyone (maybe even my partner and she's a woman) could do this!

Just remember to take your time, be methodical and clear about what you are doing and above all else enjoy the job knoing that you didn't pay a garage £600+ to get your HG changed!

Regards Graham
Logged
Pages: [1]   Go Up
 

Page created in 0.016 seconds with 18 queries.