Fitting a cylinder tank:Again, there are a few options. I will only cover fitting a cylinder tank in the boot. Hopefully someone who has fitted a toroidal (spare wheel) tank will be able to do a separate guide.
Lay the tank into the frame and trial fit it in the boot, to get the positioning.

You then need to measure out the position of the Chassis rails under the car and work out where on the frame the chassis rails will run. You can fit the frame so the bolts come through into the floor pan but my preference is to secure it to the chassis. Should you have an accident this is the strongest position to secure the heavy tank to

Mark the frame where the chassis rails are and, if necessary, drill some new holes for the bolts to pass through.

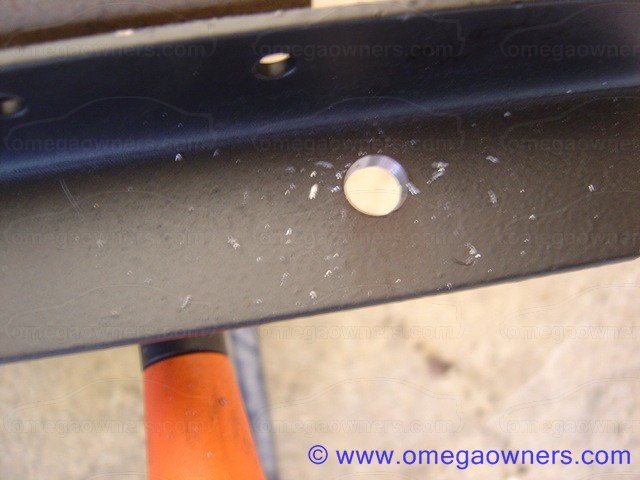
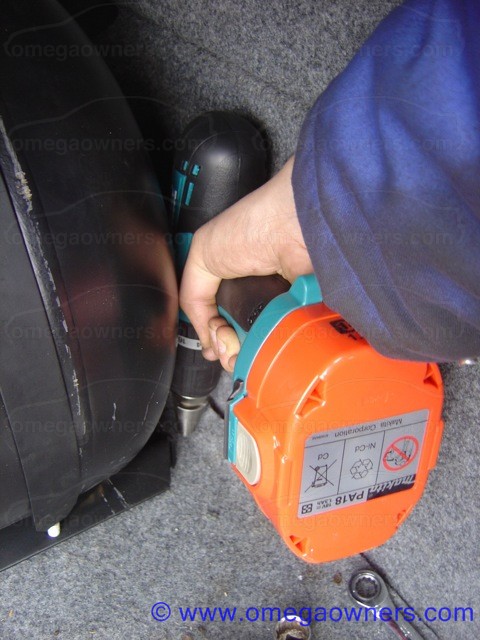
Re-position the tank/frame in the boot and mark where you want to drill the holes. I tend to drill small pilot holes (approx 3mm) and then check that they have come through inside the chassis with a coat hanger/screwdriver. Once you are sure the holes are all in the correct place, drill them out with the correct size drill and also drill through the chassis, obviously being sure that you are not going to hit anything underneath.


Once all the holes are drilled and you are certain they all line up, lift the carpet and treat the holes with under seal, doing the same from underneath too.

Lay the frame in and insert the bolts (checking they are long enough

), not forgetting washers, through the holes. I prefer to use a spring washer and a flat washer both ends (as well as a nylock nut) due to the low torque when these bolts are tightened.
Climb underneath and fit the spreader plates, washers and nuts and tighten. You may find it easier to tighten up the 2 bolts which will be under the tank first, leaving the other 2 loose until later in this fitting process (all will become clear!) although these pictures show all 4 tightened
 Be careful not to distort the frame when doing these bolts up
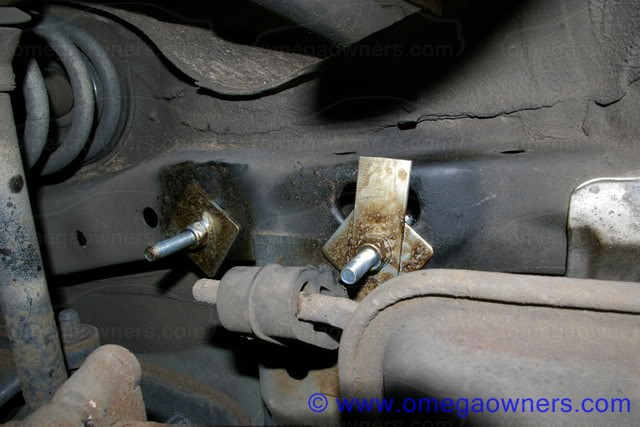
Note, due to the proximity of the large hole in the chassis, Kevin used an additional plate to spread the load further. Don't forget to treat all the new shiny metalwork with under seal
Put the tank back into the frame, ensuring you have placed the rubber "protectors" into the frame under the tank first, and make sure you have the angle of the valve correct. My tank had a cross welded on it which corresponded with the middle of that side (vertically). Tunnie's had the information plate positioned centrally in the vertical plane.
Then feed the straps over the tank. Be warned that you will probably have to attach one end of the straps
before dropping the tank in.
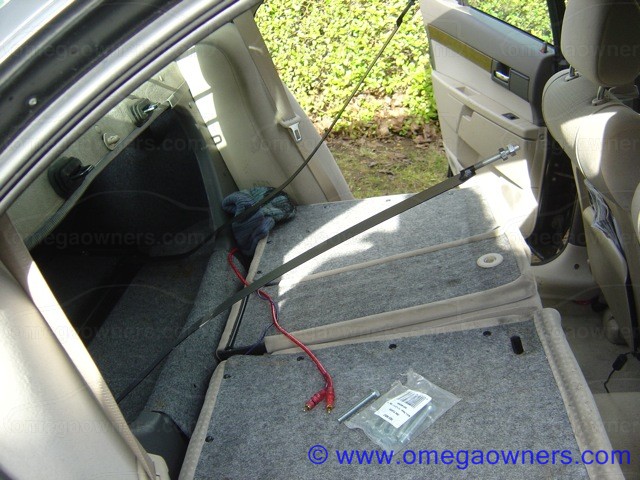
And attach them to the frame the other side. Normally there are 2 nuts for each strap. You may need to screw the second one onto the thread before the strap is completely tight due to clearance.


Then tighten the other 2 bolts on the frame.
Next is to fit the multi valve if you have bought a single hole tank (if you didn't buy it valved). Most 4 hole tanks come valved automatically. If you have to fit a multi valve it only takes a few minutes.
There is a large O Ring (not pictured) which goes around the flange on the tank. Then feed the Float and pickup pipe
carefully through the gas tight box and into the tank.
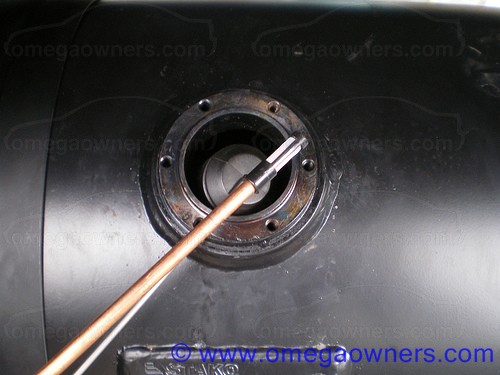
Then insert the bolts through and
cross-tighten, as you should wheel nuts, torquing them to the correct value
(probably 5-6nm but check the paperwork supplied).

In these pictures I have removed the solenoid for access. It's just one nut/bolt in the middle and easy to do
You'll also have to fit the sender to the valve, again fairly obvious how to do.
With a 4 hole tank the valves are probably fitted already and look like this

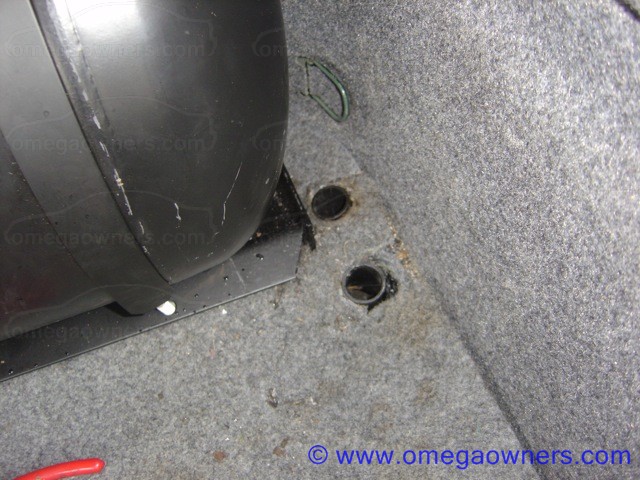
Next you need to make the hole(s) in the floor for the vent hose. To comply with COP 11 you will need 2 vent hoses if you run the fill pipe through as well as the liquid feed and wiring.
Check where the hole will appear under the car and drill out the 30mm hole(s) as required for the vent "top hats".
Again, treating well with under seal before inserting and securing them...

...and laying the carpet back down.
Cut the vent pipe(s) to length, allowing a little slack, and trial fit. Then the fill pipe can be fed through and cut to length (if using normal pipe, not JIC type) again, you may want a little slack.
To be continue


 Author
Topic: Fitting LPG - Cylinder Tank (Read 12109 times)
Author
Topic: Fitting LPG - Cylinder Tank (Read 12109 times)