Omega Owners Forum

Please login or register.

Login with username, password and session length
Advanced search  

News:

Search the maintenance guides for answers to 99.999% of Omega questions

Pages: 1 ... 23 24 25 26 27 28 29 [30] 31 32 33 34 35 36 37 ... 42   Go Down

Author Topic: Mechanic School Blog  (Read 95967 times)

0 Members and 1 Guest are viewing this topic.

Webby the Bear

  • Omega Queen
  • *****
  • Offline Offline
  • Gender: Male
  • Northampton
  • Posts: 12722
    • 2000 (W Reg.) 2.5 V6 CD
    • View Profile
Re: Mechanic School Blog
« Reply #435 on: 18 March 2013, 21:59:10 »

i believe i've had an epithany.... i feel a drawing coming on.... 5 mins plz  :y
Logged
RIP Paul Lovejoy

Webby the Bear

  • Omega Queen
  • *****
  • Offline Offline
  • Gender: Male
  • Northampton
  • Posts: 12722
    • 2000 (W Reg.) 2.5 V6 CD
    • View Profile
Re: Mechanic School Blog
« Reply #436 on: 18 March 2013, 22:15:11 »

ok, series circuit...


live through to the last bulb. voltage can only go one way so stays the same. but the bulbs need exactly the same current to draw the power (watts) to each bulb so the ampage is shared.

the parlell circuit...


having drawn it i can clearly see that the parelell clearly has its own seperate circuit hence why if one bulb goes, the others still get the power through their own circuits. the voltage is split as its going three seperate ways. but why doesnt the ampage (current) also get shared?
Logged
RIP Paul Lovejoy

Entwood

  • Omega Queen
  • *****
  • Offline Offline
  • Gender: Male
  • North Wiltshire
  • Posts: 19566
  • My Old 3.2 V6 Elite (LPG)
    • Audi A6 Allroad 3.0 DTI
    • View Profile
Re: Mechanic School Blog
« Reply #437 on: 18 March 2013, 22:43:50 »

It's a bit like a dual carriage way beside a single road ...  one can carry a lot more traffic than the other, parallel circuits are the same .. the electricity will take the "path of least resistance" .. literally ..

IF all the parallel circuits are IDENTICAL in resistance terms, then the current is split equally across them .. if one is "easier" then more current will go through it ...

and the voltage is NOT SPLIT .. the voltage across each one is identical at 12v the black line at 0v and the redline at 12V in your lower diagram   (theoretically in the top diagram the bit of wire between the two "bulbs" should be a different colour .. as the voltage has "dropped" after the first one and is no longer red 12v)

Try and imagine the red line is a hose pipe .. the 12v is the PRESSURE of the water, if each of your loads is a tap ... the more you open a tap the easier it is for water to flow, so more runs through the open (low resistance) tap than the shut (high resistance) ones .. the flow of water is the current. If all the taps are fully shut the pressure in the hose is at its maximum (12v in this case)

HTH :)
« Last Edit: 18 March 2013, 22:51:21 by Entwood »
Logged

Webby the Bear

  • Omega Queen
  • *****
  • Offline Offline
  • Gender: Male
  • Northampton
  • Posts: 12722
    • 2000 (W Reg.) 2.5 V6 CD
    • View Profile
Re: Mechanic School Blog
« Reply #438 on: 18 March 2013, 22:54:17 »

it does. thanks mate.
stuff like this should be simple but i was rubbish at science at school  :-[
Logged
RIP Paul Lovejoy

Andy B

  • Get A Life!!
  • *****
  • Offline Offline
  • Gender: Male
  • Bury Lancs
  • Posts: 39483
    • ML350 TDM SmartRoadster
    • View Profile
Re: Mechanic School Blog
« Reply #439 on: 18 March 2013, 23:17:55 »

it does. thanks mate.
stuff like this should be simple but i was rubbish at science at school  :-[

Some depends on how good your teacher was at teaching .......  ;) ;)
Logged

Webby the Bear

  • Omega Queen
  • *****
  • Offline Offline
  • Gender: Male
  • Northampton
  • Posts: 12722
    • 2000 (W Reg.) 2.5 V6 CD
    • View Profile
Re: Mechanic School Blog
« Reply #440 on: 19 March 2013, 09:40:14 »

it does. thanks mate.
stuff like this should be simple but i was rubbish at science at school  :-[

Some depends on how good your teacher was at teaching .......  ;) ;)

lol there is that too but at school i simply had no interest especially in science. funny how later on down the line i'm learning a subject that is a huge amount to do with science... if only i'd have listened in class  ::) ;D
Logged
RIP Paul Lovejoy

Kevin Wood

  • Global Moderator
  • *****
  • Offline Offline
  • Gender: Male
  • Alton, Hampshire
  • Posts: 36281
    • Jaguar XE 25t, Westfield
    • View Profile
Re: Mechanic School Blog
« Reply #441 on: 19 March 2013, 09:50:16 »

it does. thanks mate.
stuff like this should be simple but i was rubbish at science at school  :-[

Some depends on how good your teacher was at teaching .......  ;) ;)

I always got into trouble for correcting the Electronics teacher at school. ::) I think my demonstration of why, contrary to his teaching, you don't have ferrite cores on mains transformers was quite helpful, actually. I made one with each type of core, and when the smoke had cleared, he had learned something. ;D
Logged
Tech2 services currently available. See TheBoy's price list: http://theboy.omegaowners.com/

Webby the Bear

  • Omega Queen
  • *****
  • Offline Offline
  • Gender: Male
  • Northampton
  • Posts: 12722
    • 2000 (W Reg.) 2.5 V6 CD
    • View Profile
Re: Mechanic School Blog
« Reply #442 on: 19 March 2013, 09:51:25 »

it does. thanks mate.
stuff like this should be simple but i was rubbish at science at school  :-[

Some depends on how good your teacher was at teaching .......  ;) ;)

I always got into trouble for correcting the Electronics teacher at school. ::) I think my demonstration of why, contrary to his teaching, you don't have ferrite cores on mains transformers was quite helpful, actually. I made one with each type of core, and when the smoke had cleared, he had learned something. ;D

 ;D ;D ;D ;D ;D
Logged
RIP Paul Lovejoy

Marks DTM Calib

  • Administrator
  • *****
  • Offline Offline
  • Gender: Male
  • West Bridgford
  • Posts: 33839
  • Git!
    • View Profile
Re: Mechanic School Blog
« Reply #443 on: 19 March 2013, 12:11:37 »

it does. thanks mate.
stuff like this should be simple but i was rubbish at science at school  :-[

Some depends on how good your teacher was at teaching .......  ;) ;)

I always got into trouble for correcting the Electronics teacher at school. ::) I think my demonstration of why, contrary to his teaching, you don't have ferrite cores on mains transformers was quite helpful, actually. I made one with each type of core, and when the smoke had cleared, he had learned something. ;D

pmsl, losses a little to great !
Logged

Entwood

  • Omega Queen
  • *****
  • Offline Offline
  • Gender: Male
  • North Wiltshire
  • Posts: 19566
  • My Old 3.2 V6 Elite (LPG)
    • Audi A6 Allroad 3.0 DTI
    • View Profile
Re: Mechanic School Blog
« Reply #444 on: 19 March 2013, 13:27:17 »

Webby .. don't know if this will help at all, but is a useful aide memoire on how the elements all go together, all stem from 2 simple equations that you already know ..

V=IR (Volts = Current x Resistance) 

and

P=VI (Power = Volts x Current)

Logged

CaptainZok

  • Omega Lord
  • *****
  • Offline Offline
  • Gender: Male
  • Bolton
  • Posts: 8093
  • Victim of Cyberbullying.
    • 3.2 MV6 Estate
    • View Profile
Re: Mechanic School Blog
« Reply #445 on: 19 March 2013, 13:50:11 »

Another point to note when you start doing the calculations is make sure you have the units right Ohms, Amps, Volts and Watts. Missing a Kilo, milli or Mega is going to throw your answers out by various powers of 10.
Logged
PM me for code reading/clearing
TuBy's new whipping boy.

Webby the Bear

  • Omega Queen
  • *****
  • Offline Offline
  • Gender: Male
  • Northampton
  • Posts: 12722
    • 2000 (W Reg.) 2.5 V6 CD
    • View Profile
Re: Mechanic School Blog
« Reply #446 on: 19 March 2013, 17:20:04 »

Entwood that's really handy, thanks for that... that means I simply have to input two figures (of what I know) and can easily work it out from there  :y cheers mate
Logged
RIP Paul Lovejoy

Webby the Bear

  • Omega Queen
  • *****
  • Offline Offline
  • Gender: Male
  • Northampton
  • Posts: 12722
    • 2000 (W Reg.) 2.5 V6 CD
    • View Profile
Re: Mechanic School Blog
« Reply #447 on: 26 March 2013, 17:55:46 »

This week I've been mostly doing.... ::)

BRAKES, TYRES & WHEEL BALANCING.

Brakes first of all. Well we've only done disc brakes and drums next week  :'( but disc brakes are stupidly easy.

We had to remove the pads and discs, measure them (including run out on the discs) and compare to spec and produce a report as to whether we would replace or continue to use (serviceable).

I've done brakes on 4 cars today and this was pretty much the same set up for all:

remove caliper (tie up out of the way)
remove pads
remove mounting bracket
remove disc holding bolts (if the person before remembered to put them back  ::))
remove disc
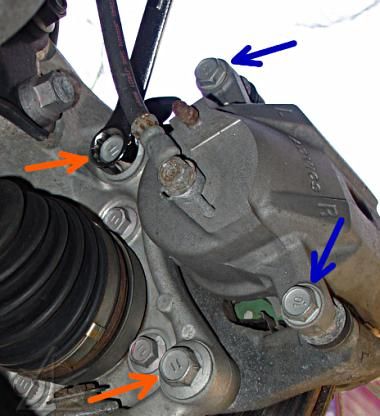
here's a pic of what the caliper bolts (blue arrows) and the mounting bracket bolts (orange)look like in situ.


now, what I do at this point is give the whole area a good clean with brake clean. wipe everything clean. you probanly don't need to every time but just for good measure I take emery cloth and lightly file the mounting bracket where the pads sit just to get the shit off.
I then take out my slide pins (ive noticed that most calipers one slide pin is in the mounting bracket and one is fioxed and part of the caliper). either way, lube them up with silicone paste...

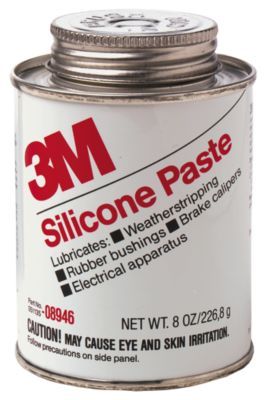
now I never insist on anything and i'm always more than happy to be corrected but I wont on this!!  ;D YOU MUST USE SILICONE PASTE ON THE SLIDE PINS. END OF!  ;D
Anyway, we weren't putting new pads in so there was no need to push the piston back. however if you were putting new pads in I pinch off the brake hose using these vice grips with bits of fuel line to protect hose...

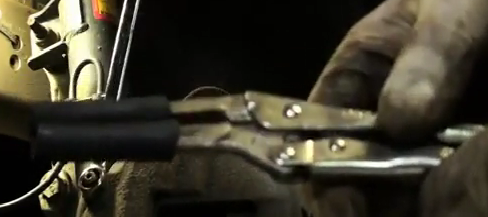
...I then attach a bleed kit with tubing with a one way valve (to stop air getting in), push piston back and do up your bleed screw, unlock vice grips. DONE
So I then put a bit of copper grease where the disc will make contact with the hub.
I then put disc back, reattach mounting bracket, lube pads with copper anti seize paste where the pad touches the mount, reattach caliper, wheel back on. Pump pedal (just for good measure even though I didn't push piston back). DONE

As for measuring, well use a micrometer. pretty self explanatory. and to do the run out use a DTI whilst spinning the disc to get the run out reading.

not sure why I took a pic of this but here it is  ??? ;D


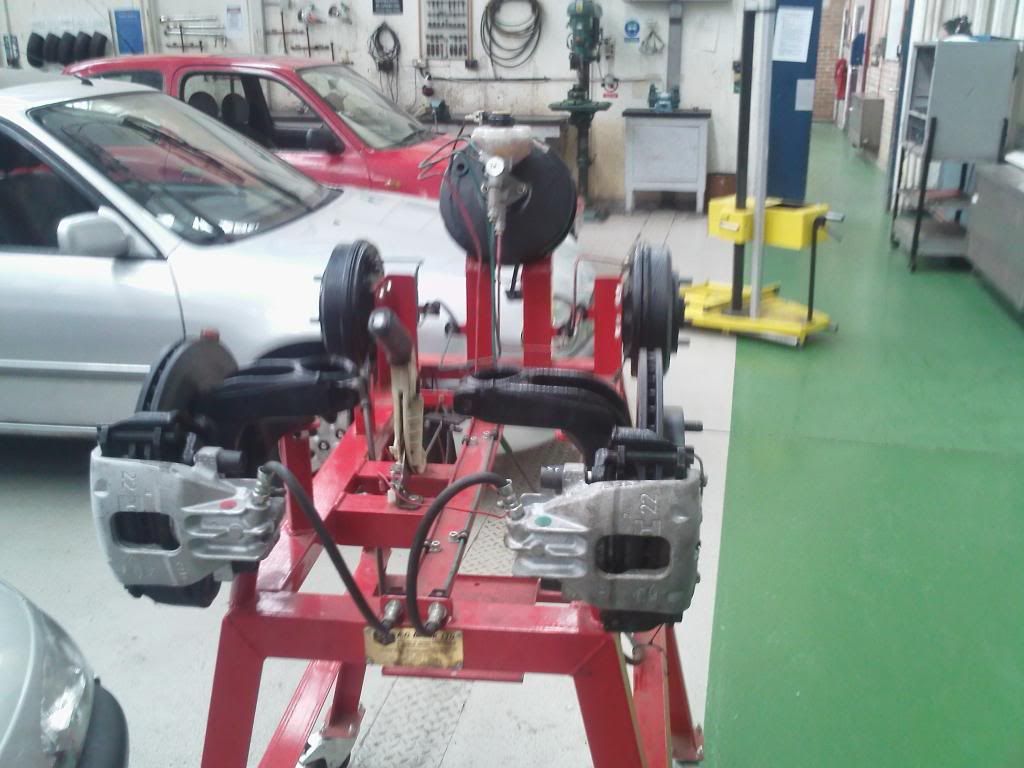
also I thought this was pretty cool showing the brake system without the body...


TYRES & WHEEL BALANCING

I've only done this once so I don't feel confident at doing a guide  :-[ 
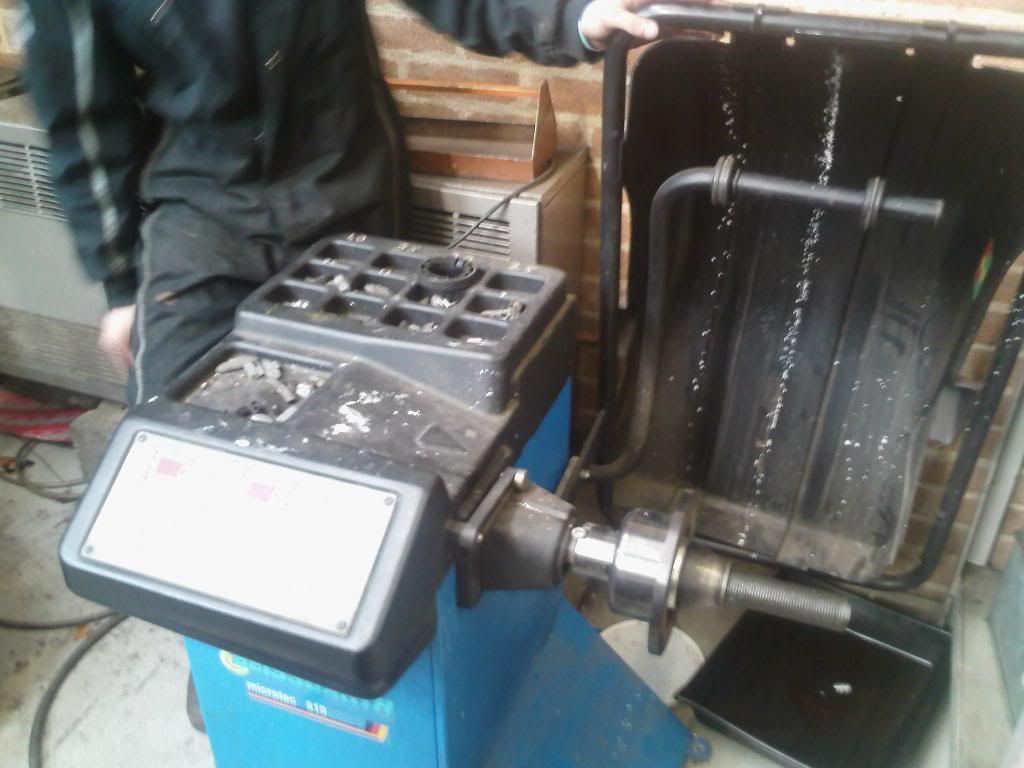
we're doing more next week so ill reveal all then but heres the equipment
this is called breaking the bead... I think ...  :-\


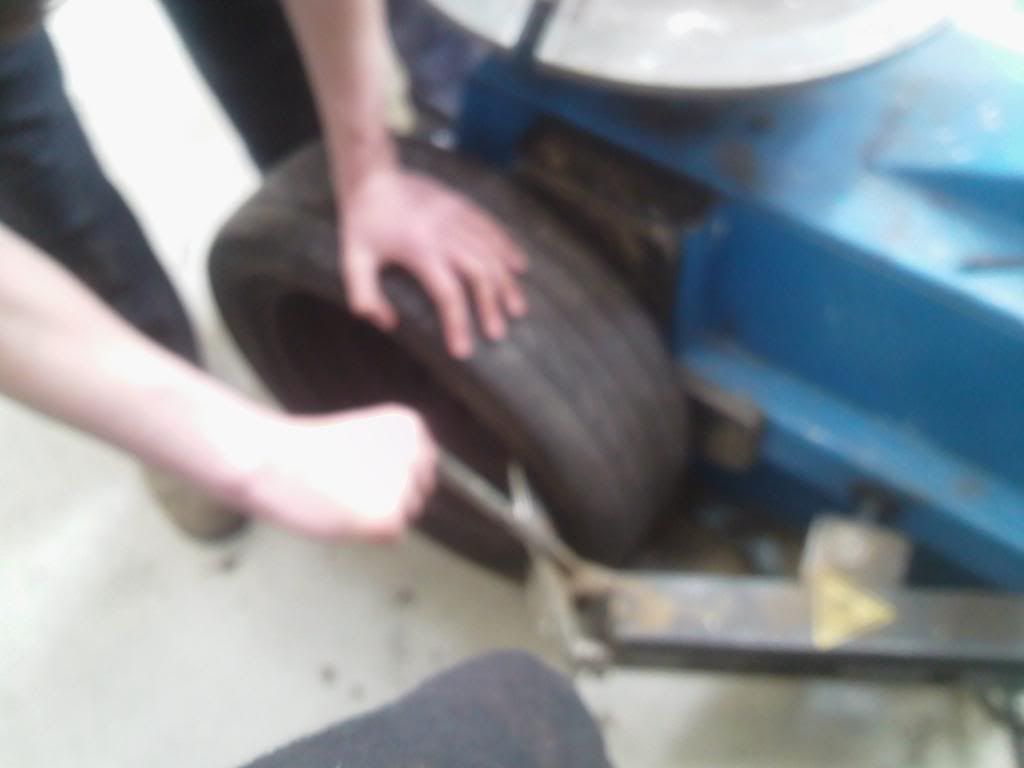
getting the tyre off the rim... now I don't know if this rim is fubard following the useless kids trying to do this  :-\ but looks nackered  ;D this is actually quite tricky cos when you take the tyre off you have to get the lip on one side... and when you put it back it has to go on opposite.


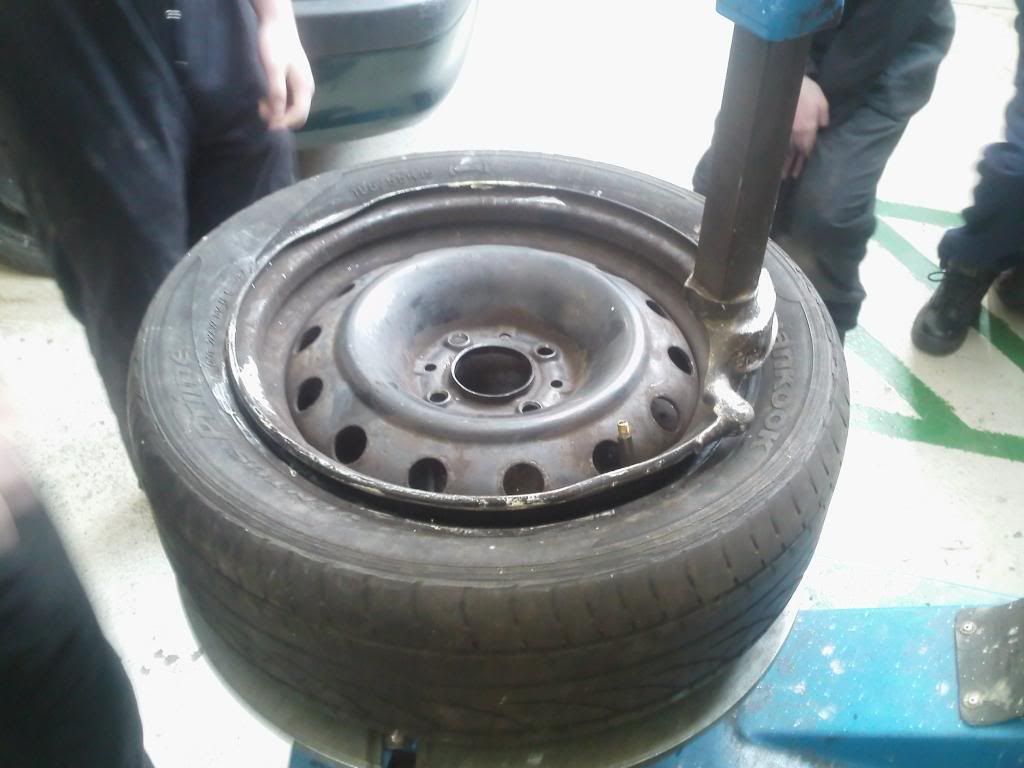
and heres the balancing machine, really easy to use. tyre on, run it, it tells you what weight ands where to add. bash on the right weight. done


here's a vid of it being done by a pro though  :y :y :y
http://www.youtube.com/watch?v=8hOZXIr1ujE
Logged
RIP Paul Lovejoy

Entwood

  • Omega Queen
  • *****
  • Offline Offline
  • Gender: Male
  • North Wiltshire
  • Posts: 19566
  • My Old 3.2 V6 Elite (LPG)
    • Audi A6 Allroad 3.0 DTI
    • View Profile
Re: Mechanic School Blog
« Reply #448 on: 26 March 2013, 18:15:18 »

Sorry Webby .. I MUST make a strong disagreement with a small, but highly important part of your post .. I'm not going to quote the whole post for one little bit .. but you say, under balancing ...

Quote
heres the balancing machine, really easy to use. tyre on, run it, it tells you what weight ands where to add. bash on the right weight. done

Absolutely and 100% WRONG !!!! - and the cause of many an argument between me and poor tyre fitters .. and I've won every argument :)

On every tyre there are little coloured dots, these represent the "light" point (yellow) and the "high" point (red). The yellow dot should be positioned by the valve (the weight of the valve compensates for the light point of the tyre). IF the wheel is marked with a "low point" (expensive wheels only) the red dot should be aligned with this.

Doing it any other way just ensures that massive amounts of un-needed weights are added to a wheel, giving further harmonic loads to an already stressed item. It also increases the risk of a weight coming off.

I could also add information about tyre "run out", colour bands and the importance of the right tyre being in the right place on the car ...

If you wish to read up on this ....

http://www.wheels-inmotion.co.uk/forum/index.php?showtopic=165

post #12 and post #1 are probably the most useful :)

HTH :)


« Last Edit: 26 March 2013, 18:23:12 by Entwood »
Logged

albitz

  • Guest
Re: Mechanic School Blog
« Reply #449 on: 26 March 2013, 18:42:40 »

I wish I,d known all that before Sunday evening when I fitted a tyre to one of my elite alloys. ::) ;D
Will know next time though. ;)
Logged
Pages: 1 ... 23 24 25 26 27 28 29 [30] 31 32 33 34 35 36 37 ... 42   Go Up
 

Page created in 0.03 seconds with 18 queries.