Omega Owners Forum

Please login or register.

Login with username, password and session length
Advanced search  

News:

Please play nicely.  No one wants to listen/read a keyboard warriors rants....

Pages: 1 2 3 [4]  All   Go Down

Author Topic: Getting her back to tip-top.  (Read 14093 times)

0 Members and 1 Guest are viewing this topic.

biggriffin

  • Omega Lord
  • *****
  • Offline Offline
  • huntingdon, Hoof'land
  • Posts: 9765
    • Vectra in a posh frock.
    • View Profile
Re: Getting her back to tip-top.
« Reply #45 on: 14 January 2011, 23:31:15 »

just having read this maybe it should have its own space "how to the complete service guide"
  excellent report.  :y
    also the problem with the cambelt/tensioner seems to be happing alot with different people? urm vx cocking up?
Logged
Hoof'land storeman.

Boditza

  • Senior Member
  • ****
  • Offline Offline
  • Gender: Male
  • Craiova, Romania
  • Posts: 601
    • View Profile
Re: Getting her back to tip-top.
« Reply #46 on: 05 February 2011, 20:09:04 »

is it tip top now?? any more work to be done?
Logged

V6 CDX-er

  • Intermediate Member
  • ***
  • Offline Offline
  • Sheffield
  • Posts: 452
    • View Profile
Re: Getting her back to tip-top.
« Reply #47 on: 18 February 2011, 08:59:06 »

Right, here's a few more updates.

Elite Pete was kind enough to pop over and got my cambelt sorted in about 30 minutes. IIRC I had messed around with one of the tensioners that much that I'd lost track of what position it should be in, and how to get it there. But now the cambelt and timing are all tip top. Cheers Pete  :y


Fuel filter;

An easy enough job providing that you have the right tools!

I mistakingly thought that I'd be able to remove and re-fit the fuel filter by just using a regular set of needle nosed pliers. Wrong! All I suceeded in doing was chewing up the plastic connectors. What you really need is this; http://www.machinemart.co.uk/shop/product/details/cht441-3pce-fuel-line-disconnect-set

Yes, it might be £15, but with this tool I got the fuel filter changed in about 20 minutes. Without it I at first struggled for a couple of hours, and still hadn't got it changed.

The fuel filter is located just behind the drivers side rear wheel. Removing the rear wheel makes access dead easy.

Old fuel filter in place;


New kit, included new plastic connectors;


As you can see in this picture, because I wasn't (at first) using the correct tools for the job, I made a nice mess of the connector clips, which required some filing in order to get the new clips in place;


New filter  in place. As you can see I couldn't remove the old filter strap, so had to bodge the old one a little. It seems pretty secure though;


EDITED TO ADD;

First, a pic of the fuel filter pliers;


And secondly a little tip. When your under the car, having petrol dripping into your face, I found it wasn't that obvious in which direction the fuel filter 'flowed'. By making it very obvious by writing the flow direction in marker pen, it made the job a bit easier.

« Last Edit: 19 February 2011, 01:32:15 by V6_CDX-er »
Logged

V6 CDX-er

  • Intermediate Member
  • ***
  • Offline Offline
  • Sheffield
  • Posts: 452
    • View Profile
Re: Getting her back to tip-top.
« Reply #48 on: 18 February 2011, 23:59:40 »

Next up, Aux belt.....

I bought mine from Euro Car Parts. Belt ordered after giving them my reg number and confirming vehicle model and spec.

Old belt off;


Euro Car Parts belt;


This belt was too short by at least 20 odd cm. Looks to me like this ContiTech belt was for vehicles without air-con. According to Euro Car parts this is the longest belt that they do.

The old belt looked worn, but not too bad. Personally with all the other work that I was doing, and with a lack of history to confirm when it was last done, I'd rather change it anyway;


Now a trip to Vauxhall to get the proper belt for it;


Which fitted like a glove  :)

Whilst I was at it I decieded to take the aux belt tensioner apart and re-grease the inner bearings. A simple, cheap and worthwhile job, but the use of a vice will make the job a lot easier.

Before;


After;


Don't forget that both sides need re-packing with grease.

Whilst I was at it, I also gave the all the pulleys a dam good clean, gave the mating surfaces of the pulleys a light sanding, and put a liberal coating of grease on the mating surfaces of the various pulleys that the aux belt passes over, and used brand new bolts, (as reccomended in the Haynes Manual).


So long as the intake 'trumpets' are removed, changing of the aux belt is a piece of cake, although because the tensioner needs winding back, it is slightly easier to get someone to help hold the tensioner back whilst fitting the new belt.

This is not the best photo as I was actually taking a picture of something else, but here's the new belt fitted before the rest of the gubbins get mounted around it;


Just a little top tip for you chaps......

When trying to place a bolt into a bit of a tight spot, the sort of area where you really, really don't want to be dropping it, I found this this little trick works a treat.

Have your bolt in the socket, then hold it in place by sticking masking tape at opposite sides of the socket. The masking tape is strong enogh to ensure that the bolt won't drop out of the socket, (so long as you are still carefull), but is also weak enough to enable you to pull the socket and the tape clear once the bolt is in place.


Logged

V6 CDX-er

  • Intermediate Member
  • ***
  • Offline Offline
  • Sheffield
  • Posts: 452
    • View Profile
Re: Getting her back to tip-top.
« Reply #49 on: 19 February 2011, 01:00:57 »

And now we move onto converting my oil filter from a canister type to the spin on type. There are a couple of words of caution here, (one very serious), so you may wish to read carefully.

Changing the crappy canister type filter for a spin on one has been covered plenty on this forum. It's isn't really a difficult job, (or at least shouldn't be unless things go wrong), but there is a certain knack to it due to the fact that there isn't that much room to work in.

First tip is to turn the steering to either full left lock or full right, (sorry, I cant remember which way now). This will give you that extra couple of cm clearance needed.

Second tip is to buy a proper oil filter canister car removal tool like this; http://www.machinemart.co.uk/shop/product/details/oil-filter-wrench-set-cup-style-15-piece

I've seen these tools sold as kits in Machine Mart or sold seperatly in Halfords. I didn't buy one, but in retrospect I wish that I had.

What I did do was use a regular 12 sided 27mm socket to try and get the cap off, attatched to a 28" long breaker bar. All this did was start to round off the nut on top of the cap. (NOTE; even with the steering turned to full lock, there isn't much room to swing the bar).


Next I decieded to try using a 6 sided 27mm impact socket. This still didn't budge the bloody cap  >:(

Ok, plan 'C', and now I'm starting to lose my temper a little.

Forget the socket, just use the 1/2" square end of the breaker bar allied to some rather colourfull language and threats of extreme violence.

FAIL! All this did was split the cap in two, without actually unscrewing it at all;


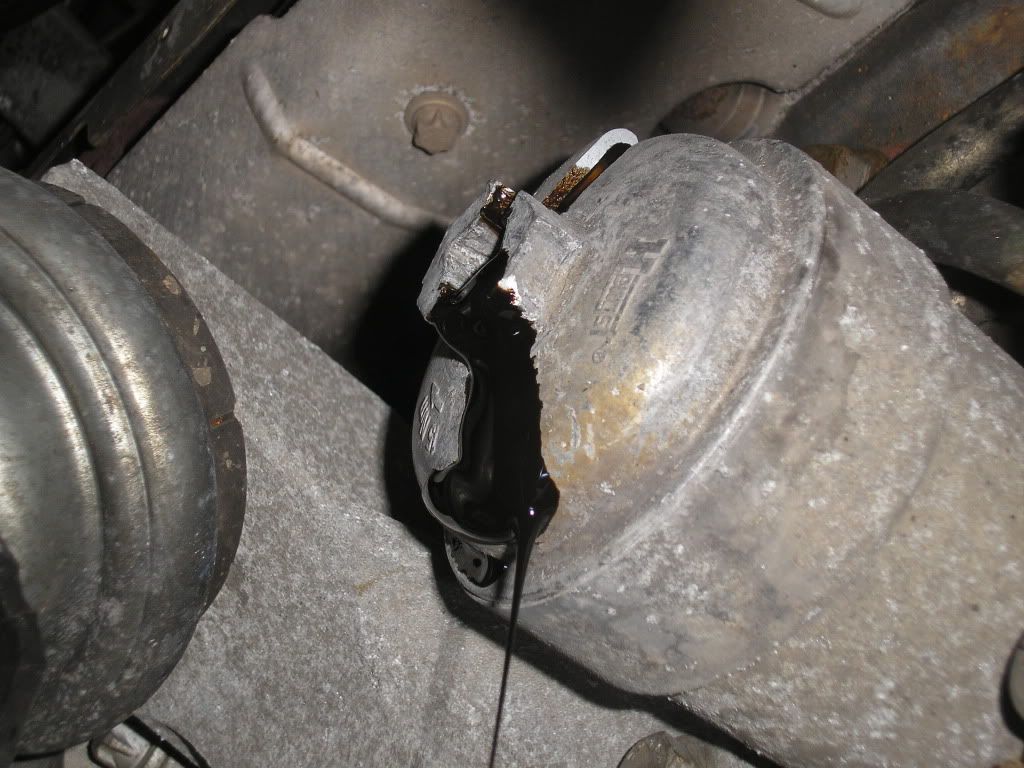
At this point I'd reached Defom 5 so got the angle grinder out to teach this oil filter canister exactly who was boss.

To be honest this isn't exactly the safest way to go about removing the canister, but because I hadn't used the correct tools for the job, it was about the only option left. I dread to think of the consiquences(sp?) of dropping the angle grinder whilst stood / laid underneath it  :o but eventually I managed to cut the bugger off;


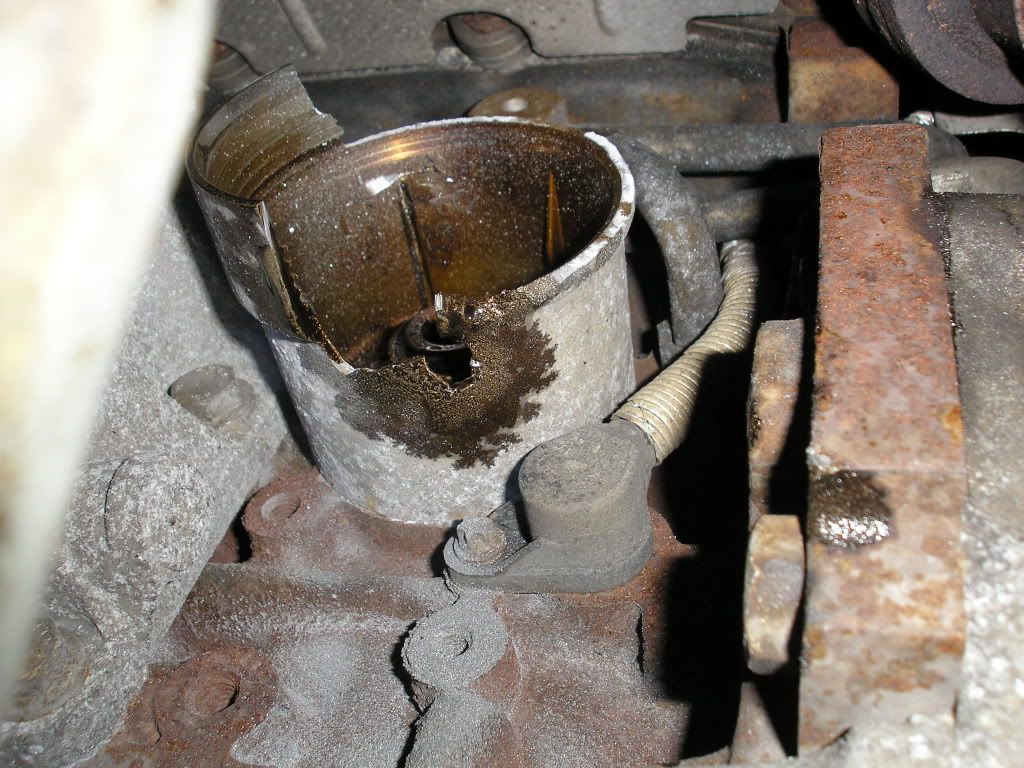
You can just see in the picture above the 'hex' drive bolt that bolts the base of the canister to the block. This is a 12mm hex. Nothing else would have got my canister off.

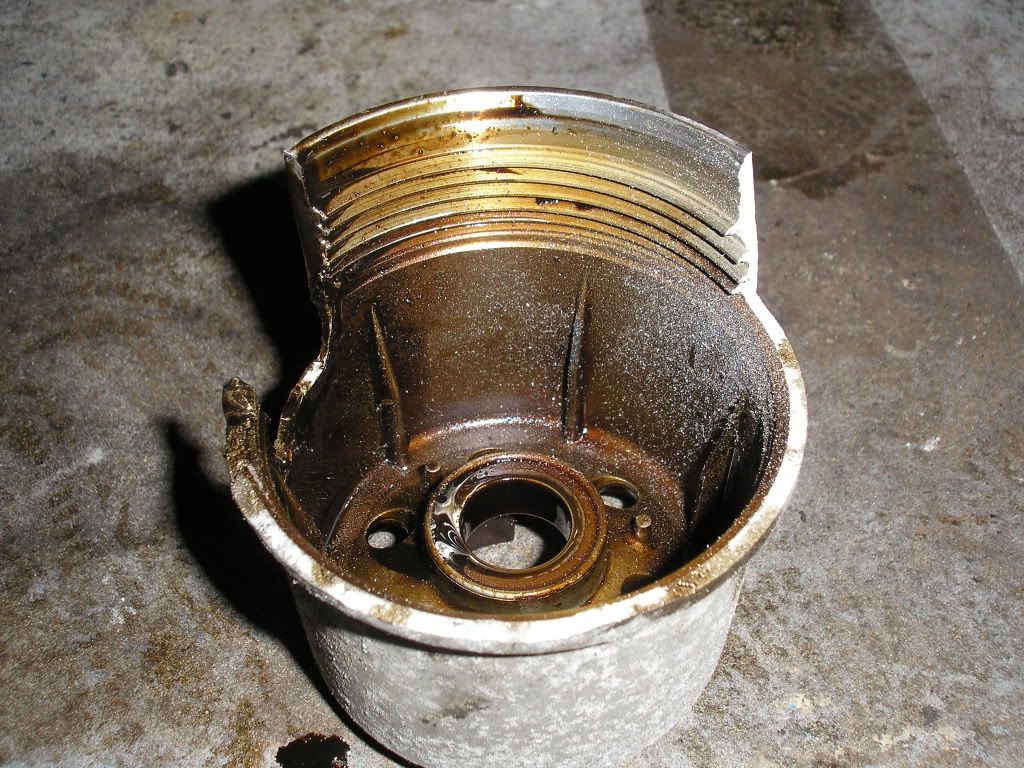
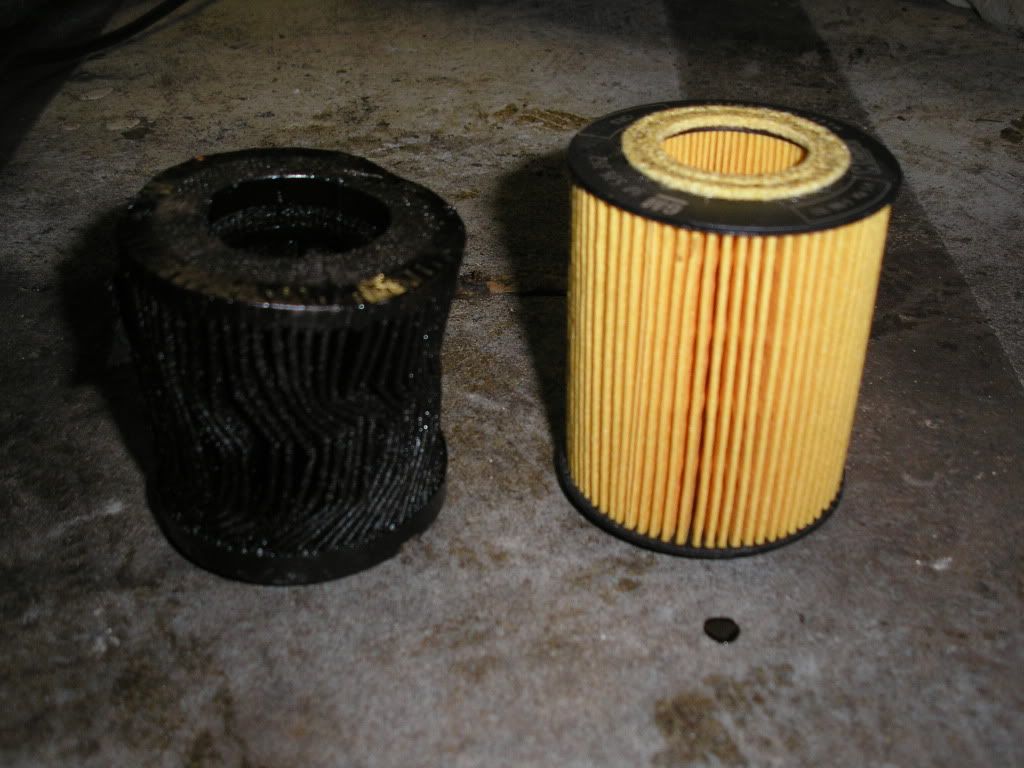
Once my canister was removed, here's what was left of it. You'll note the old oil filter, (I dread to think how old it is!) next to a new canister type filter. This is because at first I wasn't going to change from a canister filter to a spin on one, so I already had the new canister oil filter.


Old V New oil filters;


And the parts needed for converting to the new type of spin-on oil filter. Don't forget to use some decent stud-lock for the stud that bolts into the engine block;


There are two different types of spin-on oil filter. BE VERY CAREFULL THAT YOU BUY THE CORRECT ONE.

After changing my oil cooler I didn't buy the correct type of oil filter. After fitting and within 10-20 seconds of starting the engine, the (wrong type) oil filter popped clean off. Luckily the vehicle was still stood over my inspection pit and I had somehow sensed that something wasn't quite right so my hand was already on the ignition key ready to turn the engine off. I was very lucky that no damage was caused. I dread to think what would have happened at 80mph in lane three of the motorway  :o

According to the friendly parts chap at Vauxhall there is two different strength valves inside the two different oil filters. The one with the weaker valve doesn't have the strength to withstand the V6's oil pressure, hence pops off.

I'll be going to collect the correct type of oil filter tomorrow so I'll post up clear pictures of the right and wrong type next to each other for clarity.

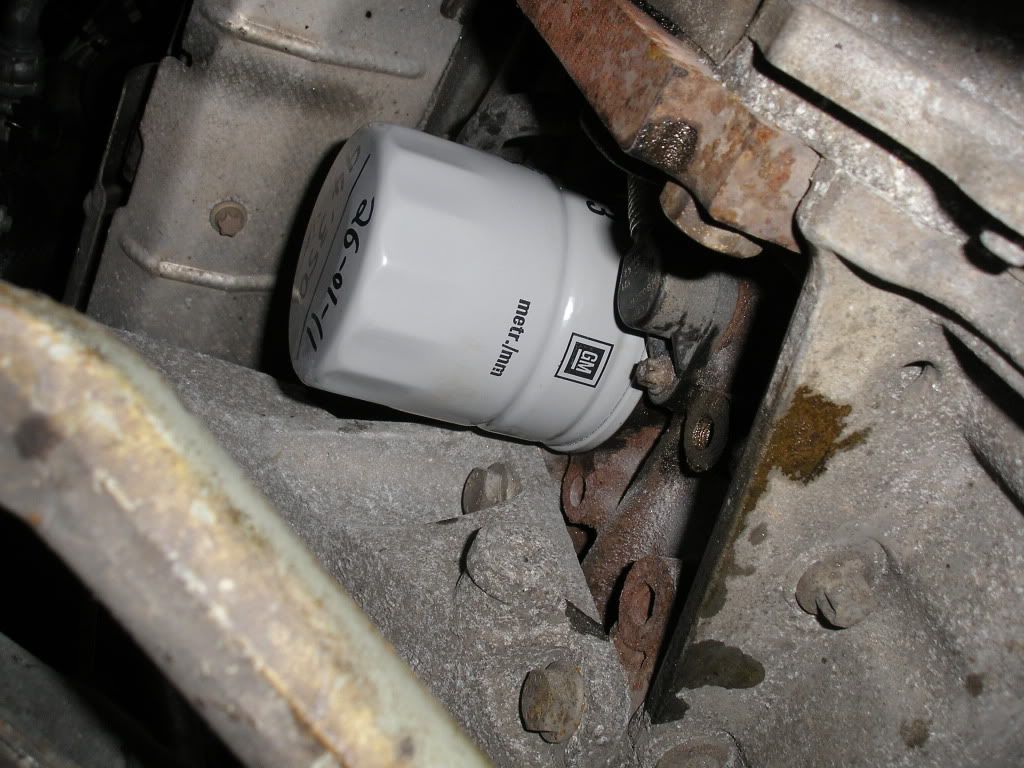
Anyway, mouting stud Loctited in place, left 24 hours to set, then new spin-on filter filled with fresh oil, (GM own brand 10w/40 semi synthetic) and put in place, (and obviously 6.25 litres of fresh oil in the sump).

Job jobbed as they say  :)
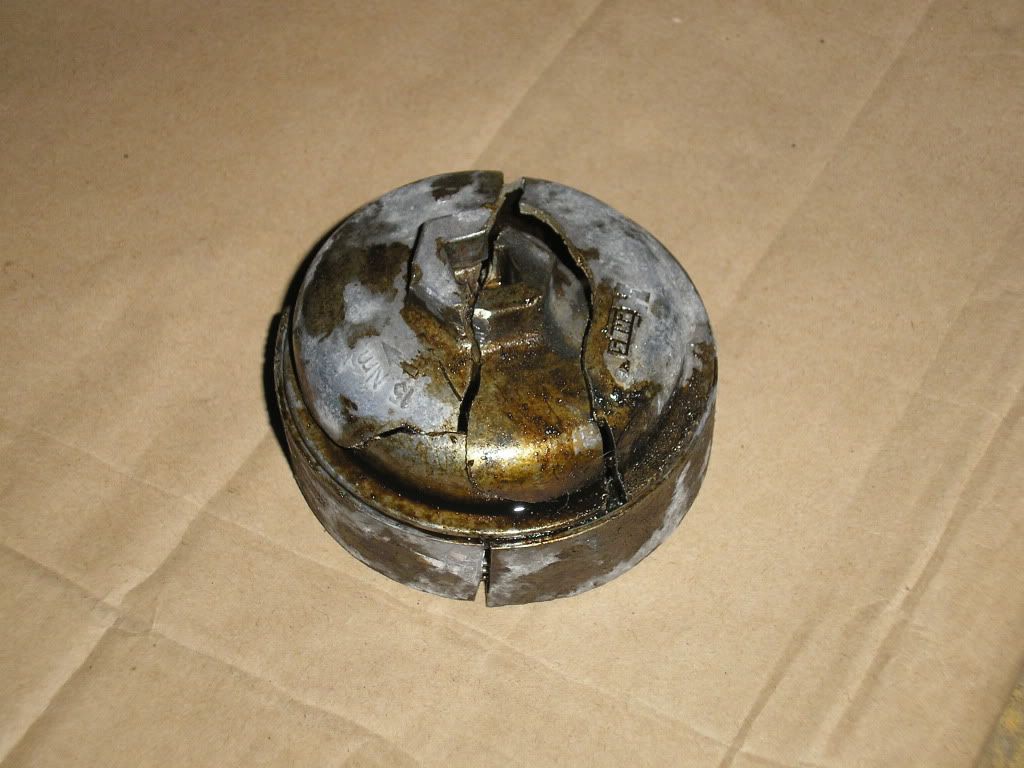


EDITED TO ADD;

A picture of what was left of the oil filter canister cap after I had had to butcher it.

« Last Edit: 19 February 2011, 01:35:28 by V6_CDX-er »
Logged

Andy B

  • Get A Life!!
  • *****
  • Online Online
  • Gender: Male
  • Bury Lancs
  • Posts: 39494
    • ML350 TDM SmartRoadster
    • View Profile
Re: Getting her back to tip-top.
« Reply #50 on: 19 February 2011, 01:04:37 »

Quote
.....
What I did do was use a regular 12 sided 27mm socket to try and get the cap off .....


i thought it was 24mm  :-/ :-/ :-/
Logged

V6 CDX-er

  • Intermediate Member
  • ***
  • Offline Offline
  • Sheffield
  • Posts: 452
    • View Profile
Re: Getting her back to tip-top.
« Reply #51 on: 19 February 2011, 01:25:03 »

Bleeding brakes.

An easy one this one, but once again, just so long as you have the right kit.

Me and a mate tried the traditional two man method in the order described in the Haynes Manual. Well, after nearly three hours we still hadn't managed to bleed even one corner. Plenty of air bubbles were coming out, but they just seemed to keep on coming. At 11pm we got cold / bored / tired / hungry and called it a night.

The next day I bought myself a Gunson Eazi-Bleed kit from Halfords, (retails at £15.99 I think?). Worth it weight in gold, but with one very serious word of caution.

To those not familiar with this bit of kit, you have to fill one bottle up with fresh brake fluid which them transfers the new fluid into the master cylinder under air pressure from a spare wheel.

If you look at the picture below you will notice a clear plastic tube that runs from the bottle to the master cylinder. This is the tube that transfers the new brake fluid to the master cylinder under pressure. Gunsons themselves reccomend no more than 20psi. I set my spare tyre, (space saver so it can easily be carried around for this task), to 17-18psi.


Once connected I found that the clear plastic tube had a very tiny hole in it. Luckily this shot off, (rather impressively, like a brake fluid fountain) to the offside of the car, missing all bodywork, my tools, toolchest and my wife. The word of warning is that I took this kit back and another 8 of these kits that Halfords had in stock were damaged in exactly the same place.

You couldn't really see the tiny split, but you could just about feel it by running your thumb nail along the length of the pipe.

The solution was to trim a little bit of the pipe off and re-attatch. The only problem with this is that my kit now weeps a little, requiring the wife to stand over the master cylinder cap with a couple of rags to catch the leakage.

The good news is that the kit gets even badly air-locked brakes bled in next to no time.
Logged

V6 CDX-er

  • Intermediate Member
  • ***
  • Offline Offline
  • Sheffield
  • Posts: 452
    • View Profile
Re: Getting her back to tip-top.
« Reply #52 on: 19 February 2011, 01:37:58 »

Quote
Quote
.....
What I did do was use a regular 12 sided 27mm socket to try and get the cap off .....


I thought it was 24mm  :-/ :-/ :-/

You might be right. It's been a few weeks since I did it. This old age and sleepless nights, my memory ain't as good as it used to be  :D
Logged

P6UL K

  • Omega Knight
  • *****
  • Offline Offline
  • Gender: Male
  • Dartford, Kent
  • Posts: 1001
    • Vauxhall Omega 3.0 Elite
    • View Profile
Re: Getting her back to tip-top.
« Reply #53 on: 20 February 2011, 16:14:27 »

With regard to the changing of the aux belt, new bolts for pulleys and the parts needed for changing the oil filter, do you have any part numbers available for the bits you got from Vauxhall?

Otherwise, looks like you've been cracking on and I'll be following suit very soon!  :y
Logged
2008 Vx Vectra 2.8T VXR V6 Estate - ExNI Police • 1985 'B' Ford Escort Cabriolet 1.6 Rs Turbo

V6 CDX-er

  • Intermediate Member
  • ***
  • Offline Offline
  • Sheffield
  • Posts: 452
    • View Profile
Re: Getting her back to tip-top.
« Reply #54 on: 21 February 2011, 01:57:54 »

Quote
With regard to the changing of the aux belt, new bolts for pulleys and the parts needed for changing the oil filter, do you have any part numbers available for the bits you got from Vauxhall?

Otherwise, looks like you've been cracking on and I'll be following suit very soon!  :y

I'll try and get a proper answer to you in the next couple of days. The best I can do for now is the following;

If you look in the maintinance section of this website there is a topic entitled "How to convert your oil filter" (I think?). You will find the part numbers for that job in there.

For the aux belt I was told by my local VX main dealer that there is only one belt available for the facelifts, as they all came with air-con fitted. Euro Car Parts seemed to think that no Omega was ever fitted with air-con, hence supplying me with a belt that was far too short.

The new bolts for the pulleys, the crank uses 6x E10's, PAS uses 3x 10mm's and the air-son uses 3x E10's. Your local VX main dealer should know exactly which ones you mean, and TBH I didn't find the main dealers really any more expensive than some random nut and bolt supplier.

However I'll try and get you all the part numbers listed up here by tomorrow night.

HTH?
Logged

P6UL K

  • Omega Knight
  • *****
  • Offline Offline
  • Gender: Male
  • Dartford, Kent
  • Posts: 1001
    • Vauxhall Omega 3.0 Elite
    • View Profile
Re: Getting her back to tip-top.
« Reply #55 on: 21 February 2011, 02:51:40 »

Lovely job, thank you  :y
Logged
2008 Vx Vectra 2.8T VXR V6 Estate - ExNI Police • 1985 'B' Ford Escort Cabriolet 1.6 Rs Turbo

Omega_Dan

  • Guest
Re: Getting her back to tip-top.
« Reply #56 on: 21 February 2011, 07:33:03 »

Really enjoyed reading through this thread. great work so far :y
Logged
Pages: 1 2 3 [4]  All   Go Up
 

Page created in 0.037 seconds with 21 queries.