Omega Owners Forum

Please login or register.

Login with username, password and session length
Advanced search  

News:

Please play nicely.  No one wants to listen/read a keyboard warriors rants....

Show Posts

This section allows you to view all posts made by this member. Note that you can only see posts made in areas you currently have access to.

Messages - Phil B

Pages: [1] 2 3 4 5 6 7 8 ... 16
1
General Car Chat / Re: Omega replacement
« on: 30 March 2012, 14:02:35 »
Yes petrol is an issue, but if I was worried about that I wouldn't already be harrassing a barge to work and back. Oil consumption is by design, a measured pump delivers small amounts to the rotor tips to keep the apex seals happy. In fact it seems to be using less that the Omega.

Flooding is not a problem, as long as the temp guage has started to move when you switch off. The coils can get weak, and you don't want unburnt fuel washing around the chambers dissolving all that injected oil, so yes I will be replacing those plus leads and plugs.

As for durability, there are cars with 120k on the clock on the original engine. They seem fine as long as you look after them, but to be honest they are so simple it looks no problem to pop the rotors out and rebuild with new seals.

I think you are being unfair Nick! I bought this purely because it has a rotary, it's nice to be different. The only unsuitable issue is the fuel consumption which is, frankly, ridiculous. But when I'm "making progress" passed others with those rotors screaming at 9000rpm I'm glad it's under the bonnet. I haven't giggled like that since I was a younger boy

2
General Car Chat / Omega replacement
« on: 30 March 2012, 02:13:41 »
Sorry guys, the Omega has to go. I just did my second timing belt kit not long ago and she still drives lurvely, but I don't have time to repair the rotting arches/door edges etc. so I have bought a new run-about.

It's still RWD, and has an LSD and leather but it's not quite a V6. Still it's good for 231PS, is an 06 model and only 35k on the clock.


Well, here it is:


3
Maintenance Guides / How2 Door trims
« on: 14 October 2007, 02:14:04 »
Hello. Thought I'd write a guide for changing the plastic door trims, as I couldn't find one. The Haynes manual lists this as a book-into-vauxhall-job, but it's easy.

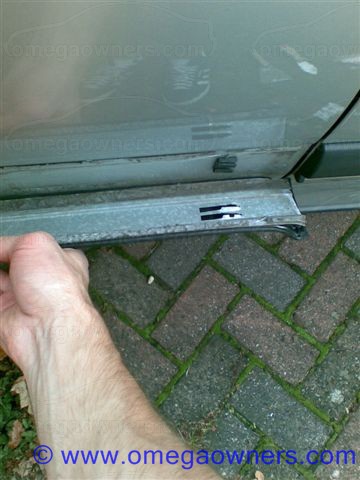
Do any of your door trims look like this?


Then you need to hot-foot it to vauxhall and get a new trim. I wrote this guide whilst changing my offside rear door trim, I guess the others are the same.

The trim is bonded to the door across the top and bottom lengths by self-adhesive foam strips, and a press fit plastic jiggy at the front and back. See the photo of the new strip near the bottom for reference!

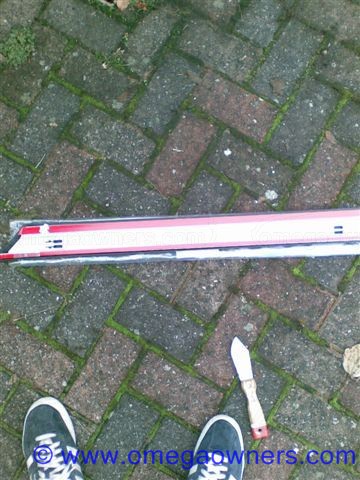
First, you need some crude decorating tools like this:


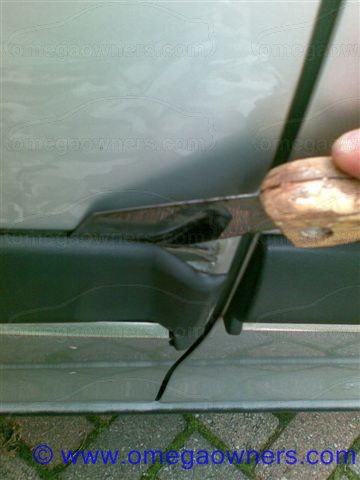
Use the big flat one first to cut the bottom adhesive:


I started at the front with the front corner jabbed in and kind of jimmied it upwards until it cut through the width of the tool. Then move it back one width and repeat, until you've cut the entire bottom length free. Try not to get it at too much of an angle or you'll scratch the paint, but it generally stands up to it. Just keep the tool off the visible surface (you can always patch up the bit under the trim if you get too aggressive!)

Once the bottom is free, cut the top one off:


Same goes, keep the tool off the visible body work but don't go in at such an angle that digs the tip into the paint underneath the strip. Take your time to feel what's going on, you will understand when you start doing it.
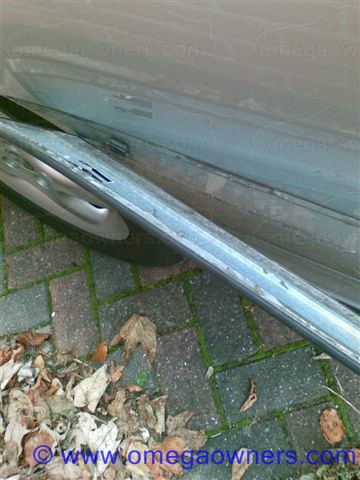
Now check both top and bottom are free by alternately lifting the top then bottom away from the door, swivelling the strip on it's plastic mounts.
Now, the trim is mounted on plastic bungs that press-clip into a hole at each end of the door. The trim slides off these bungs rearwards, so the easiest thing I found to do is pull the center of the strip away from the door so that the frontward end slides rearwards out of it's clip. Ease it back and fore a few times and it will go, I promise!


Now, You can push the strip rearwards and it will come off the back one too:


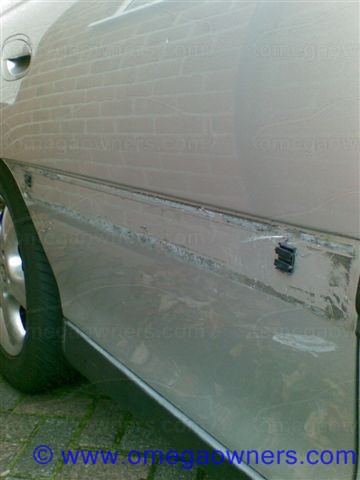
Then your left with the crappy adhesive gunk and two plastic bung-like clips:


Now, dig the clippy tabs in with a screw driver and remove the plastic bungs, and set about getting that old adhesive off! (This took me ages. I found a bit of thick perspex and my finger nails worked well without scratching the paint. Also, I nicked some degreasing adhesive remover off the RAC man that was changing my windscreen at the time, but meths work just as well)

Now it's all clean, get the new strip out of the bag. Yes, 45 bucks is alot for a bit of plastic and chromed metal!


Here you can see the kind of clip they use


Give the surface a good wipe over with some meths, then peel the plastic off the new strip and jam it on there.
The plastic clip-ma-jigs line it up for you and the adehesive seemed to just suck on to the door.

Job's a good 'un!
Now you can open your door all the way!

4
I'm not after any can-o-worms action, I just want a K59 if it's not going to kill anyone!

Anyone got any info for it?

5
Quote
Quote
Out of interest, can I therefore add this relay to get my lights to come on with the ignition? Out of preference I drive everywhere with dipped beam, having them come on automatically would be nice
But not for motorcyclists who tend to die around cars with headlamps on in the daytime. ;)

I use my lights all the time as it seems to make other drivers pay a little more attention. I have found it increases the amount of thought some others give to pulling out of t junctions, or changing lane in front of me.

I wasn't aware motorcyclists tended to die around cars using their dipped beam in the day? My sister is a frequent motorcylcist, and she prefers to use her lights when driving her car in the day. My dad is also a seasoned biker and a member of AIM through his advanced bike test, and he's not aware of problems caused by this, or has any problem himself with cars that do this.

If there is a good reason why it might cause danger to bikers though I would gladly change my habit!  :y

6
Out of interest, can I therefore add this relay to get my lights to come on with the ignition? Out of preference I drive everywhere with dipped beam, having them come on automatically would be nice

7
I just did mine, drilled through from the inside, sort of between the pollen filter and one grommet.

Hardest thing is getting the drill bit to bite, as it's tight in the footwell you have to drill at an angle. I just started with a small bit and progressed up to the size I needed.

Phil

8
Just for future reference as far as I have worked out it's not a relay, but the actual coupling transformer for the audio feed to the stereo from the hands free. I guess if this is not there then the audio in at the prewire plug under the glove box will not be connected, so you would have to intercept the ISO leads behind the stereo.

As the parrot kit claims it is good enough to be connected straight to the stereo in this way I guess the "relay" is just an element of protection included by vauxhall, however it's presence being essential to connect the prewire audio in to the stereo loom audio in.

My car already had it anyway :)

I fitted the parrot to the prewire loom without removing the centre console and without the autoleads adaptor. I had to use a multimeter and common sense to work out the prewire colours / pin assignments as all the pinout diagrams I found simply reference the pin numbers of the VDA and not wire colour.

An old 4 pin pentium 4 power connector fits the power socket on the parrot, soldered to the 12v, ignition indicator and 0v on the prewire loom (red, black and brown).
As for the mute and audio connector I had to use the included parrot ISO lead as it contains some sort of logic circuit to interface the mute signal (pull up or down I guess). So the mute wire from there soldered to the other black on the prewire loom, and the audio signal and ground to the twisted blue and brown wires with stripes (that feed the coupling transformer under the steering wheel).

I now get the stereo muted and 'PHONE' on the display, with audio routed through the stereo to the front speakers, volume controllable with the steering controls. All proper and everything.

Hope this is of help to someone in the future!

Phil

9
Just found this info:

VAU01REL - Vauxhall Telephone Solid State Relay
Original Vauxhall voltage regulator
• For Pre-wired vehicles without relay
• Prevents car kit overdriving head unit.

Still none the wiser

10
Thanks mate I'll have a look when I get out of work. Does anyone know what it does in case I haven't already got one?

It isn't required when you fit the parrot using the ISO looms, but they seem to connect up the same as the prewire in a roundabout way.

11
Car is a 98 mini-facelift with CD500

12
Hi all

I've got a Parrot ck3100 to fit but I don't want to spend 38 bucks on /can't wait for delivery of the autolead, so I want to solder the parrot's connectors in properly to the pre-wire cable.

My concern is there is a relay listed for my application, can anyone tell me what this is for and where it should be located?

Cheers
Phil

13
Omega Electrical and Audio Help / Re: CCRT700 Adding Sub
« on: 22 March 2009, 23:32:11 »
I just did this to my CD500, using one of these http://cpc.farnell.com/_/b070a/car-amplifier-impedance-matching/dp/CP03284?_requestid=535937

I snipped the bullet connectors off and extended the input cables so I could mount the unit behind the glove box, and spliced them in to the front speaker outputs behind the stereo. Solder them in proper and use shrink wrap tubing!

Then I used a female-female rca adaptor to connect it to a stereo RCA cable and ran it to the boot, along with power from the battery and signal feed to turn the amp on spliced into the power antenna line from the stereo.

Took an afternoon, hardest thing being drilling through the bulkhead and fitting a new grommet for the heavy guage power cable, but even this was ok. Sounds much better now!

14
Cheers Dave

I'm alright getting a good 0v connection from the car body to the negative amp terminal, I just wanted to confirm that it's alright for the amp's extruded body to touch the car chassis.

I think it was a 120W Pro sound amp that came with these plastic insulators to prevent this, and warnings of death otherwise!

15
I'm fitting an aftermarket amp to the underside of the parcel shelf. I remember reading in the installation instructions of an old amp ages ago that you had to isolate the chassis of the amp from the 0v chassis of the car. Is this a general thing for all aftermarket amps?

Cheers
Phil

Pages: [1] 2 3 4 5 6 7 8 ... 16

Page created in 0.033 seconds with 19 queries.