XP Users, see http://tutorials.photobucket.com/tutorial_40.html for easiest way to upload to photobucket, then use the end of this guide for posting these images on forum...Please Note picture sizes Before Uploading, they must be re-sized if they are too big Right, so you have taken pictures of your car with your brand new kick ass camera, and you want to upload them?
First, make a
copy of the photos, because we are going to edit them. Copy them to a new folder say...
\\mypictures\omega\webupload
That way the orginal photos will remain safe

Digital camera photos are massive when in orginal format..
Just take a look at the size of these photos, i took these pictures with a digital camera that is
FIVE years old!
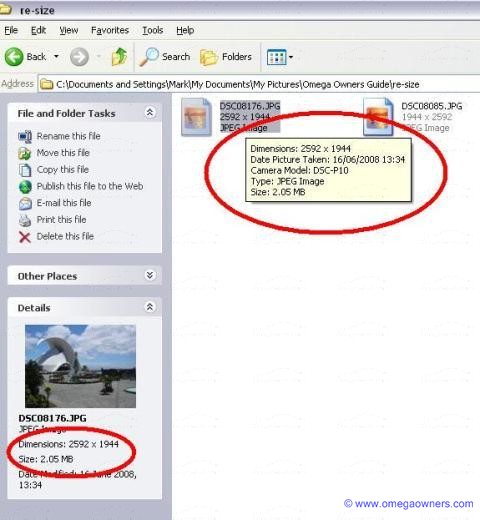
As you can see this photo is 2.05MB & 2592 x 1944 pixels.
Even my 19" TFT monitor only runs at 1280 x 1024 pixels!
We need to re-size the picture so that its down to around 400 x 600 pixesls and below 100 KB
This allows the forum to:
1) Downloads quicker
2) It can be easily viewed by people with smaller monitors.
3) Saves bandwidth.
For those with Microsoft Office 2003/2007 there is a nifty tool called "Windows Picture Manager" which allows you to easily re-size photos on bulk.
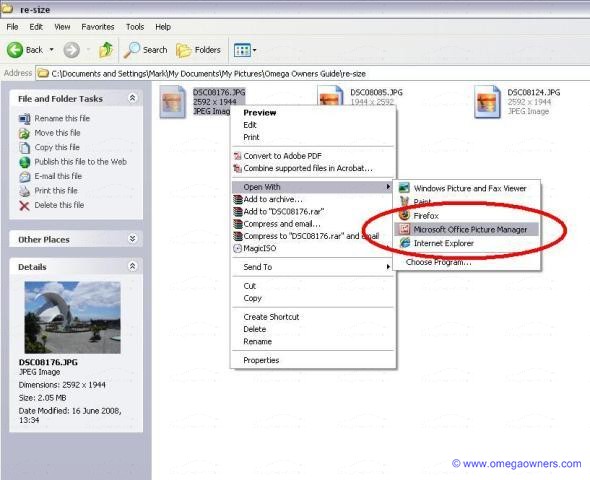
Right click your photo and select "
Open With" (If its not listed click "Choose Program" it should be listed there)
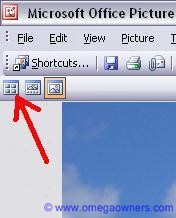
Once its opened, you need to press this button at the top left:
This is what it should look like, the button you pressed allows you to see all the photos in that folder , here are some sample photos i took on holiday:
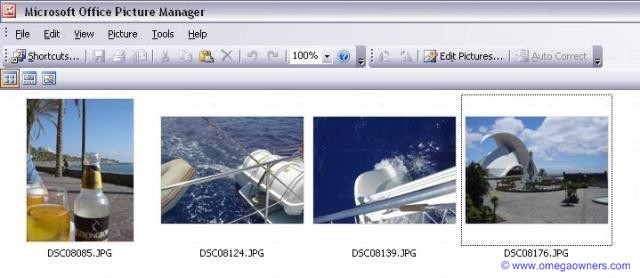
You need to click the
"Edit Pictures" button, but we need to apply this change to all your photos you want to upload, so either click, "Edit" & "Select All" or click press Cntrl + A on your keyboard, OR drag a selection box around them!
Either way, select all the photos, they will go Orange. Once selected, click "Edit Pictures"
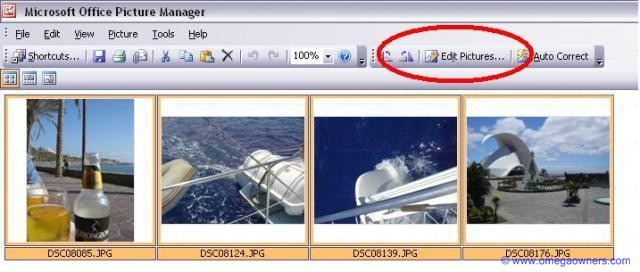
Then select "
Web Large"
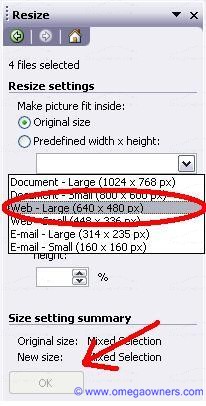
Once you have done that, the OK button will be come active.
Now you need to save the changes...

Thats it, photos now can be uploaded.
To show uploaded images on this siteOk so you want to display your images on our site, first thing to say is we don't store them, you have to store them remotly and link to them. Easy way is to use photobucket (its free!)
So.
You have pictures on your PC you want to show:
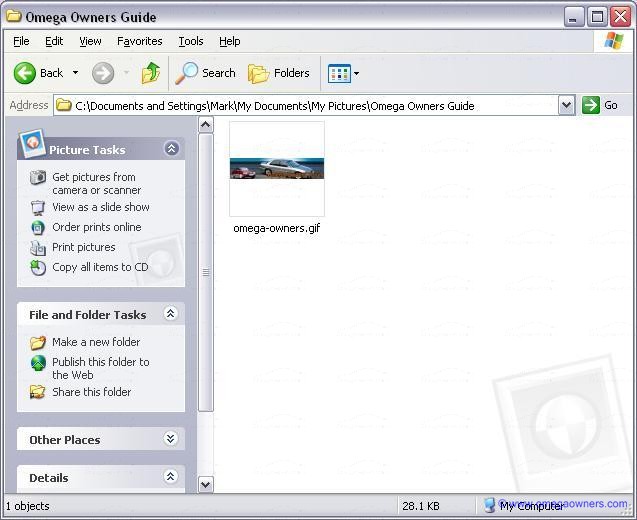
First to upload this picture you need to register here:
http://photobucket.com/Once registered and logged into your account. Create a new album to keep all pictures car related in one place.
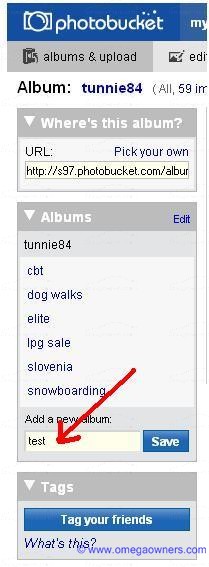
Give it name eg "Omega"
Once created, use the upload section:
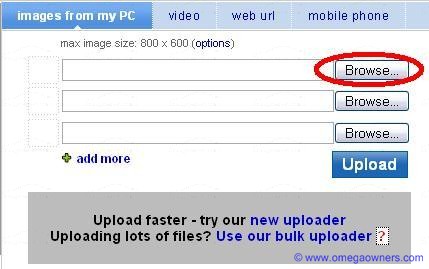
Click
Browse and navigate to the photos on your PC you want to upload, select it, and click "
Upload" If you have more than 3 to go at the same time, click "add more" it gives you a longer list.
Once uploaded, you should see something like this:
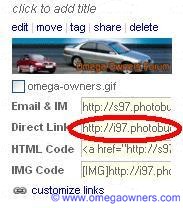
Click the link next to "
Direct Link" - As soon as you click in that box its automatically copied.
Now go to the forum.
Click new post / reply, and click the image button:

Now paste the URL inbetween the "[ IMG ]" brackets.
**Update**
Above still correct for some sites, but Photobucket have done an update.
Once you have uploaded your photo, click the share link:
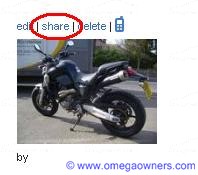
On the following popup, copy the URL for forums with IMG tag:

Just paste that into your post, thats it job done!

 Author
Topic: How to get your photos on this site - PHOTOBUCKET (Read 31213 times)

