Omega Owners Forum

Please login or register.

Login with username, password and session length
Advanced search  

News:

Please play nicely.  No one wants to listen/read a keyboard warriors rants....

Show Posts

This section allows you to view all posts made by this member. Note that you can only see posts made in areas you currently have access to.

Topics - jules

Pages: [1] 2
1
Look what I bought ........


Not an Omega, but I consider it to be the next generation. (I'll take the flames for that)

Question - Does anyone have the full Tech 2 in Scotland ?

Oh and yes that is the Elite trim, on 18" rims with the colour Sat-Nav in case anyone was interested ;)


2
Maintenance Guides / Installing CARIN Sat-NAV into Pre & Mini Facel
« on: 11 February 2008, 11:56:04 »
The SAT-NAV as factory and dealer fitted was a Phillips/VDO model called the CARIN. There were various revisions of the control unit, detailled here :

http://www.hxs.de/CARiN.htm

The system comprises of a NAV unit (Brain) mounted in the rear of the car, A body loom, a head loom, a monochrome screen, a speaker, a GPS mouse and a joystick remote.


For the purposes of this how-to, I'm working with a SYS-582 unit which came from a 1999 Elite. The procedure I describe here was performed on my January 1999 CDX.

First step is to partially remove the passenger kick panel, this is held in with two torx screws, one visible the other under the door kick plate.
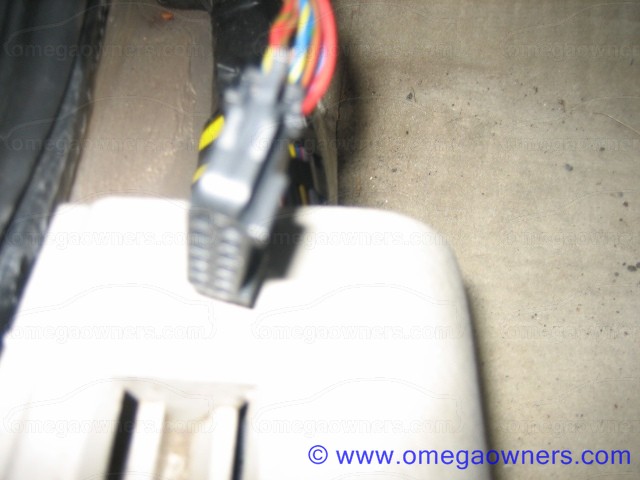
To begin with, just remove the visible screw and wiggle the panel loose. Just above the two large loom connectors you should see a black six hole connector - Jackpot!

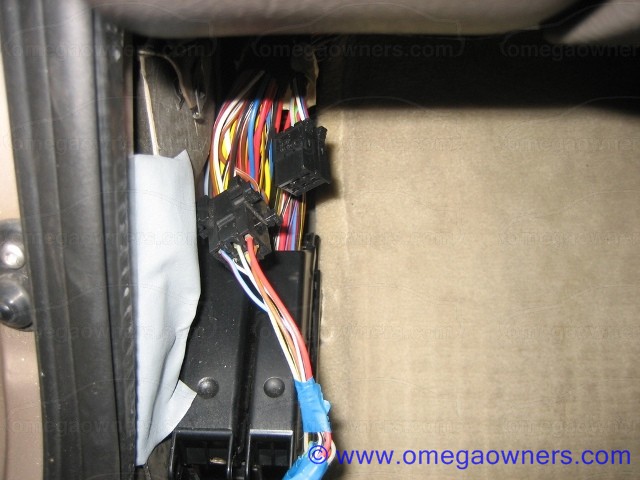
This connector carries:
Permanent live; Switched live; illumination; speed pulse; reverse; and speed dependant volume.

If you find this connector is not there, you have two choices, either locate the wires within the large multiplugs and tap in there. Detailed here:

http://mysite.wanadoo-members.co.uk/omega-elite/menupages/omegasatnav/satnav.htm

Personally I would suggest using the radio connections because bar reverse, they are all available there.

Now is a good time to test the system, especially if you sourced it from a breaker or ebay.

Lay the brain in the footwell and connect the two connectors to it, then connect the screen and the remote and the speaker and the gps.
Now carefully strip the end off the brown earth trailing wire you will find located close to where the male 6 pin plug is located on the head loom. Loosen the screw on the door frame for the courtesy light and temporarily fix the earth . Now plug in the six pin plug to the car loom and after about 10 seconds the system should be live.

To test that all the inputs are functioning, put the unit into service mode by selecting service with the joystick and entering 6330 as the code. This will allow you to see realtime that the speed pulse, reverse signal, gps, and illumination are working amognst other things.

Ok so it works? lets fit it!

First remove the radio and climate control panel, there is already an excellent how-to on this site if you haven't already done this.

Now remove the cubby hole to the left of the stereo, this is where the screen fits.

If you look down through the hole where the climate panel was you should be able to see some light in the passenger footwell. This is roughly the point at which the centre console around the gearbox meets the climate and radio console. This is where you are aiming in the next step.

Carefully seperate the body loom from the head loom,
and working from the front of the dash where the screen will live, feed the loom connector down towards the light, it SHOULD actually be quite easy.

Then carefully tape the speaker connector and the remote control connector together and feed these in the same way.

Once all three plugs are lying in the passenger footwell, tie some string around the screen connector (This bit is important because the length of the remote control lead is tight) Now gently pull all the wires through the aperture and towards the footwell, making sure to keep hold of the string !!  ;D Once you have all the wires fully into the footwell, pull the screen connector back up towards you until you have about 3-4 cms of wire and connector hanging out of the dash.


Now put all the climate panel and radio back, remembering to push the screen lead through the correct hole. Once done, connect the screen and push firmly into the dash. Tip -  If your screen connector has broken latches, wind one turn of insulating tape around it before inserting.

Now remove the four philips screws from the armrest cuddy and lift it out. Remove the two rear screws holding the vent assembly for the rear and lift it gently towards the rear seat. (I didn't have to disconnect anything)

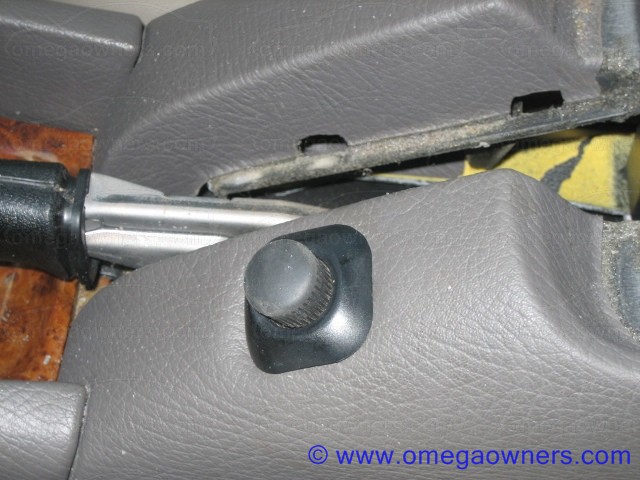
Now remove the two silver 10mm bolts behind the hand brake and the tunnel should lift about 25mm, this is enough to fit the joystick.

Remove the hand brake gaiter and identify that the remote sits approximately two thirds of the distance back from the gearstick on the passenger side.

Now fire up that drill with a 30mm hole cutter and make some mess.

Once done feed the remote wire up, under the tunnel and connect the joystick. Seat the joystick in the hole and GENTLY tuck the wiring up under the still loosened tunnel running forward to the corner where the two consoles meet. It will fit, just takes patience.


Peel back the passenger carpet at the front to reveal where the wiring loom passes from the left to the centre of the car and run the remaining loom connectors and speaker connector from the screen through this channel to arrive back in the passenger kick panel.

Once there remove the trim panel that runs along the length of the doors by carefully prising up the vauxhall logos, begin at the edges with a small flat blade screwdriver and they should come loose to reveal some torx screws. Remove all the screws and gently prise away the lower part of the centre pillar trim covering the seat belt. Now lift out the trim panel to reveal the body loom.

Remove the final screw from the passenger kick panel and remove.


3
has anyone ever come across a facelift colour navigation system displaying NAVI INACTIVE in the top left corner?

Why ?

Is it just missing a map disc ?

Cheers

4
Omega Electrical and Audio Help / 1999 CDX SAT-NAV question
« on: 11 December 2007, 11:12:29 »
Hiya,

I became the proud owner of a 1999 2.0l 16V CDX last night.

It has the CCRT700 stereo.

There is a lead lying in the boot with a black multi plug and a mini coax connector on it.

It seems to come around the back of the windscreen and hangs loose on the left rear of the boot.

Is this a pre-wire for a sat-nav ? I ask because the handbook pack has a sat nav manual in it and I was wondering if it had been removed.

Would the display used for the radio/telephone be the display for a factory sat-nav (Carin)

Could I retrofit it or not ?

Cheers Guys


5
Omega Electrical and Audio Help / Climate / Dash bulb types
« on: 15 December 2007, 09:19:53 »
Hey all,

Halfrauds list two types of bulbs for the Omega, one is a 5mm ish width and the ither is a 10mm ish width.

Question is which one fits my 1999 mini-facelift CDX ?

Cheers

6
Omega General Help / Potentially coming back to the fold !!
« on: 07 January 2010, 10:12:24 »
Morning All, and a Happy New Year.

I have the chance to buy an Omega and thus return :)


Question is, what's this worth in your opinions ?

March 2001 Omega Estate 2.5 TD Elite.
88K With a manual box (aparently)
Star silver.
6 months MOT
Sat-Nav/Audio/Leather are unknown, I haven't seen the car yet.

Ball park figures welcomed.

Cheers

Jules

7
Omega General Help / V6 overheating
« on: 08 October 2009, 14:55:35 »
Some advice please.

3 litre V6 overheating and plumes of white smoke from exhaust.

No oil in water.
Smell of petrol in expansion tank.
System is pressurising.

Is this symptomatic of a HBV fault or something else ?

Cheers

Jules

8
Omega General Help / To flush or not to flush
« on: 30 May 2008, 13:24:10 »
Question:

I'm having an oil change done tomorrow by Kwickfit, (I know I know)

Should I run a can of flush through beforehand based on the fact that I don't know when the oil was last changed and my breathers still seem to be blocking rather quickly.

If so what brand does anyone reccommend

Cheers
 :y

9
Omega General Help / Two easy questions for the experts.
« on: 23 May 2008, 10:22:14 »
Going to be doing some work on the car tomorrow and need to know :

On a 2 litre what size spanner to remove the idle breather ?

How do I remove the O2 sensor ? Again what size spanner and how do I get access to it ? I believe it's at the back of the engine at the top of the exhaust.

Cheers

J

10
Omega General Help / Vibration from Clutch pedal
« on: 17 May 2008, 17:14:16 »
Over the last couple of days I have noticed a vibration from the clutch pedal.

It is apparent when I rengage the clutch after changing gear and also apparent when engine breaking.

It is only a very slight vibration but it was not there last week.

Is my clutch/thrust bearing on it's way out or could my gearbox be needing oil?

Cheers guys


11
[moved] [link=http://www.omegaowners.com/forum/YaBB.pl?num=1210064316/0]General Chat[/link] [move by] hotel21.

12
Just curious, my low fuel light is on, the needle doesn't move and the range computer says 45 miles left.

My old Senator used to run about 30miles after the range said 0 miles.

(Sorry if this has been done before)

13
Omega General Help / Climate bulb change - total disaster
« on: 19 January 2008, 17:32:15 »
So, I followed the fabulous howto, when I finally managed to work out how the release bar worked I found three things:

1. I've bust my hazzard switch unless I jam it home they're on.
2. I've bent or broken some metal rod up behind the panel.
3. The bloody bulbs are the ones with plastic holder, not push in fit ones :(

So:

Anyone got a hazzard switch for a mini-facelift ?
What have I bent/broken ?
Where do I get these bulbs cheap ?
And finally I am assuming that changing these bulbs will make the led numbers light up. (I can only see them dimmly in daylight)

Cheers

14
Omega General Help / Fluttering / minute hesitiation when cruising
« on: 03 January 2008, 20:57:46 »
When my 2.0 16V is warmed up, at 70 mph there is what I can only describe as a fluttering feeling.

It's not really hesitation as as soon as I plant it, it goes away.

It's there whether I have cruise engaged or not.

Also from cold my fuel pump I think makes a hell of a racket for about 90 seconds after the car has started.

Have I got impending doom and if so what ?

cheers

15
Omega General Help / Headlight question mini-facelift Projectors
« on: 29 December 2007, 18:02:46 »
Just went to drive to the inlaws and found I had no dipped beams.

Changed a bulb, and reseated the other and they're back on.

However, I noticed that on both lights the bulb/reflector assembly is loose, i can see a gap in the corner closest to the grill where it looks like it should be flushed up. I can move both lights around by hand and can tell that if I go over a bump they must be moving.

I did feel that they were not very bright previously and I have been flashed a few times.

My question is how should the bulb/reflector be attached and how do I go about repairing this ?

Many thanx

Jules


Pages: [1] 2

Page created in 0.029 seconds with 17 queries.