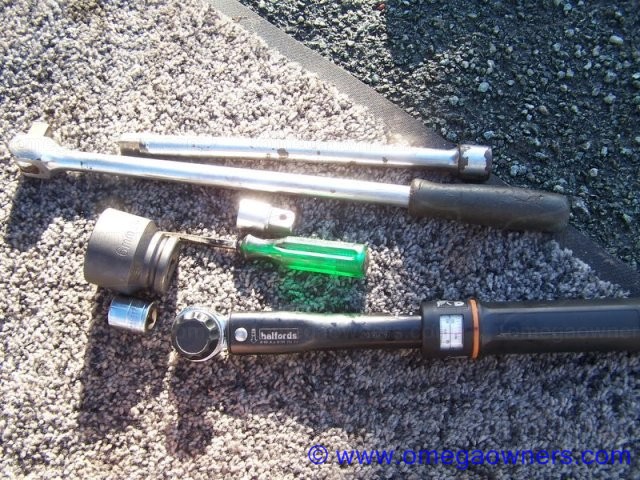
Omega Owners Forum

Please login or register.

Login with username, password and session length
Advanced search  

News:

Please play nicely.  No one wants to listen/read a keyboard warriors rants....

Show Posts

This section allows you to view all posts made by this member. Note that you can only see posts made in areas you currently have access to.

Messages - JesterRT

Pages: 1 [2] 3 4 5 6 7 8 9 ... 23
16
Sorry - just read the two obvious stickies on this board and neither mention it, but no worries - £30 the pair + postage or arrange pickup/delivery (within reason) on the above route.

Ta!

17
Car Parts, bits For Sale & Wanted / FS - Rear Blind
« on: 29 May 2012, 20:32:07 »
Removed from a 1998 Elite, not including parcel shelf.  Came from a dark interior.  Tenner plus postage (or can arrange pickup/delivery between J13 and J2 M6 or around the coventry/leamington area).

18
Yours for the postage.  I've no longer got me miggy  :'( so not much use to me and having a clearout.

19
Hi,

I've got a pair of headlights removed from my 1998 Elite.  Make me an offer - can deliver/meet up anywhere between J13 M6 and J2 M6, also around Coventry/Leamington Spa area.

20
General Discussion Area / Re: Omega Owners Forum
« on: 18 May 2012, 19:27:09 »
OOF is STILL one of the best forums

All said - I haven't had a miggy for some time, and I still completely agree with the above - I don't visit any other forum anywhere near as regularly, and I often browse through the Car and General discussions because the topics are often interesting/funny/enlightening.

21
General Discussion Area / Re: Omega Owners Forum
« on: 18 May 2012, 19:24:48 »
...or perhaps Omega's aren't cheap to be motoring around in these days, so people aren't visiting for the mechanical know-how (the side-show discussions have been brilliant - even as a spectator), but I know I visited a lot more when there was a miggy on the drive (still very, very sad to have seen it go, both times).  The old ones are being scrapped/scavenged/written off and the new ones cost the earth to tax (and run) so people are shifting into small economical crappy FWD euro-boxes.

22
General Discussion Area / Re: eu lorry driving standards
« on: 18 May 2012, 13:30:39 »
I come across bikers almost daily around here riding with their wheels almost on the white line - which is fine until you think about where the top half of their bike, body and head are.  Rightly or wrongly, I kinda see everything from the kerb to the whiteline as 'my' space, so I can put my car where I like within those confines.  If I go over the line, it's my fault (including wing mirrors).  Providing I'm not driving excessively quickly, and I don't always ::), then that to me seems reasonable.  I choose the lines through corners for my comfort most the time, which means I'll be closer to the white line exiting when entering and exiting a corner.

23
General Discussion Area / Re: for potential iphone buyers :)
« on: 21 October 2011, 13:04:12 »
I have a Nokia 6210.  It's been drop kicked across the office in a fit of peak, dropped in water (mental note: check pockets before going canoeing), regularly dropped on the ground as I fumble carrying stuff from the car, gets stuffed into a pocket with keys, and generally gets abused most days.  It's never let me down, the battery lasts a week, the signal outstrips every smartphone in my office (if it's new and shiny, someone here has one) and I'm loathed to change it.  SWMBO has an iPhone 4S and I cringe everytime I see it get thrown into a bag, or picked up by the kids.

They just don't make 'em like they used to!

24
Maintenance Guides / HowTo: Changing Rear Shock Absorbers
« on: 17 April 2008, 20:28:36 »
Tools
16mm Socket
22mm Socket (Can't be sure - borrowed an imperial one that was a close fit)
Small Adjustable Spanner
Trolley Jack
Axle Stand
WD40
Wire Brush

Parts
90542942 - Standard Rear Shock Absorber (£73.00+vat retail, £45.85+vat TC)
72119084 - Self Levelling Shock Absorber (£103+vat retail, £64.88+vat TC)

Note
Self Levelling shocks can be replaced be the standard shocks with no ill-effect (I've just done mine ;)), just need to tidy up the air lines from the compressor.

Took me (novice mechanic) an hour a side.  Would be much quicker now I've a better idea of what I'm doing.
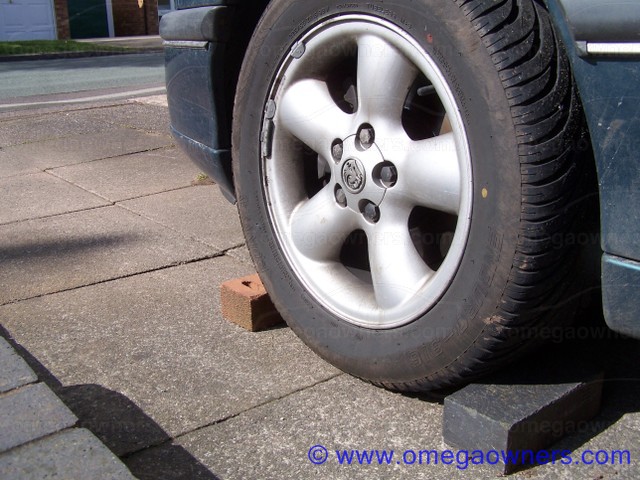
How to...
First things first, if the rear of the car is coming off the ground then your handbrake or leaving the car in gear isn't enough - chock up the front wheels (both sides) so it doesn't move.


Whichever side you're going to start on, loosen the nuts to the wheel before you jack it up - I can guarantee that if you weren't standing over the tyre monkey that last fitted/balanced your wheels then they'll be on ridiculously tight!

Jack up the rear end of the car and get an axle stand underneath onto something nice and solid.  Once it's nicely supported give the car a gently shove to make sure it's not going to move around.  Remove the nuts and take the wheel off and if your shocks are knackered then you'll be greeted with a sight similar to this:


You can see the fluid leaking down the sides of the shock, and that was the good side - here's the worst:


Now place a jack underneath the old shock and crank it up.  You'll see the trailing arm rise with it, the idea being to compress the shock before lowering it out:


With the bottom jacked up open the boot and take a look inside.  If you have a saloon then you'll be able to see the rubber caps covering the top of either shock:


Whip the rubber cap off and you'll see one 16mm nut.  If you've got a deep socket then you'll be able to get that straight on, if not then it's spanners out and do it the hard way.  There's a chance that the whole thing will spin, which is why you may need a second spanner to get hold of the very top of the spindle which thoughtfully has two flat sides to hold things steady:


Take the nut off, remove the large metal washer and thick bit of rubber.  Back underneath the car, wind down the jack and you should find the shock drops neatly out from above:


If you've got the fancy self levelling shocks then now is the time to remove the clips and valves at the top end of the barrel.  Next comes the hard bit.

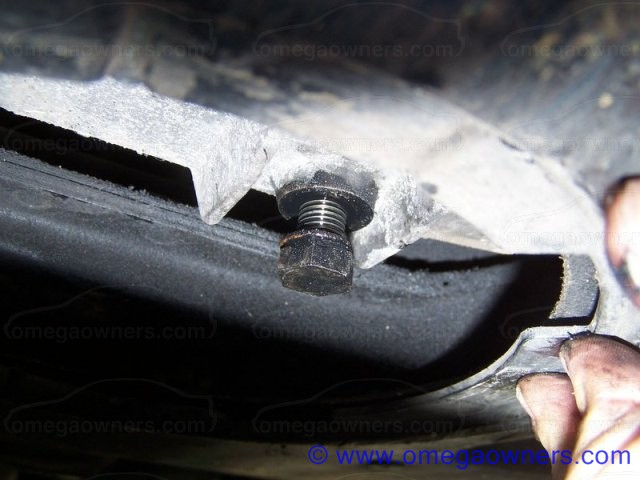
Clean off the end of the lower bolt with a wire brush and then spray it with WD40.  Give it a few minutes to penetrate, then get a socket onto the rear facing 22mm? bolt and undo that:


I found that one side was worse than the other, and took some serious effort to shift, but it did loosen off, eventually.  With the bottom bolt off you'll find you have a cup washer with it.  Save this to go back on later.
I had to give the old shock a fair thump to get it off.

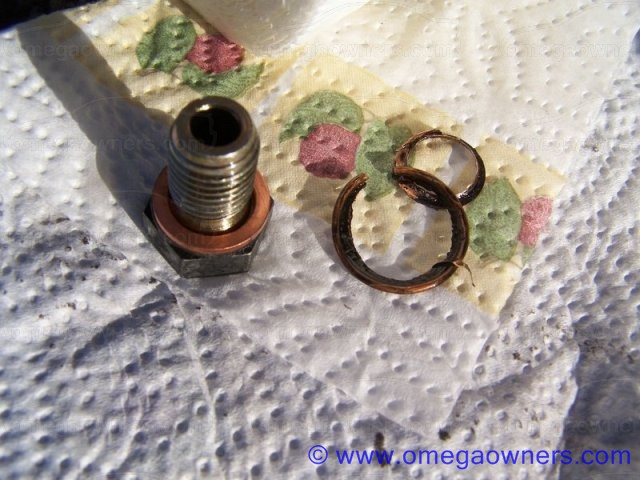
Now, if you bought those shocks from VX then you'll have the following new shiny bits:


I read the Haynes Destruction manual and followed the instructions about priming the new shocks, which basically means move the piston in and out four times.  After that stick the larger rubber washer on the top of the piston:


Locate the bottom bolt, remembering the old cup washer and making sure that it's the right way round (the bottom of the shock should fit into the bottom bracket slightly).  Do the bolt up loosely (tighter than shown) so the thread is through the other side:


Now jack the new shock up, making sure that the top rubber goes neatly into place.  As the saying goes - replacement is the reverse of removal, so, with the new shock sticking up into the boot you just need to pop the other rubber back on (rounded bit down) and replace the large metal washer.  Use the new nut and tighten it up.  You will almost certainly have to grab hold of the top of the spindle this time.  This needs to go to 60Nm (although I have no means of checking that so I just did 'pretty tight')

With the top tight you need to do up the bottom to something fairly extravagant like 110Nm (again, I have no means of checking this but did this one up to 'bloody tight').

Lower the jack (shock will extend) and pop your wheel back on.  Lower the car and you should be done, just one more side to do  :y

25
Maintenance Guides / Oil Change 2.5TD (BMW Engine)
« on: 26 November 2006, 14:03:19 »
Please note that due to several stripped sump threads, Vauxhall have reiterated the following sump plug torques:
M16 oil drain plug - 45Nm
M12 oil drain plug - 25Nm


Tools
17mm Socket
36mm Socket (a big 'un!)
Short extension bar
Screwdriver
Torque Wrench
Bowl (big enough to collect the old oil in.  I use an old washing up bowl)
Gloves, Paper towel and a funnel all come in handy


Parts
Depends on the age of the car.  Mine should have been an early one, but for some reason took the later filter:
2.5TD (filter element) to ENG no 34398417 - 93180820 £10.90 + Vat retail
2.5TD (filter element) from ENG no 34408417 - 93180093 £7.60 + Vat retail
(Cheers Mark DTM for the part no's & prices)


6.5 litres of oil


Right then, time to get dirty.  Go for a short run and get the engine up to temperature.  The oil comes out nice and easy if it's warm.  Either jack the car up and put it on axle stands, or get the ramps out (watch the bumper, my ramps only just fit under there) and get the nose of the car in the air.  Once it's up and supported give the car a rock to make sure it's properly supported - you're going under there, so best be sure it's not going to drop on you.


Underneath the car there's a small cover that can be removed to reveal the oil sump.  Remove this by twisting it, and it just drops out.


You should be able to see the sump plug.  Have your container already under the car, and at hand.


Grab a 17mm socket and undo it, slowly.  Once it's loose get your container under the sump and begin to remove it by hand - it's less messy if you can hold onto the sump plug before it drops into the container of old oil.


Once the plug comes out, the oil follows it at a fair pace.


Whilst the oil continues to gently drains out, pop the bonnet and unclip the sensor.  There's a little tab to push in under the mounting bracket, and it just slides off.  I found I needed to move this just to get a bit more space.  I'm sure more nimble fingers could skip this step.


Get a plastic bag ready on the top of the engine to drop the old filter in.  Get the 36mm socket and undo the oil filter.  You will probably hear a lot more oil escape out of the bottom of the engine as you undo this.  In one swift movement, put the oil filter assembly straight into the plastic bag.  The oil filter may stay in the canister on the engine, if it does, just lift it straight out of there and into the bag.


In the filter kit from Vauxhall you should have three rubber rings, two small and one much larger.  Clean up the filter cap/stalk and then replace the two small rubber rings on the end of the stalk.


The larger rubber ring around the top of the cap needs to be replaced too.  Be gentle with the screwdriver,  don't want any gouges out the plastic.


Put the new filter on and you're ready for reassembly.  Drop it back into the container on the engine and turn it by hand to get the threads right.  Tighten it up (as written on the top of the cap) to 25Nm with a Torque Wrench.


Take the old copper washer off the sump plug (mine was particularly nasty since Vauxhall gave me the wrong one last time), and replace it with the new one from the pack.  Back under the car and pop the sump plug back in, tightening it to 45Nm (seemed excessive to me, but it was what was written on the service manual).
While your under there, pop the cover back on to hide the sump.


Fill with your favourite oil (Vauxhall's own oil is well priced).  I fill it with 6 litres, and then top up as necessary - use a funnel if you've got one, otherwise a steady hand will suffice.  There's only 1ltr between min and max on the dipstick.  Turn on the engine and wait for the oil light on the instrument panel to go out.

If you've removed the sensor, then clip it back on.  Bonnet shut, Job Done.  :D

26
Omega Electrical and Audio Help / Re: door speakers
« on: 02 October 2008, 12:59:10 »
The Bose setup I had in my Elite seemed pretty good to me.  I've got a Kenwood head unit in my CDX which is truly awful - but whether that's down to the speakers or the head unit I'm not sure.  The speakers used in the Bose setup are rated at 2 Ohm, so perhaps a different construction?  (Either way - not the same speaker as found in the non-Bose systems, right?)

I never found a point in the Elite where I wanted the music any louder - just gets too loud to listen to, but then perhaps I'm an old grumpy sod.  ::)  One problem I see in installing top notch audio gear in cars where you part with £££'s is that you ruin it by using the car - all that wind noise, road noise, exhaust, engine (and who'd want to stop the V6 singing :D).

27
Omega Electrical and Audio Help / Re: door speakers
« on: 02 October 2008, 12:53:20 »
@russzero

The shelf needs to come out.  There's a metal sheet between the top of the boot and the actual parcel shelf.  To get the shelf out is a bit fiddly - you need to dismantle the rear seats a bit to slide it out, undo some clips in the boot, and remove the clips that the head restraints go in.  You'll be cutting holes in the rear metal panel to drop speakers in (like I will to retro fit BOSE setup into my CDX).  TheBoy posted a picture of a parcel shelf recently showing the underside (where the speaker grill clips are visible).

28
Omega Electrical and Audio Help / Re: Bose Transfer
« on: 12 September 2008, 18:02:06 »
Well maybe I could transfer the MID from the Elite to the CDX too?  Tech 2 job I guess but, possible?

They look the same.  Just worried about what a job was done by the 17yr old who fitted the crappy kenwood headunit.  It's awful - but I did get a free CD with it :)

29
Omega Electrical and Audio Help / Re: Bose Transfer
« on: 12 September 2008, 12:41:38 »
So, it's about 17 digits long, and ends in a number, but about the 10th digit is an 'X'.

Whassat mean? :-?

30
Omega Electrical and Audio Help / Re: Bose Transfer
« on: 11 September 2008, 22:23:06 »
Same as the Elite.  At the moment instead of getting the radio station on the middle readout I permanently get the date.

Pages: 1 [2] 3 4 5 6 7 8 9 ... 23

Page created in 0.017 seconds with 14 queries.