You will need:
A Good Tool kit which includes a selection of Torx sockets
- Rocker gaskets: 90511451, one set per bank (£25+ Vat retail)
- O-rings: 90411826, 8 per bank (13p+ VAT retail)
- Gasket, Inlet bridge to head: 90501652, 2 off - Optional
- Gasket, Inlet to Inlet bridge: 90501653, 3 off - Optional
- Gasket, Inlet to Plenum O rings: 9118135, 6 off - Optional
- Sealent, Black (not the Green stuff!): 90485251, 1 off
It is essential to use original Vx camcover gaskets, pattern parts dont last, fit badly and are often rock hard and squashed flat after 4 months running. Its your risk !!!
On all the ones I have changed so far (and I have doen a fair few!), I havn't needed to change the inlet gaskets....but, the numbers are there for completeness
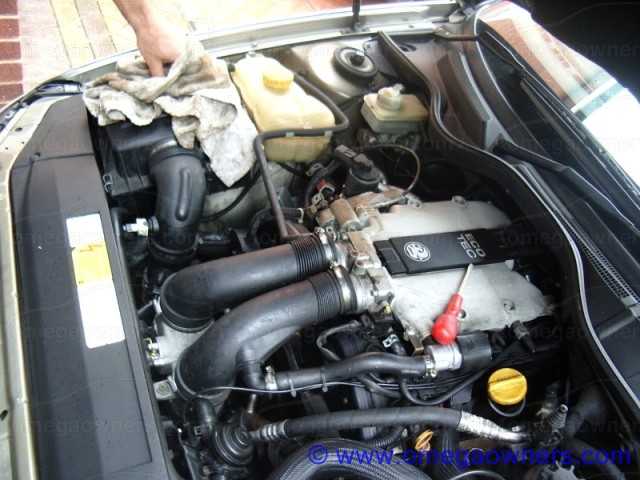
A COLD engine, some fuel will escape during this procedure so care is required.
First, disconnect the battery negative and the inlet trunking from the plenum chamber.
2.5V6 and 3.0V6 Only - Remove the single torx bolt that holds the bracket from the drivers side exhaust manifold to the base of the EGR block and diconnect the EGR flexi pipe union.
Then remove the feed and return water pipes from the throttle body heater by squeezing the retaining clips with suitable pliers (mole grips work well, small amounts of water may escape)
2.5V6 and 3.0V6 Only - Now disconnect the throttle cable by carefuly removing the securing clip. Also, if fitted disconnect the cruise control cable. Unbolt the throttle cable mounting bracket and place to one side.
2.6V6 and 3.2V6 Only - Disconnect the cable connection to the electronic throttle assembly and the small vaccum connection to the fuel pressure regulator.
2.5V6 and 3.0V6 Only - Disconnect the pipe and connector attached to the idle valve
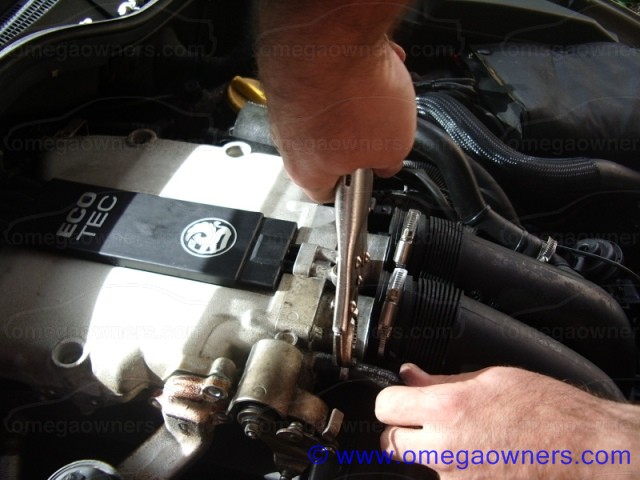
Remove the four plenum securing bolts (there may be plastic caps over the bolts). Also remove the two bolts which retain the cable tray.
If fitted, remove the bolt securing the two coolant pipes at the rear left of the plenum
Now remove the breather pipes from the rear of the plenum (4 off, two large and 2 small)
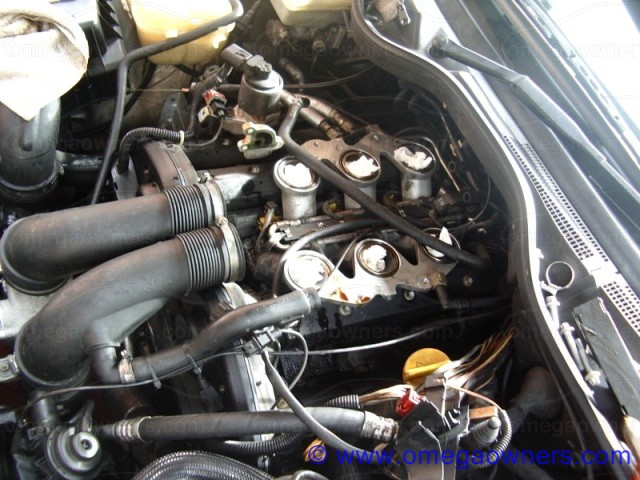
Carefully lift the plenum and ease forward so that you can reach in behind and disconnect the vaccum feed and electrical connector to the rear multiram.
Remove the plenum or place to one side.
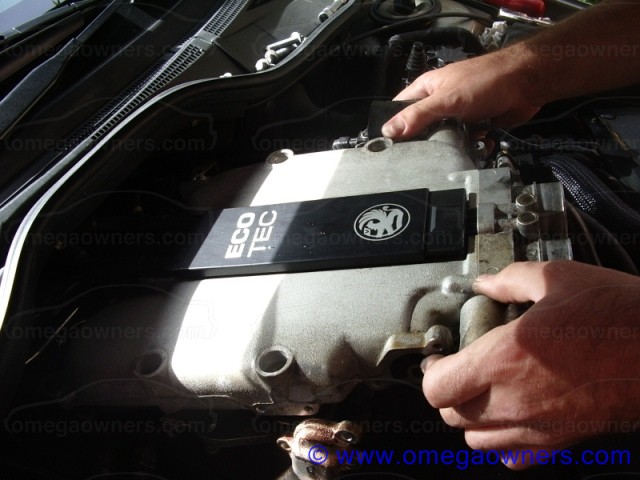
It is recommended that the cable assembly that runs across the passenger side cam cover is removed from the cable tray and the cable tray is placed to one side (as shown). This makes access to the cam cover considerably easier.
Insert some suitable rags to stop anything falling into the inlets!
Now de-pressurise the fuel system by removing the black plastic cap at the rear left of the injector rail, surrounding it in a dry rag and pressing the centre of the valve in (alternatively depressurise the fuel system before starting work by removing the fuel pump fuse.....or simply disconnect the fuel pipes being prepared for fuel loss).
Un-bolt the feed and return unions on the fuel rail (Caution some fuel will escape so surround it in a rag)
Disconnect the air pipe from the fuel pressure regulator. Unplug the injector loom and remove the 6 securing bolts which hold the injector bridge assembly to the inlet.
Remove the inlet bridge and injector assembly.


 Author
Topic: Changing the V6 Cam Cover Gaskets (Read 34355 times)
Author
Topic: Changing the V6 Cam Cover Gaskets (Read 34355 times)