Omega Owners Forum

Please login or register.

Login with username, password and session length
Advanced search  

News:

Please check the Forum Guidelines at the top of the Newbie section

Pages: [1] 2  All   Go Down

Author Topic: Pictures of my recent engine rebuild...  (Read 2752 times)

0 Members and 1 Guest are viewing this topic.

JamesV6CDX

  • Omega Queen
  • *****
  • Offline Offline
  • Gloucestershire/Buckinghamshire
  • Posts: 16640
    • Omega 3.2 Retail MV6 LPG
    • View Profile
Pictures of my recent engine rebuild...
« on: 30 January 2008, 10:28:57 »

As you will all know by now, I bought Max's Elite Estate 3.0 Auto as a non-runner project, and did some reasonably major engine work to get it running. It had to be a bit of a swift one, because A) I need an Estate quickly for the dogs, and B) I didn't want it Hanging around due to nowhere to work on it.

Symptoms

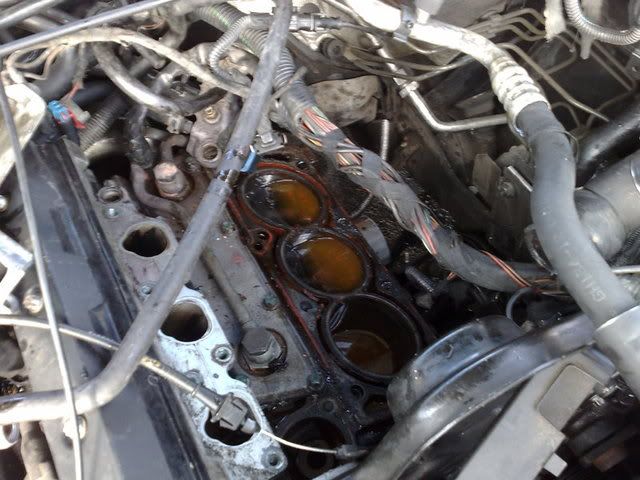
The main problem with the car, is that it was losing coolant. The coolant loss was down the back passenger side, and was running down the block onto the floor.

This car was OOF'd at the last cambelt party, laidback did the brakes, and Mark DTM removed and resealed the oil cooler, and coolant bridge doughty seals. Sadly the leak didn't go away. Shortly after this, I changed the thermostat seal and front transfer pipe seals. This improved the leak, but it was STILL there.

It gradually got worse, to the point it would dump all it's coolant in about 20 miles.

Diagnosis

Max's garage recently diagnosed a head gasket leak on the 2-4-6 bank, and I was inclined to agree with them. So - seeing as it needed a head gasket, I decided to go all out and do a top end rebuild.

I rebuilt two heads, using new valve stem seals, cleaning everything thoroughly, and grinding the valves back in using some fine paste.

I flattened the exhaust manifold mating faces on the heads, and the manifolds, and fitted new exhaust manifold gaskets and studs / nuts all round. Sassanach helped me helicoil 2 broken threads on one head.

Armed with my nicely rebuild heads, I attacked the car.

When I arrived, the plenum, inlets, DIS and coolant bridge were off. Otherwise it was complete.

Day 1)

Removed bagpipes, aux belt tensioner, cambelt cover, water pump, cambelt, inlet bridge, cambelt cover(rear), camcovers, camshafts, all 4 sprockets, NS SAI pipe, Thermostat and front transfer pipe.. exhaust downpipes... basically everything in the way of the heads. I then undid the head bolts (a scary moment, they DIDNT feel good!). I then removed both the heads, and rebuilt the drivers side one and cleaned all the mating surfaces. (Had already done the passenger head).

I then re-fitted both heads (using new HGs obivously) to the car. Got the camshafts back in, rear cambelt cover on, cam sprockets all back on, and the cambelt kit back on and the valve timing set. Also got stat and transfer pipe in, and that barsteward rear transfer pipe too.

At that point, I was working with a torch inbetween my teeth, so decided to call it a day once the cambelt was on. I then had a few beers on the train home.


Day 2)

Woke up with sore head, after only 4 hrs sleep.

Arrived at Max's, and starting putting all the bits together. Inlet, coolant bridge, DIS, leads, plugs.. blah...

Pics are below. I must admit, at one point I thought "oh dear, I've taken on a bit much working alone over 2 days here)....

But it's all turned out well.

When I fired her up, she literally started on the first turn, with no fault light. That pleased me immensly :)

I drove her home 40 miles, and no problems at all. Temp stable, and NO coolant loss, so it's fixed it :D

General Pics of rebuild below:


Passenger head coming off:


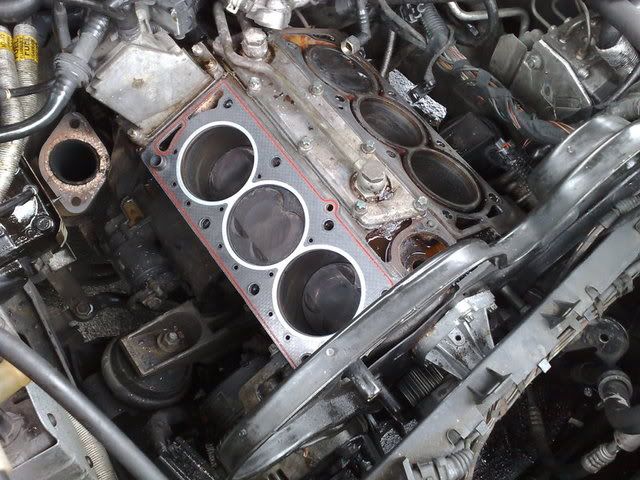
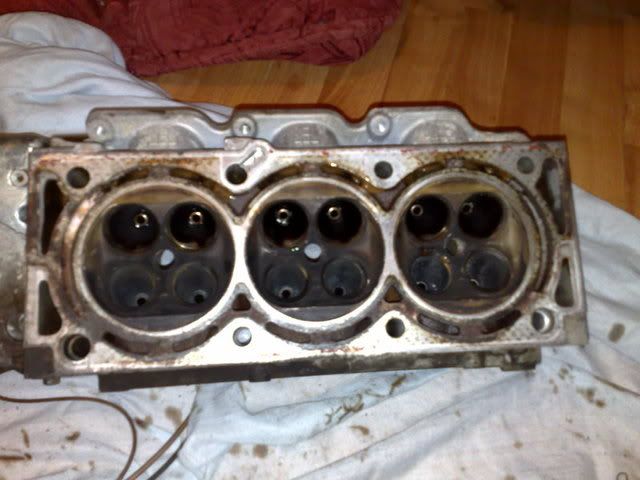
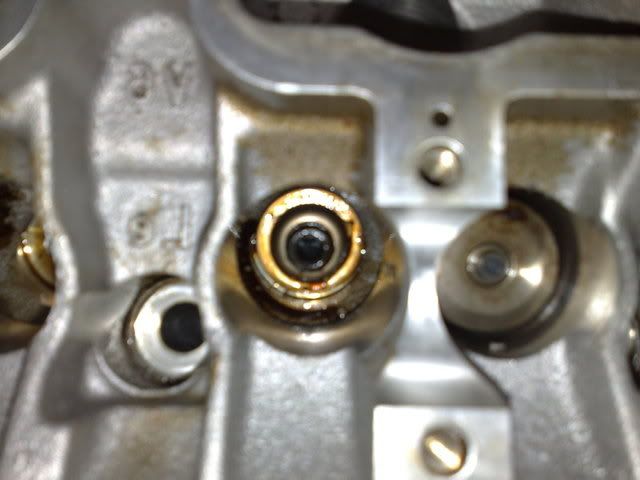
Both heads off, and new HG being offered up to make
sure it's correct. NOTE: The crank was set to 60deg BTDC before head fitting! I had been moving pistons up and down at this stage for cleaning purposes. Also note the corrosion in the water jacket on the 246 bank, where there's been no antifreeze in it.


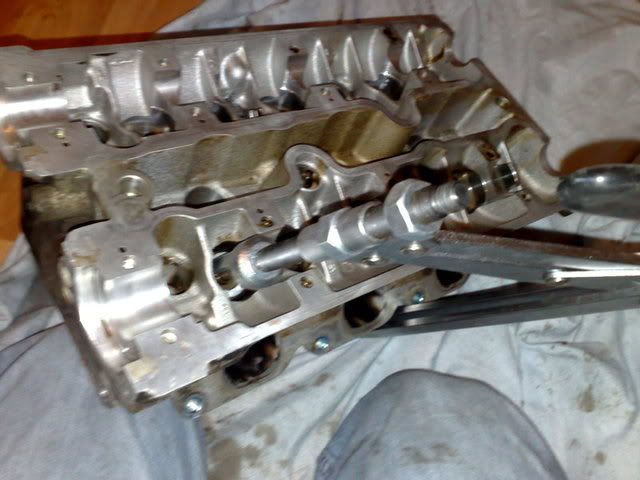
Now onto the head rebuild.

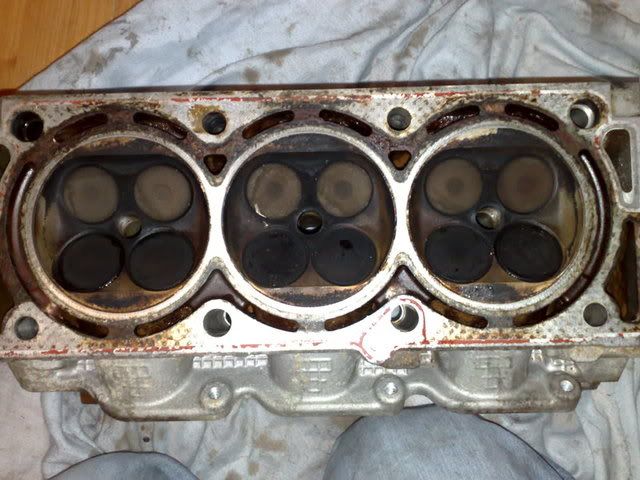
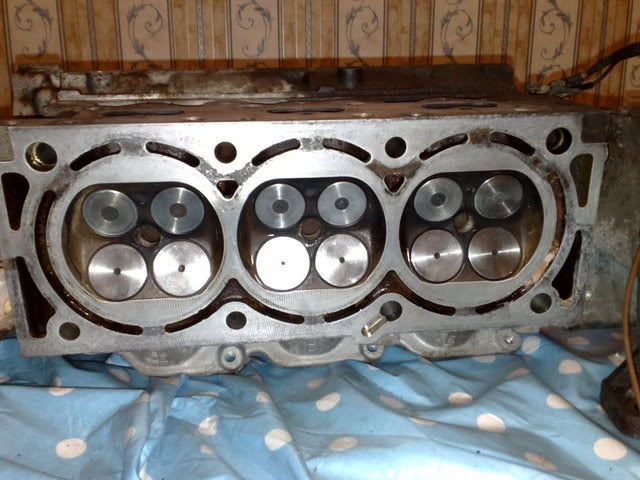
2 4 6 head before rebuild:
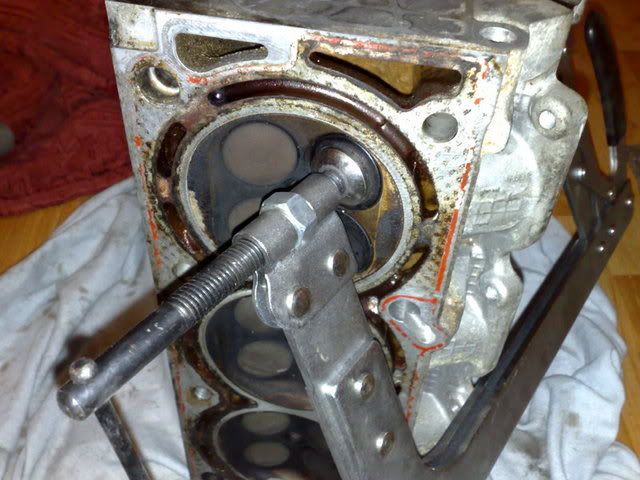


Removing Valves:


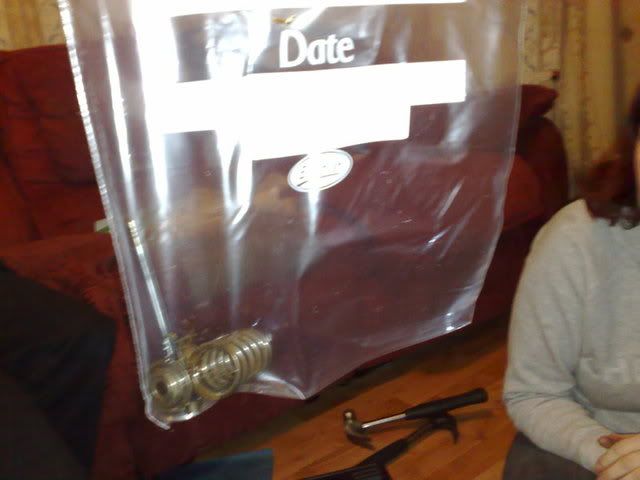
All valve components in bags, to ensure they are fitted in their original locations:


Here is the head with no valves!
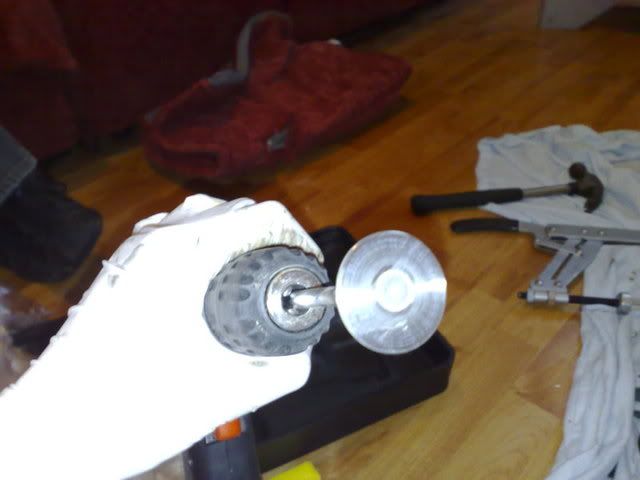


Cleaning Valves:


Removing collet, Valve spring,stem seal and seat washer


All valves cleaned, lapped back in, and fitted with new stem seals:


The FUBAR head gasket. (One of). This was caused by running with no antifreeze, I guess:


Offering up new exhaust manifold gasket following cleaning of the faces. Note the helicoils in the bottom right two holes..  


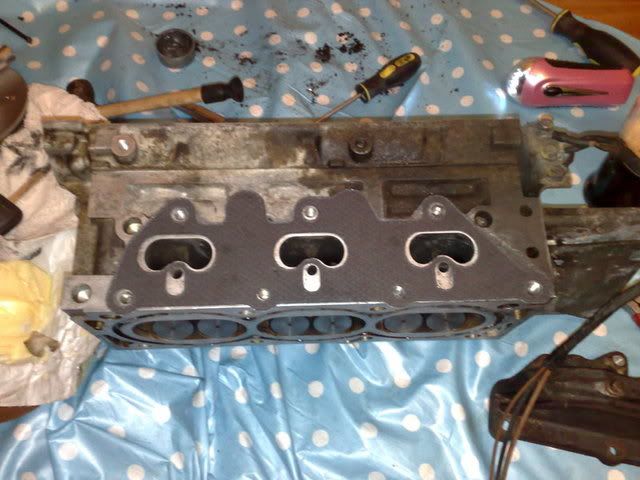
I obviously used new gaskets for downpipe to manifold too, and new studs/nuts all round.

Must say, I'm quietly pleased the rebuild went so well, without so much as a minor glitch really.

My next couple of days off hopefully won't be spent working like a mad thing under a bonnet of an Omega!

PS - I got a few funny looks / comments, doing a Head gasket change on a V6 at the side of the road ;D ;D ;D
Logged

Craig_R

  • Omega Knight
  • *****
  • Offline Offline
  • Gender: Male
  • Watford
  • Posts: 1244
    • View Profile
Re: Pictures of my recent engine rebuild...
« Reply #1 on: 30 January 2008, 10:43:05 »

Great Work there james and in the time you did it

You should be a private mobile mechanic mate you could make a small fortune  8-)

Dont forget the Macro setting on the camera for those closeups :)

Craig
Logged
Mod's
LPG, MV6 Dark Grey Leather, Carputer, Euro Grill, Rear Sun Blind,  Auto Dip Mirror, Cruise Control, AMP for Carputer
[To be Fitted]Reverse Sensors

Marks DTM Calib

  • Administrator
  • *****
  • Offline Offline
  • Gender: Male
  • West Bridgford
  • Posts: 34012
  • Git!
    • View Profile
Re: Pictures of my recent engine rebuild...
« Reply #2 on: 30 January 2008, 10:52:34 »

Tut, tut.....using composite exhaust manifold gaskets!

You can see the head damage around the water jacket on the head face at the dis pack mounting end. Quite a bit of pitting there.
Logged

JamesV6CDX

  • Omega Queen
  • *****
  • Offline Offline
  • Gloucestershire/Buckinghamshire
  • Posts: 16640
    • Omega 3.2 Retail MV6 LPG
    • View Profile
Re: Pictures of my recent engine rebuild...
« Reply #3 on: 30 January 2008, 10:55:36 »

Quote
Tut, tut.....using composite exhaust manifold gaskets!


I had MONEY on you picking that up, you sod ;D

End of the day, it's a £300 car, and VX didn't have any in, so I took the risk. Should be OK with new studs and flat surfaces.

Quote

You can see the head damage around the water jacket on the head face at the dis pack mounting end. Quite a bit of pitting there.

That head didn't come off Max's car... it was off my other Elite shed, which was equally poorly maintained.

Think it will be OK with new gaskets and correct coolant?
Logged

Marks DTM Calib

  • Administrator
  • *****
  • Offline Offline
  • Gender: Male
  • West Bridgford
  • Posts: 34012
  • Git!
    • View Profile
Re: Pictures of my recent engine rebuild...
« Reply #4 on: 30 January 2008, 10:57:20 »

Quote
Quote
Tut, tut.....using composite exhaust manifold gaskets!


I had MONEY on you picking that up, you sod ;D

End of the day, it's a £300 car, and VX didn't have any in, so I took the risk. Should be OK with new studs and flat surfaces.

Quote

You can see the head damage around the water jacket on the head face at the dis pack mounting end. Quite a bit of pitting there.

That head didn't come off Max's car... it was off my other Elite shed, which was equally poorly maintained.

Think it will be OK with new gaskets and correct coolant?


Manifold gaskets should be good for 3-400 miles or so!

The corrosion should be ok.

In the past we have applied some of the green snot used on the front cam bearings to these areas to help seal them.
Logged

JamesV6CDX

  • Omega Queen
  • *****
  • Offline Offline
  • Gloucestershire/Buckinghamshire
  • Posts: 16640
    • Omega 3.2 Retail MV6 LPG
    • View Profile
Re: Pictures of my recent engine rebuild...
« Reply #5 on: 30 January 2008, 10:59:08 »

Quote


Manifold gaskets should be good for 3-400 miles or so!


Shaddap you!

Quote

The corrosion should be ok.


That's what I wanted to hear... :)
Logged

Doodley

  • Junior Member
  • **
  • Offline Offline
  • Gender: Male
  • Fleet, Hampshire
  • Posts: 129
    • View Profile
Re: Pictures of my recent engine rebuild...
« Reply #6 on: 30 January 2008, 15:39:49 »

impressive, wish i could do that! when would you like to do mine and for how many beers?!
Logged

Dazzler

  • Omega Baron
  • *****
  • Offline Offline
  • Gender: Male
  • Haverhill, Suffolk
  • Posts: 4198
  • Drive it like you stole it......
    • View Profile
Re: Pictures of my recent engine rebuild...
« Reply #7 on: 30 January 2008, 16:24:48 »

Well done, another feather in your cap ;)
Logged
Big jobbies now finished.....Now running on LPG

Marks DTM Calib

  • Administrator
  • *****
  • Offline Offline
  • Gender: Male
  • West Bridgford
  • Posts: 34012
  • Git!
    • View Profile
Re: Pictures of my recent engine rebuild...
« Reply #8 on: 30 January 2008, 16:26:50 »

Ow, by the way.

You don't need to worry about mixing the valve springs, valve caps, collets and valve bases up. The are all the same.

Its only the valves that need to go back in from whence they came!
Logged

bertiecbx550

  • Guest
Re: Pictures of my recent engine rebuild...
« Reply #9 on: 30 January 2008, 17:13:29 »

i wish i just had a tength of the confidence and skill that you have there james for doing  such a job..well done mate  :y :y
Logged

Entwood

  • Omega Queen
  • *****
  • Offline Offline
  • Gender: Male
  • North Wiltshire
  • Posts: 19566
  • My Old 3.2 V6 Elite (LPG)
    • Audi A6 Allroad 3.0 DTI
    • View Profile
Re: Pictures of my recent engine rebuild...
« Reply #10 on: 30 January 2008, 17:17:04 »

Nice one ... and all outside as well .. many a garage wouldn't do such a good job

 :y :y :y
Logged

Martin_1962

  • Guest
Re: Pictures of my recent engine rebuild...
« Reply #11 on: 30 January 2008, 18:10:10 »

I've rebuilt 8v push rod heads and 8v twin cam TSCC heads
Logged

TheBoy

  • Administrator
  • *****
  • Offline Offline
  • Gender: Male
  • Brackley, Northants
  • Posts: 107026
  • I Like Lockdown
    • Whatever Starts
    • View Profile
Re: Pictures of my recent engine rebuild...
« Reply #12 on: 30 January 2008, 20:00:46 »

I might be taking the head off the Rover again :(. Still, now I've been shown, I'm sure I can tackle it OK :)
Logged
Grumpy old man

Dazzler

  • Omega Baron
  • *****
  • Offline Offline
  • Gender: Male
  • Haverhill, Suffolk
  • Posts: 4198
  • Drive it like you stole it......
    • View Profile
Re: Pictures of my recent engine rebuild...
« Reply #13 on: 30 January 2008, 20:04:48 »

Quote
I might be taking the head off the Rover again :(. Still, now I've been shown, I'm sure I can tackle it OK :)
I would rather do the Rover head, much easier ;)
Logged
Big jobbies now finished.....Now running on LPG

TheBoy

  • Administrator
  • *****
  • Offline Offline
  • Gender: Male
  • Brackley, Northants
  • Posts: 107026
  • I Like Lockdown
    • Whatever Starts
    • View Profile
Re: Pictures of my recent engine rebuild...
« Reply #14 on: 30 January 2008, 20:05:22 »

Quote
Quote
I might be taking the head off the Rover again :(. Still, now I've been shown, I'm sure I can tackle it OK :)
I would rather do the Rover head, much easier ;)
and only 1 of them :)
Logged
Grumpy old man
Pages: [1] 2  All   Go Up
 

Page created in 0.012 seconds with 17 queries.